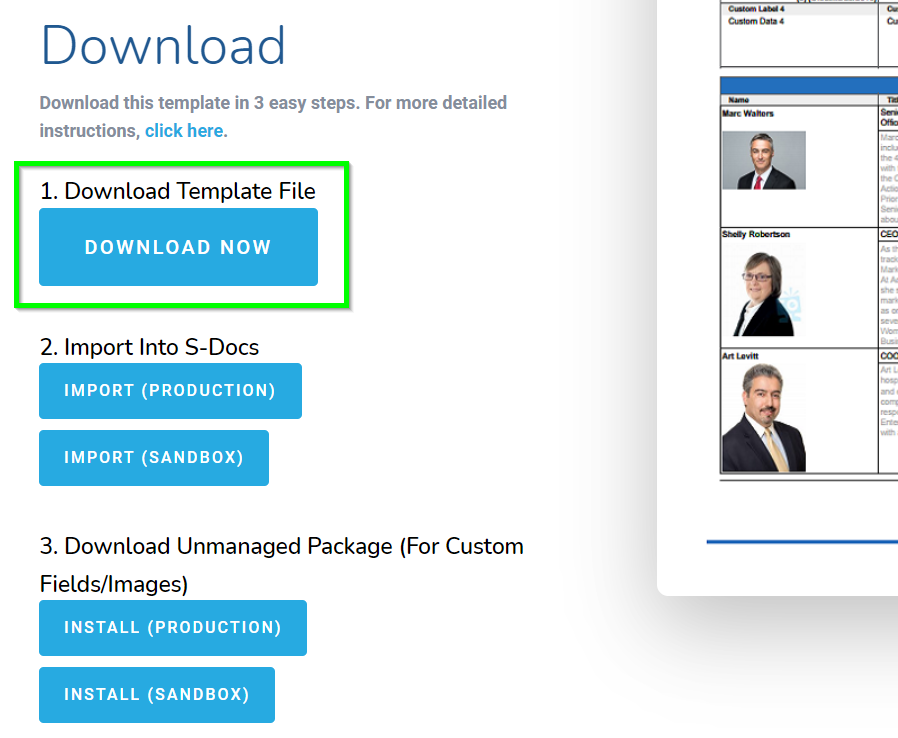
1. Download Your Template From The S-Docs Website
Importing a template into S-Docs is quick and easy. First, download the template export file from our template library by clicking the Download Now button on the template listing page. A .zip file will be downloaded to your local device.
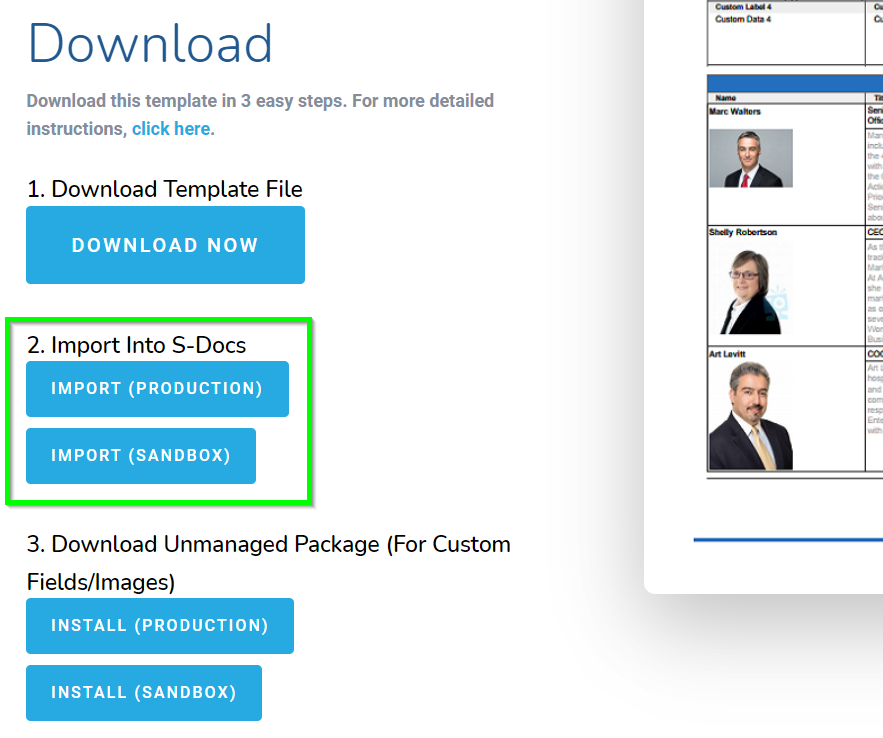
2. Import Your Template With The S-Docs Template Migrator
Now, it's time to import your template into your org using the S-Docs Template Migrator. Click one of the Import buttons on the template listing page to navigate to the Template Migrator in your org.
Next, click Choose File and select the template .zip file that you downloaded in Step 1.
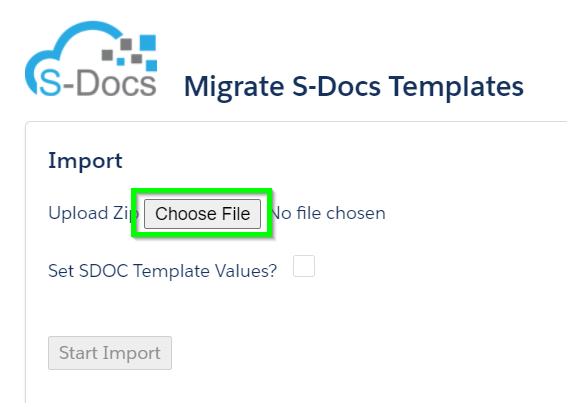
The template will display [1] its type (S-Docs or S-Sign), [2] its name, and [3] its ID. Click Start Import to import the template.

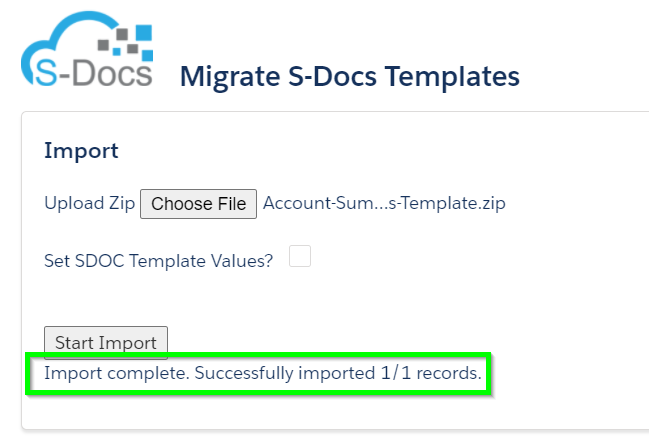
The Template Migrator will display a success message when your template has been successfully imported.
3. Download Custom Fields and Images (If Applicable)
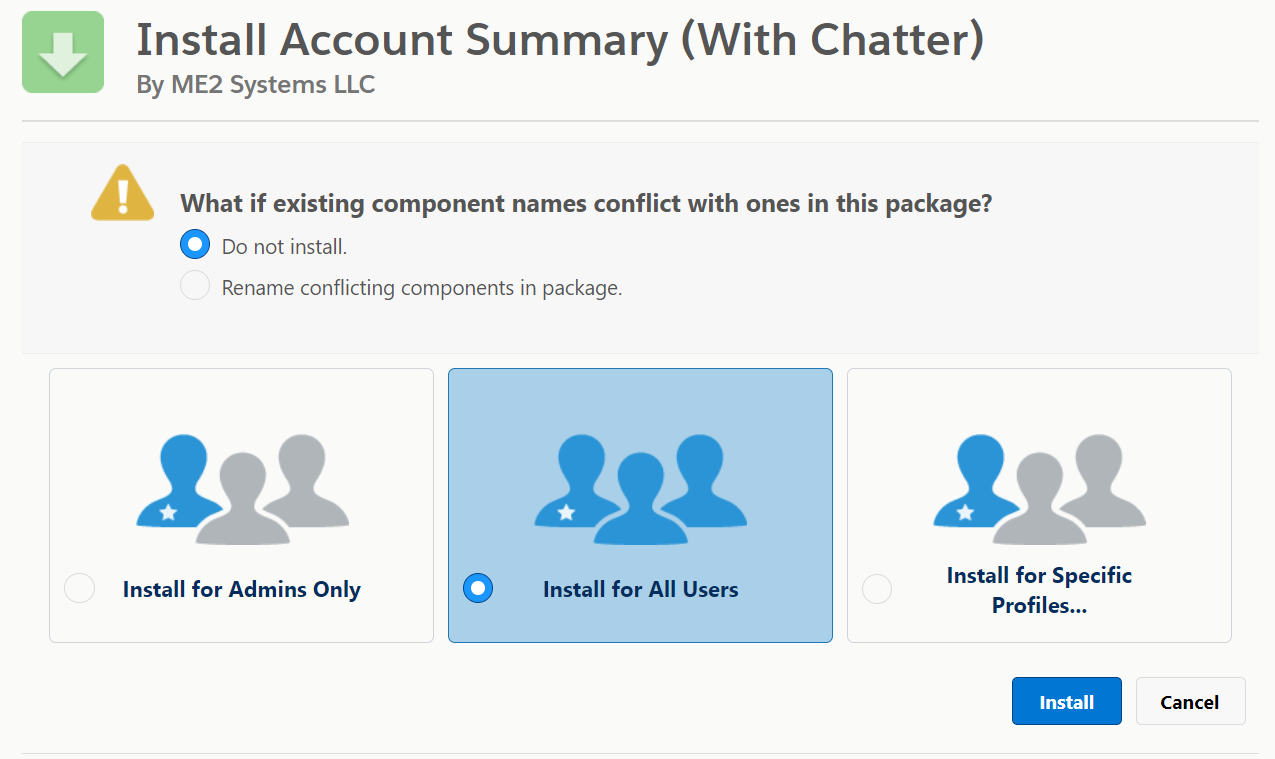
After importing your template into your org, head back to the template listing page and install the unmanaged package to get access to any custom fields or images that your template may reference. Note that some templates do not come with an unmanaged package because they do not reference any custom fields or images.

Be sure to select Install For All Users, as shown below.
Update Image URLs
When you download an unmanaged package with image files, those images are stored in your Salesforce Documents folder. However, the image in the template will still reference an image URL from the S-Docs Template Library org when first downloaded.
Find any images in your template, double-click them, and then click Browse Server in the menu that pops up.
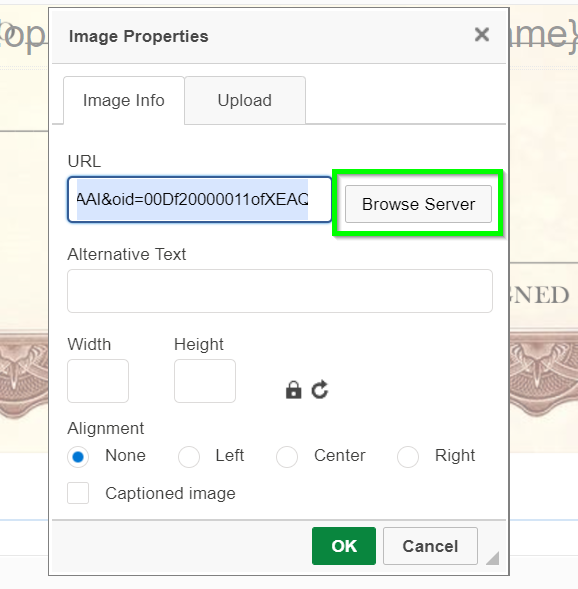
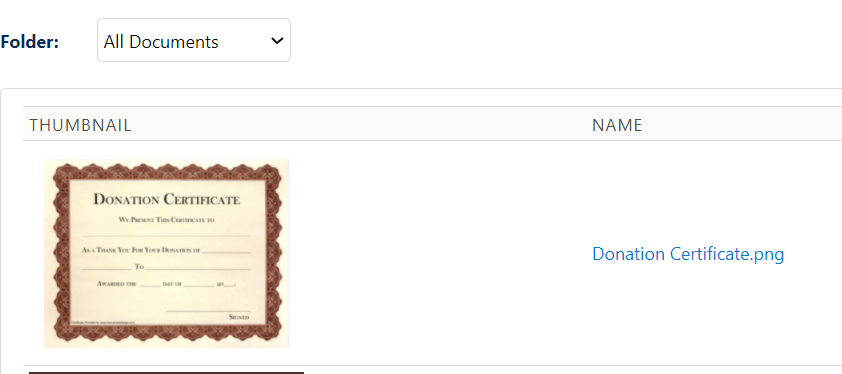
This will open your Salesforce Documents folder. Select the image in your template to update the URL.
Edit & Generate Your Template
When you navigate to the S-Docs Templates tab in Salesforce, your imported template will be available in your template list.
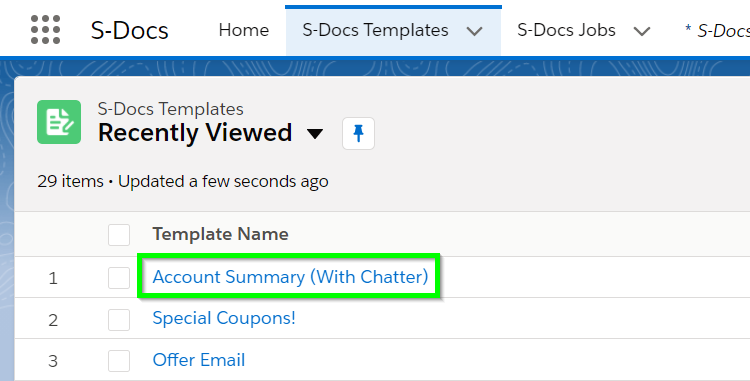
You can now edit your imported template, or begin generating documents with it immediately.