Introduction
S-Sign allows you to create custom email templates for the following automatic email events:
- Signature confirmation - Individual (sent to a user after they submit a document)
- Signature confirmation - All signers have finished signing (sent to all signers after the final signer submits the document; includes the signed document as an attachment)
- Signature declined notification (sent to the Salesforce user who sent the S-Sign request when a signer declines a signature)
These templates can be created and configured just like any normal S-Docs HTML email template, but there are a few configuration steps to take first to ensure that the S-Sign Site Guest User has the necessary permissions to generate and send your custom templates.
Configuration
There are two mains steps to granting the S-Sign Site Guest User access to send your custom templates.
1. Edit Object Permissions on the S-Sign Site Profile
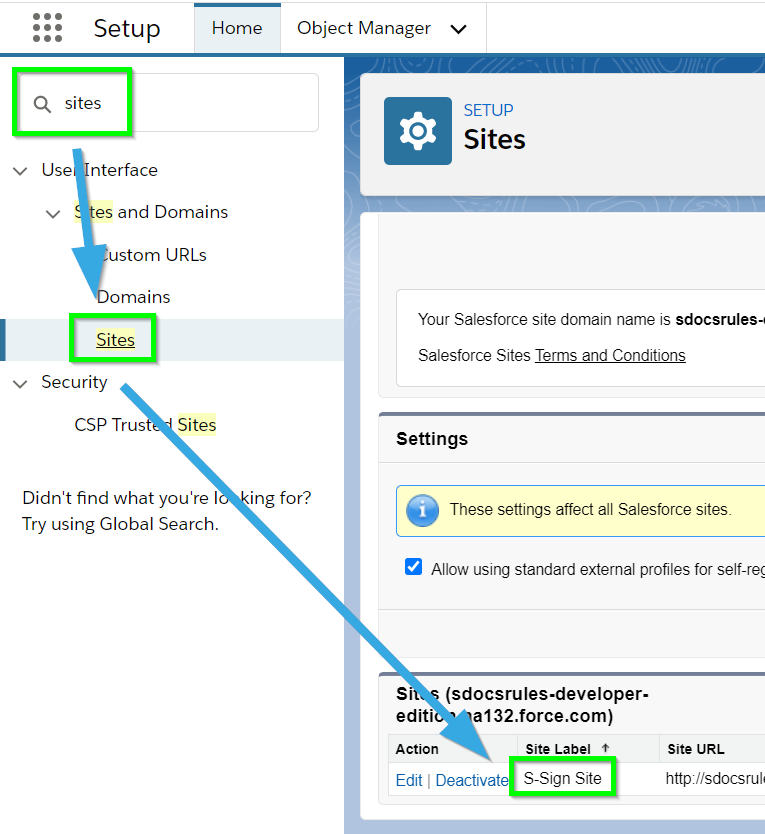
From the Setup menu, type "Sites" into the Quick Find bar, click Sites in the dropdown menu, then click your S-Sign Site Label to navigate to the S-Sign Site detail page.
From the Site detail page, click Public Access Settings.
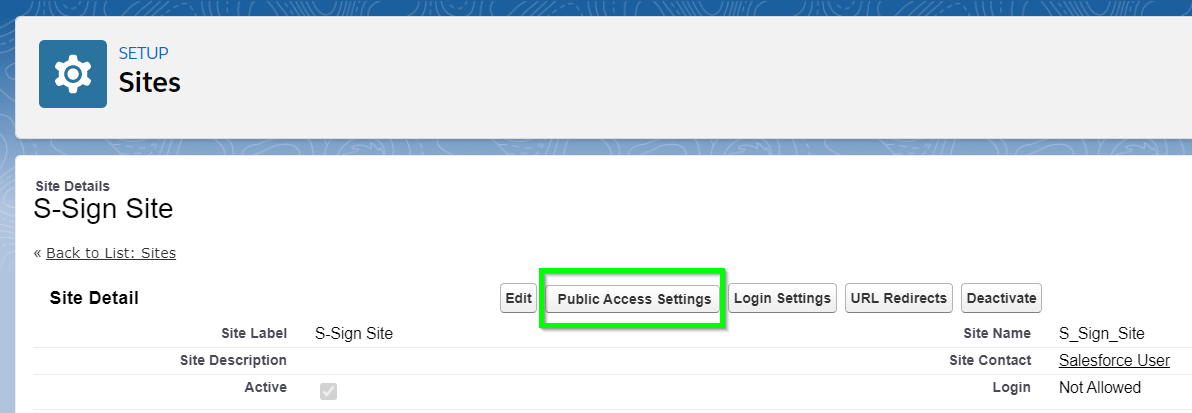
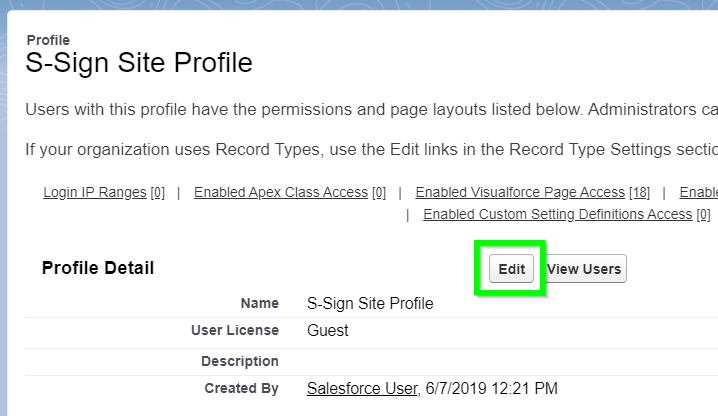
Click Edit at the top of the page.
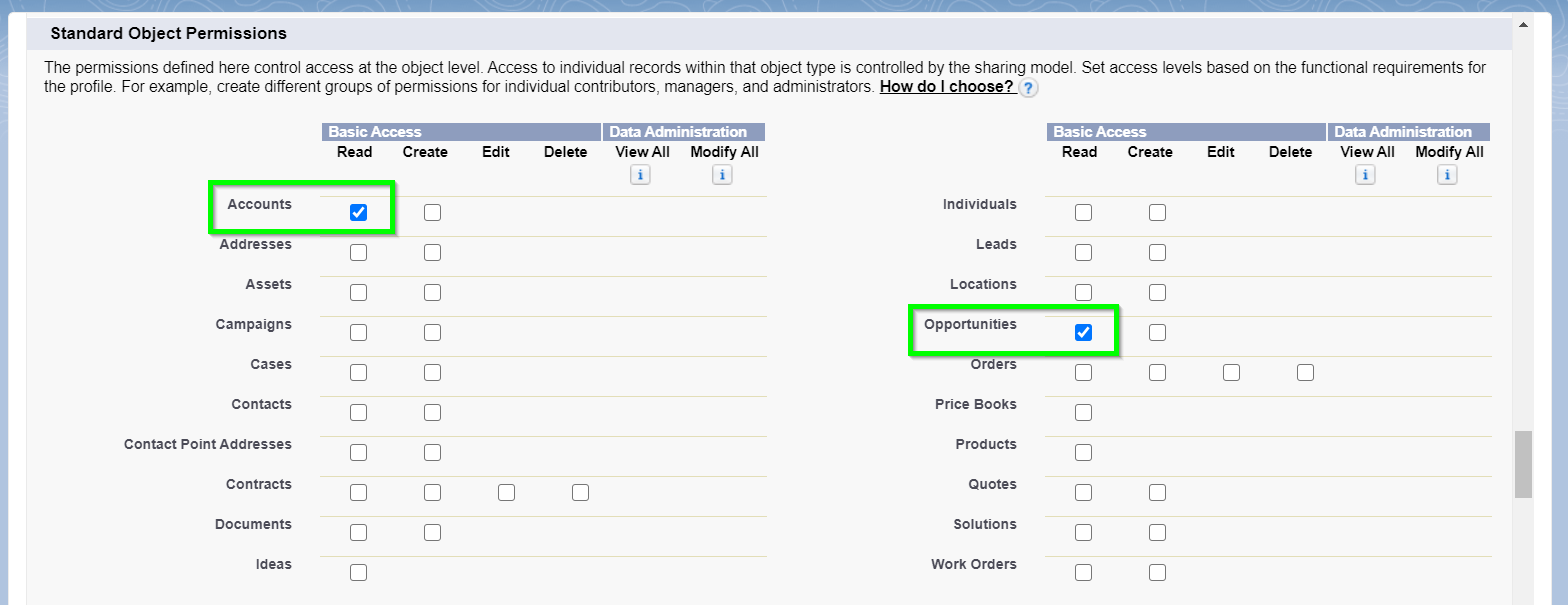
First, scroll down to the Standard Object Permissions section. Check the Read checkbox for the base object that you're using with S-Sign (the object that your S-Sign template's Related To Type field is set to), along with any other objects referenced in your custom email templates (through lookup fields or queries, for example).
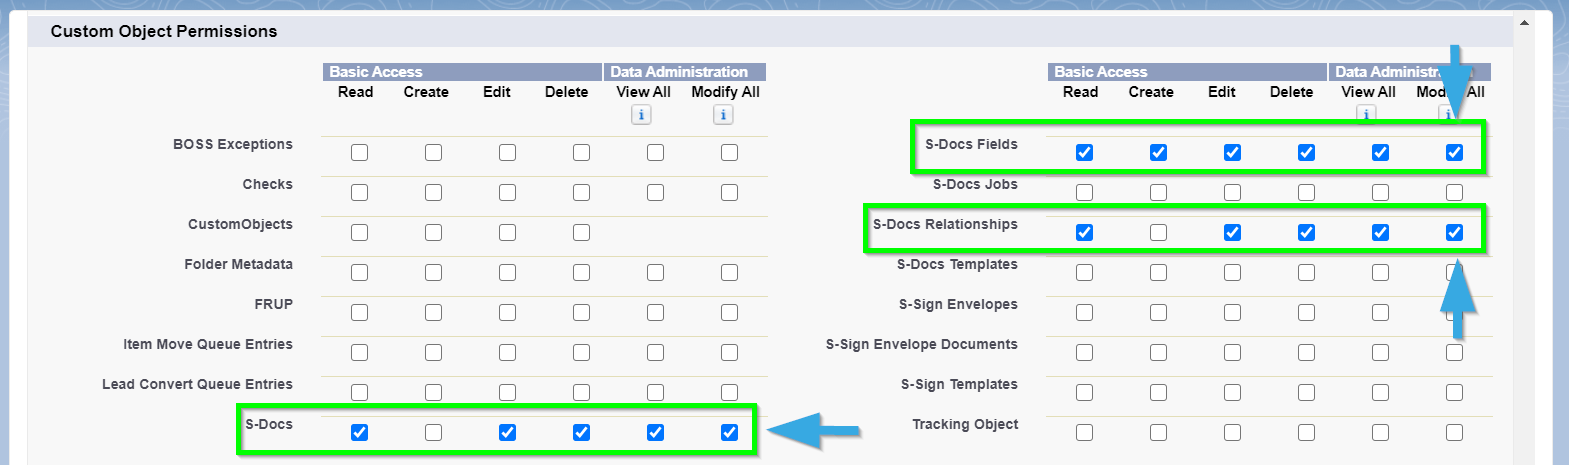
Next, scroll down to the Custom Object Permissions section. Check Modify All for the S-Docs, S-Docs Fields, and S-Docs Relationships objects.
Click Save.
2. Create A Sharing Rule On Your Base Object
The next step is to create a Sharing Rule on the base object of your S-Sign template (the object that your S-Sign template's Related To Type field is set to).
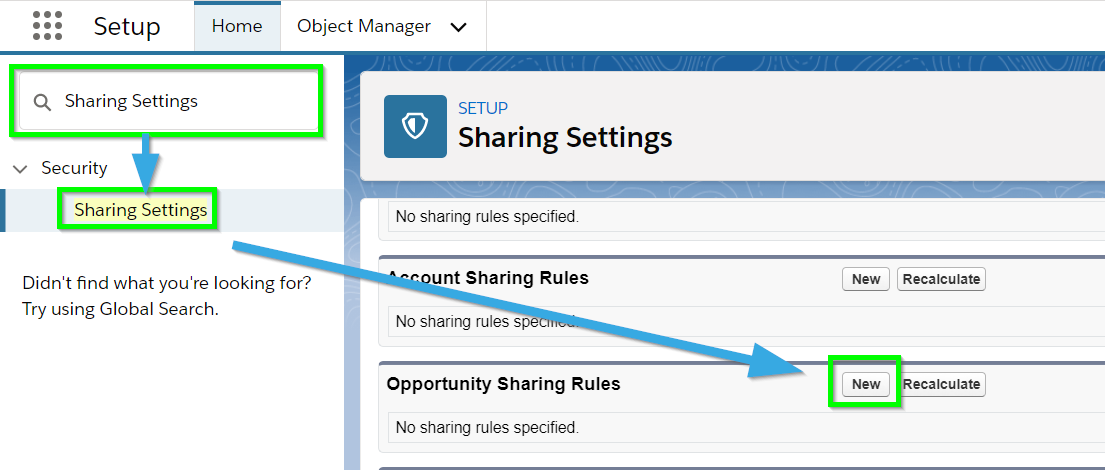
From the Setup menu, type "Sharing Settings" into the Quick Find bar and click Sharing Settings in the dropdown menu. Scroll down to Opportunity Sharing Rules, and click New.
Enter the following values for your Sharing Rule:
Rule Name
Label: S-Sign Site Guest User
Rule Name: S_Sign_Site_Guest_User
Rule Type: Guest user access, based on criteria
Criteria
Field: {Base Object} Owner ID (For example, if your base object is Opportunity, choose Opportunity Owner ID)
Operator: not equal to
Value: 1.00
Share With: S-Sign Site Site Guest User
{Base Object} Access: Read Only
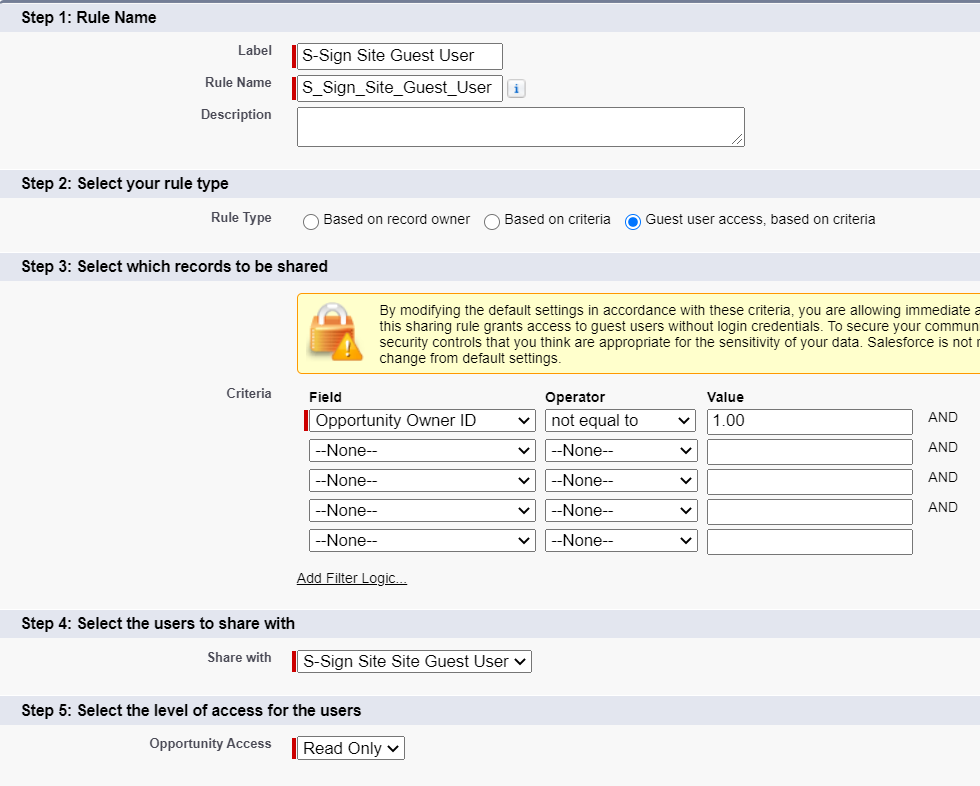
Click Save.
Create Custom Email Notification Templates
Once you've granted the S-Sign Site Guest User the necessary permissions, you can create and use your custom S-Sign email notification templates.
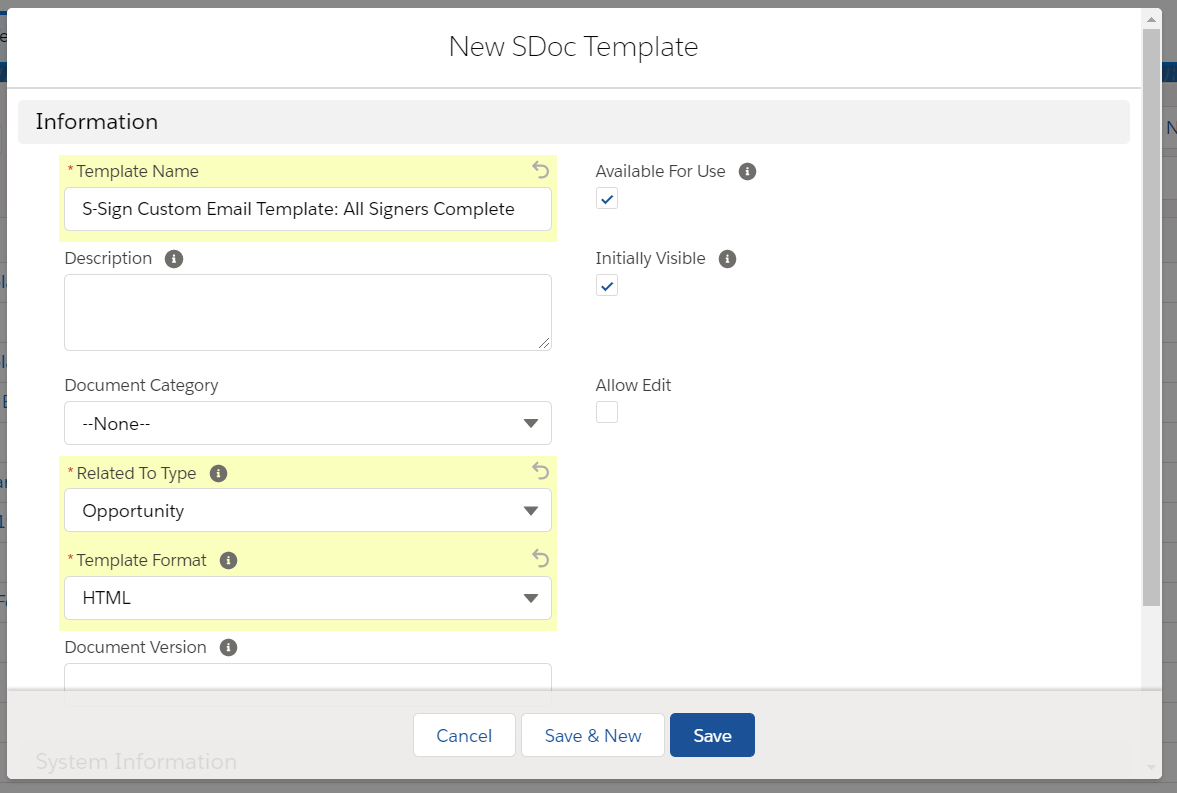
To do so, simply create a new S-Docs template. Set the Related To Type field to the same base object as your S-Sign PDF template, and set the Template Format field to HTML.
From there, you can edit your email template in the S-Docs template editor like normal.
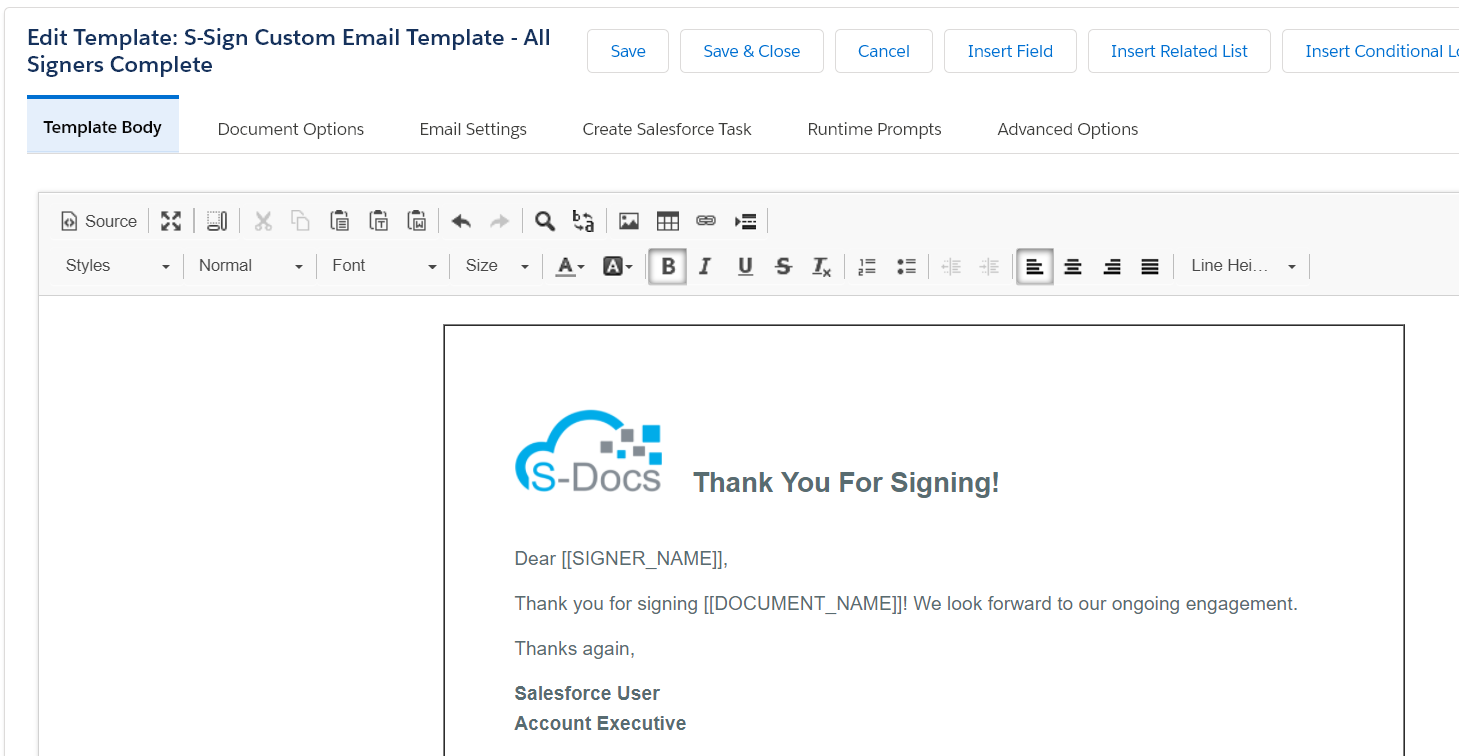
Note that you can use the following special fields in your custom email notification templates:
- [[DECLINE_REASON]]
- [[REQUESTER_NAME]]
- [[REQUESTER_EMAIL]]
- [[SIGNER_EMAIL]]
- [[SIGNER_NUMBER]]
- [[NUM_SIGNERS]]
- [[SIGNER_ROLE]]
- [[NUM_SIGNERS_REMAINING]]
- [[SIGN_LINK]]
- [[SIGNED_DOC_URL]]
- [[SIGNER_NAME]]
- [[DOCUMENT_NAME]]
- [[DOCUMENT_NUMBER]]
- [[NUM_DOCUMENTS]]
- [[EXPIRATION_DATE]]
- [[CREATED_DATE]]
Assign Email Notification Templates To S-Sign Templates
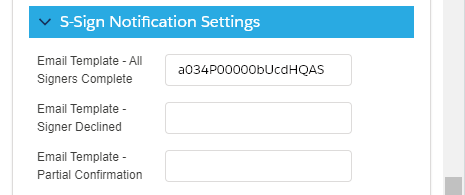
The final step is to assign your custom email notification template to an S-Sign template. To do so, navigate to your S-Sign enabled PDF template and find the S-Sign Notification Settings in the S-Sign panel on the left (under the S-Sign Template Settings tab). Paste the template ID of your custom email notification template into one of the top three fields based on which automatic email event it is for.
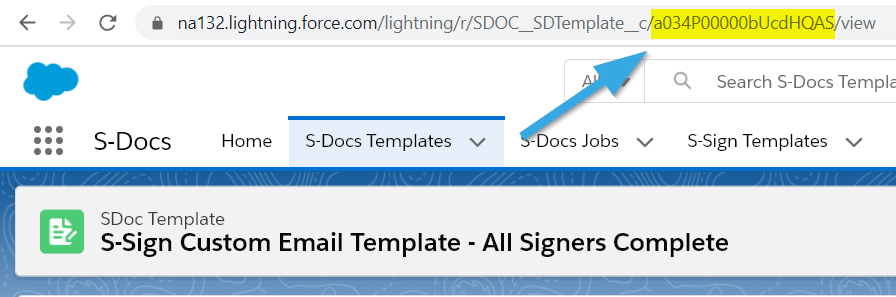
Template IDs can be found in your browser address bar on the template record detail page.
That's all there is to it! You can use a single custom notification template for all of your S-Sign templates, or create unique ones for each different type of document that you need to send for signature.