All Posts By

Zach Brueck

S-Sign Signer Profiles

By Documentation, S-Sign No Comments

Whether you're sending documents for e-signature to one person or ten, S-Sign makes it easy to configure unique signer profiles for everyone involved.

Locate The Signer Profiles Menu

The S-Sign Signer Profiles Menu is found within the S-Sign menu on the left side of the template editor for templates that are S-Sign enabled.

Signer Profile Settings

The signer profile menu appears as follows.

1. Signer Profile ID: This denotes the signer profile number that you're working with. By default, the S-Sign menu will open with 2 profiles created. If you create another, its ID will be 3, and so on.
2. Profile Name: You can give a custom name to each signer profile here (this is independent of the actual name of each signer). The default name is "Signer [Profile ID #]."
3. Email Address: This field is where you specify the signer email address.

  • If you leave this blank, users will be prompted with a screen that lets them enter this signer's email address (and any other email addresses that were left blank) when they generate this document and press Send Documents For Electronic Signature.
  • You can specify multiple email addresses in a comma-delimited list here. Each email address will receive the signature request once it's sent. When the signer opens the request, they will be able to select which email is theirs, and this email will be sent a verification code. All email addresses that are listed here will receive S-Sign system emails if applicable (expiration/reminder notifications, etc.).
  • This field supports merge fields for dynamic email selection. For example, you could write {{!Opportunity.email}} here.

4. Signer Name: You can optionally enter the name of your signer.

Note: The Profile Name, Email Address, and Signer Name fields also support the use of special shipping & billing contact merge fields such as {{!PICKLIST.billingcontact.email}}. When users generate an S-Sign request using a template that includes these special fields, they will be prompted to select contact records. Fields from chosen contact records will populate the merge fields in the document and S-Sign request (e.g. if you input {{!PICKLIST.billingcontact.email}} into the Email Address field for signer 1, the email of the contact record chosen as the billing contact will be used for signer 1). Click here to read more about using these fields.
Note that these fields can only be used for signer profiles if they are also present in the main document. In addition, the template's Related To Type field must be either Opportunity or Account.

5. Signing Order: This field allows you to set the signing order of the document. For example, if your document needs to be signed by a borrower and a lender, but the borrower has to sign first, you can set the borrower's signing order to 1, and the lender's signing order to 2.
6. Prevent From Viewing Audit: By default, a secure audit trail is attached to the end of every finalized S-Sign document. This option allows you to prevent certain profiles from being able to see the audit trail. This checkbox is grayed-out by default; to enable it, navigate to the S-Sign Template Settings menu and select "Prevent Certain Signer Profiles From Receiving The Audit Record."


7. Prevent From Receiving Document In Confirmation Email: By default, every signer will receive a copy of the finalized document after the last person has finished signing and submitted the document. This checkbox allows you to prevent signer profiles from receiving the finalized document.
8. Email Address is provided by previous signer if: By default, S-Sign requires each signer profile to have an email address linked to it before a document is sent for signature, whether it's filled in within the signer profile menu, during document generation, or dynamically with merge fields. However, you can use this field to allow certain signers to be able to specify the email address of the next signer of a document during the signing process.

This field requires a conditional statement using standard render notation (e.g. {{!Opportunity.StageName}} == ‘Closed Won’). If that expression evaluates to true, the person signing before this signer (e.g. the signer profile with a signing order that is 1 less than the profile you're working with) will be able to specify the email of the profile you're working with during the signing process.

For example, if you want signer 1 to be able to enter the email address of signer 2, you would enter an expression into this field on signer 2's signer profile (since this option allows the previous signer to specify this signer's email address). If that expression evaluates to true, signer 1 will be able to enter signer 2's email after they (signer 1) have finished signing.
9. Signer Profile is omitted if: Specify a condition that should prevent this signer profile from being included in the S-Sign request. If that condition evaluates to true, this profile will not be sent the S-Sign request. This field accepts conditional statements using standard render notation (e.g. {{!Opportunity.StageName}} == 'Closed Lost').
10. Delete Profile: Clicking this button will delete the signer profile.
11. Create Another Signer Profile: Clicking this button will create another signer profile.

You're now ready to start configuring unique signer profiles and tailoring S-Sign to any of your business needs.

S-Sign Field Types

By Documentation, S-Sign No Comments

S-Sign offers the capability to collect more than just signatures in e-signature requests. This document will explain the different S-Sign field types that you can insert into your documents to collect signer information. There are currently seven different field types available: Signature, Text, Checkbox, Initials, Date, Picklist (from text), and Picklist (from field).

Signature Fields

The signature field comprises the core functionality of S-Sign: it will create a link that opens the S-Sign signature pad when clicked. In the template editor for templates that are S-Sign enabled, the signature field menu looks like this.

[1] Set the field type to Signature to create a signature field.
[2] Choose which signer profile should interact with this field.
[3] Choose a Salesforce text field to write this data back to. You can use the Insert Field button at the top of the template editor to obtain the correct merge field syntax.
[4] Add additional styling for the signature input box as it appears to the end user on the signable document. This field accepts CSS syntax with semicolons. Note that you can use the letter-spacing property, which is not normally supported by Salesforce.
[5] Paste this tag into your template where you would like this signature field to appear.

Signature fields look like this to the signer:

Text Fields

A text field will appear as a blank box that the signer can type into. The text field menu looks like this in the template editor:

[1] Set the field type to Text to create a text field.
[2] Choose which signer profile should interact with this field.
[3] Make this field required or optional.
[4] Choose a Salesforce text field to write this data back to. You can use the Insert Field button at the top of the template editor to obtain the correct merge field syntax.
[5] Specify a default value for this field.
[6] Edit the height of the text input box as it appears to the end user on the signable document. Use any CSS length unit without semicolons.
[7] Edit the width of the text input box as it appears to the end user on the signable document. Use any CSS length unit without semicolons.
[8] Add additional styling for the text input box as it appears to the end user on the signable document. This field accepts CSS syntax with semicolons. Note that you can use the letter-spacing property, which is not normally supported by Salesforce.
[9] Paste this tag into your template where you would like this text field to appear.

Text fields look like this to the signer:

Checkbox Fields

Checkbox fields are fairly self-explanatory: a checkbox will appear where this field tag is placed. The checkbox field menu looks like this in the template editor:

[1] Set the field type to Checkbox to create a checkbox field.
[2] Choose which signer profile should interact with this field.
[3] Make this field required or optional.
[4] Choose a Salesforce checkbox field to write this data back to. You can use the Insert Field button at the top of the template editor to obtain the correct merge field syntax.
[5] Specify a default value for this field (checked or unchecked).
[6] Assign this field to an input field group. Input field groups allow you to group different checkbox fields together and set requirements for the group as a whole. Input field group settings are found in the S-Sign Template Settings menu.
[7] Add additional styling for this field. This field accepts CSS syntax.
[8] Paste this tag into your template where you would like this checkbox field to appear.

Checkbox fields look like this to the signer:

Initials Fields

The initials field type creates a link similar to the signature field type. Clicking the link brings up a variation of the signature pad for initials. Signers can either draw their initials, or use the Text to Signature feature and type them. The initials menu looks like this in the template editor:

[1] Set the field type to Initials to create an initials field.
[2] Choose which signer profile should interact with this field.
[3] Choose a Salesforce field to write this data back to. You can use the Insert Field button at the top of the template editor to obtain the correct merge field syntax.
[4] Add additional styling for the initials input box as it appears to the end user on the signable document. This field accepts CSS syntax with semicolons. Note that you can use the letter-spacing property, which is not normally supported by Salesforce.
[5]
 Paste this tag into your template where you would like this initials field to appear.

Initials fields look like this to the signer:

Date Fields

Date fields allow the signer to input a date. They look like this in the template editor:


[1] Set the field type to Date to create a date field.
[2] Choose which signer profile should interact with this field.
[3] Make this field required or optional.
[4] Choose a Salesforce date field to write this data back to. You can use the Insert Field button at the top of the template editor to obtain the correct merge field syntax.
[5] Specify a default date value for this field. A calendar will appear and allow you to choose a date when you click inside this box in the S-Sign panel.
[6] Edit the height of the date input box as it appears to the end user on the signable document. Use any CSS length unit without semicolons.
[7] Edit the width of the date input box as it appears to the end user on the signable document. Use any CSS length unit without semicolons.
[8]
 Choose to let this field be automatically populated with the date that the document is submitted.
[9] Choose a format for how the date will appear in the final document.
[10] Add additional styling for the date input box as it appears to the end user on the signable document. This field accepts CSS syntax with semicolons. Note that you can use the letter-spacing property, which is not normally supported by Salesforce.
[11] Paste this tag into your template where you would like this date field to appear.

Date fields look like this to the signer:

When clicked, a calendar will appear for the signer to choose a date from.

Picklist Fields

Picklist field types allow the signer to choose from a list of options. There are two types of picklist fields available: picklists from text, and picklists from fields.

Picklists From Text

Picklists from text are comprised of options that you input manually. The picklist from text menu looks like this in the template editor:


[1] Set the field type to Picklist (From Text) to create a picklist from text field.
[2] Choose which signer profile should interact with this field.
[3] Enter a new-line-delimited list of options for your picklist.

Note: The semicolon character ( ; ) and the character chosen for the multi-picklist delimiter cannot be used within your picklist options.

[4] Choose to make your picklist multi-select by allowing multiple options.
[5] Specify a delimiter for the picklist output data. This only applies if you checked the Multiple list selections allowed checkbox described in #4. By default, the data will be displayed as a comma-delimited list.
[6] Specify how many picklist options can be shown on screen at once. A scrollbar will appear within the picklist for the user to view all options. By default, all picklist options will be shown on screen at once.
[7] Choose a Salesforce field to write this data back to. You can use the Insert Field button at the top of the template editor to obtain the correct merge field syntax.
[8] Specify a default value for this field.
[9] Edit the width of the picklist input box as it appears to the end user on the signable document. Use any CSS length unit without semicolons.
[10] Paste this tag into your template where you would like this picklist field to appear.

Picklist (from text) fields look like this to the signer:

Picklists From Field

Picklists from field are comprised of options from an existing Salesforce picklist field. The picklist from field menu looks like this in the template editor:


[1] Set the field type to Picklist (From Field) to create a picklist from field field.
[2] Choose which signer profile should interact with this field.
[3] Specify an existing picklist field from your base record whose options should be displayed within your S-Sign document. You can use the Insert Field button at the top of the template editor to obtain the correct merge field syntax.

Note: If the picklist is multi-select, S-Sign will detect this and reflect that in the document.

[4] Specify a delimiter for the picklist output data. This only applies if your picklist is multi-select. By default, the data will be displayed as a comma-delimited list.
[5] Specify how many picklist options can be shown on screen at once. A scrollbar will appear within the picklist for the user to view all options. By default, all picklist options will be shown on screen at once.
[6] Choose a Salesforce field to write this data back to. You can use the Insert Field button at the top of the template editor to obtain the correct merge field syntax.
[7] Specify a default value for this field.
[8] Edit the width of the picklist input box as it appears to the end user on the signable document. Use any CSS length unit without semicolons.
[9] Paste this tag into your template where you would like this picklist field to appear.

In this example, we used a merge field that points toward a custom field on our opportunity record that we'd like to use in our S-Sign document.

Picklists (from field) look like this to the signer:

With these seven field types, you are ready to optimize your e-signature workflow and start gaining more value from your S-Sign requests.

S-Sign Template Settings

By Documentation, S-Sign No Comments

S-Sign offers multiple customization options that you can take advantage of to modify elements of an S-Sign request. You can edit factors like who receives confirmation emails, whether or not a verification email is required, and even the size of the signer's signature. These options are called the S-Sign Template Settings.

Locate the S-Sign Template Settings

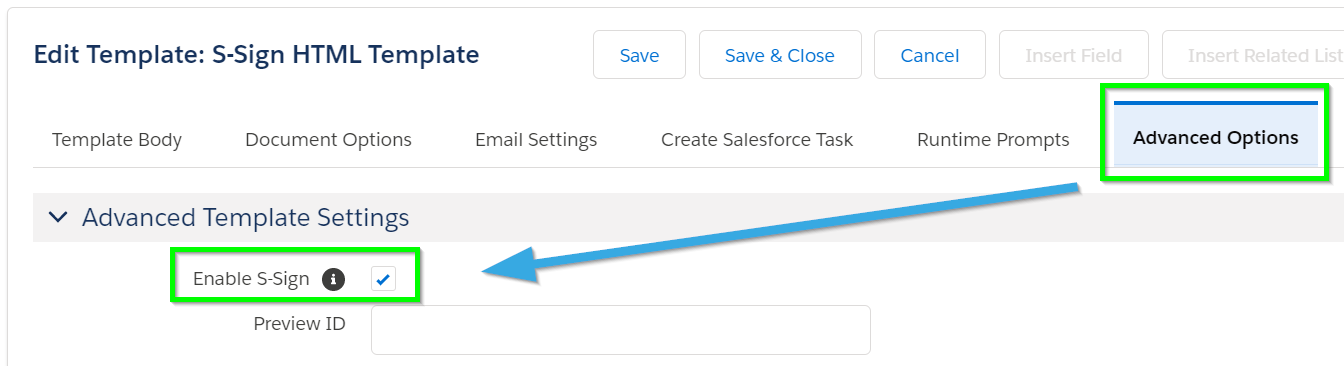
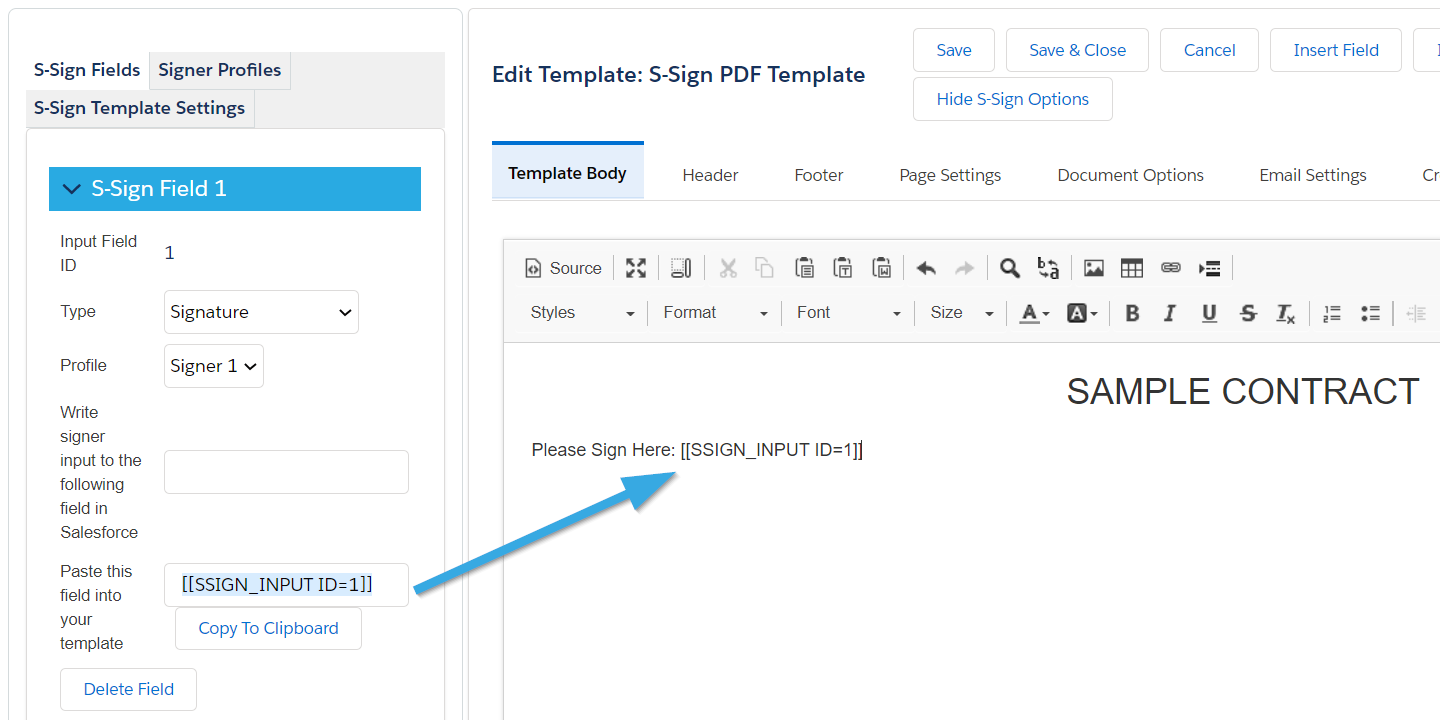
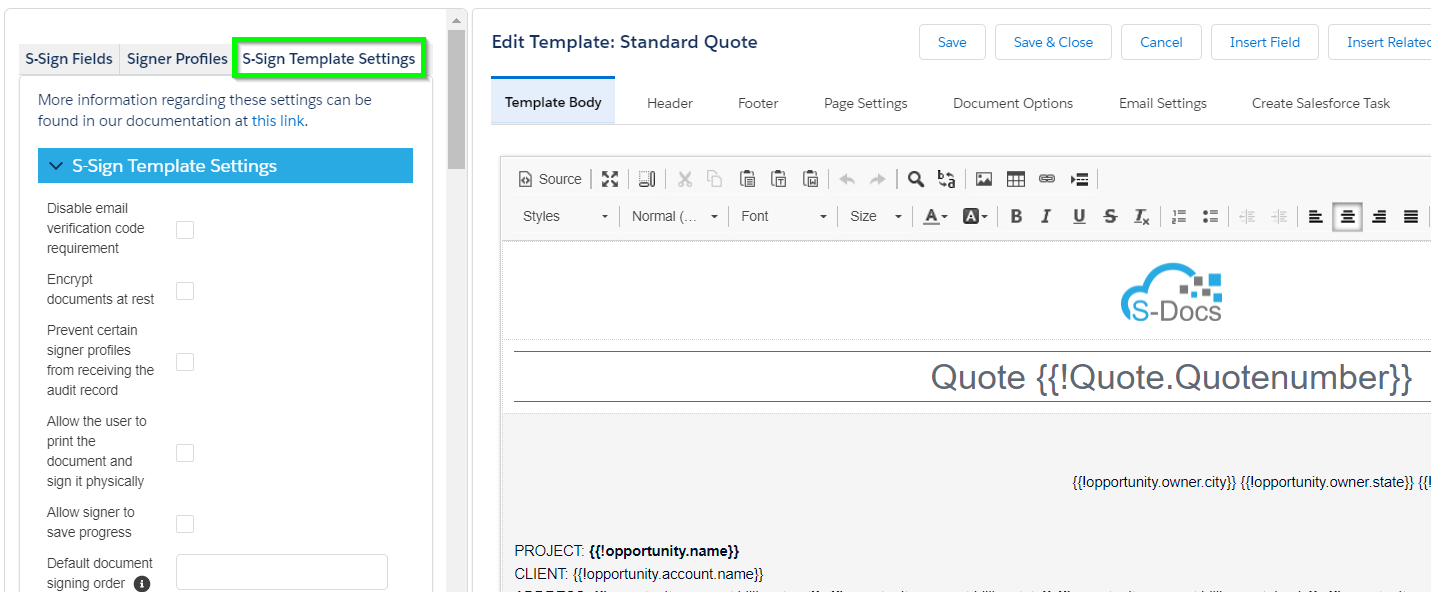
The S-Sign Template Settings are found within the S-Sign menu on the left side of the template editor for templates that are S-Sign enabled.


There are four sections within the template settings menu: General S-Sign template settings, S-Sign notification settings, S-Sign Sign In Person Settings, and S-Sign Input Field Group settings. We'll walk through all of them and explain each option in this document.

Note: Currently, S-Sign data will not clone when you clone a template. This data will need to be input manually into a cloned template.

General S-Sign Template Settings

The general S-Sign template settings menu appears as follows.


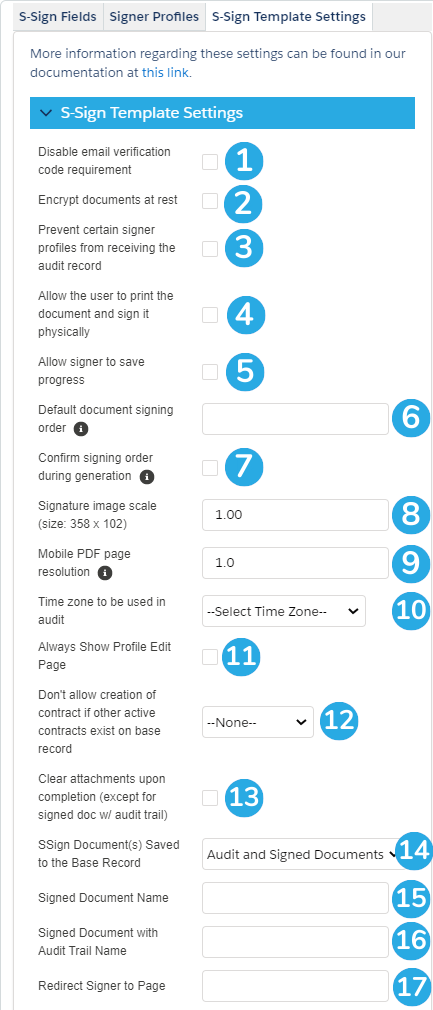
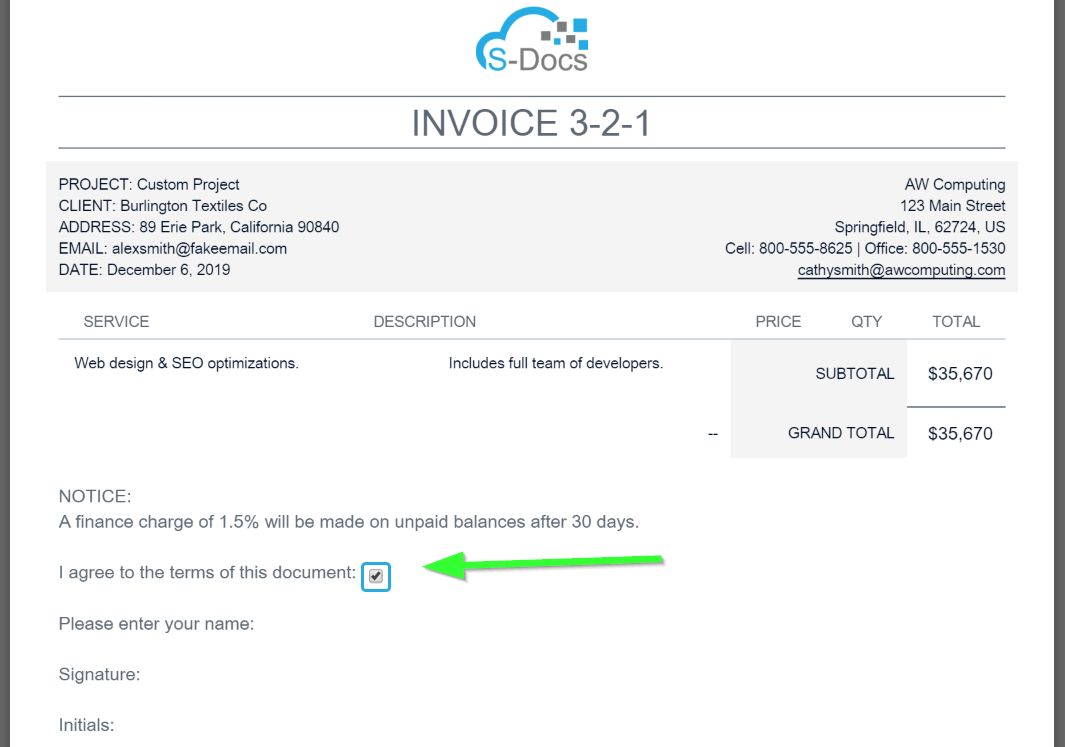
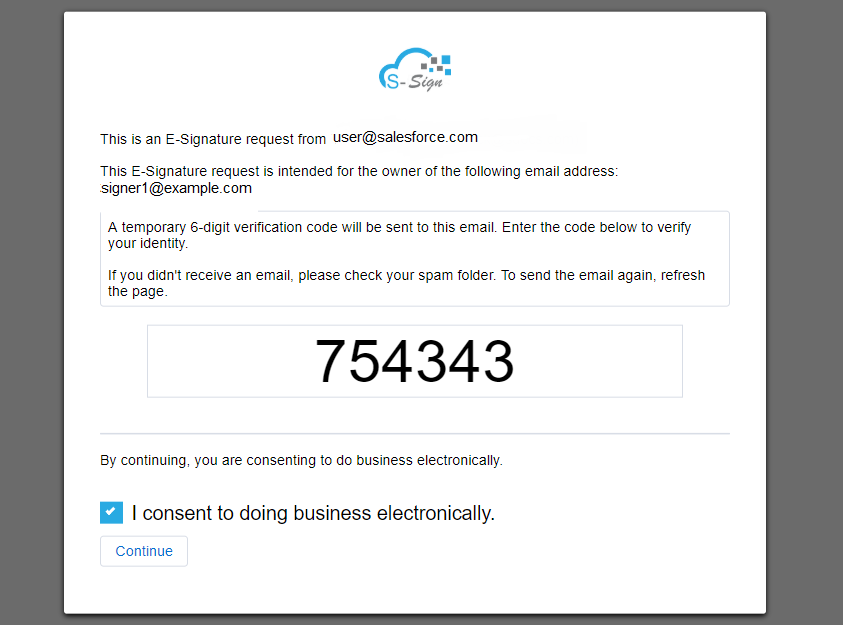
1. Disable email verification code: If this option is checked, S-Sign requests made with this template will not require signers to enter their email, receive a verification code, and enter the code in order to view and sign the document. They will only need to check "I agree to do business electronically."

Note: Checking this option allows anyone with the sign request email to open and sign the document. Keep this in mind when CC and BCCing additional people on sign request emails. We recommend reviewing this option with your legal team.

2. Encrypt documents at rest: Checking this box will encrypt any documents generated with this template at rest. The confirmation email sent to signers will contain a link to the encrypted document and require users to enter a verification code to view it.

Note: You cannot disable the email verification code option if you opt to encrypt documents at rest.

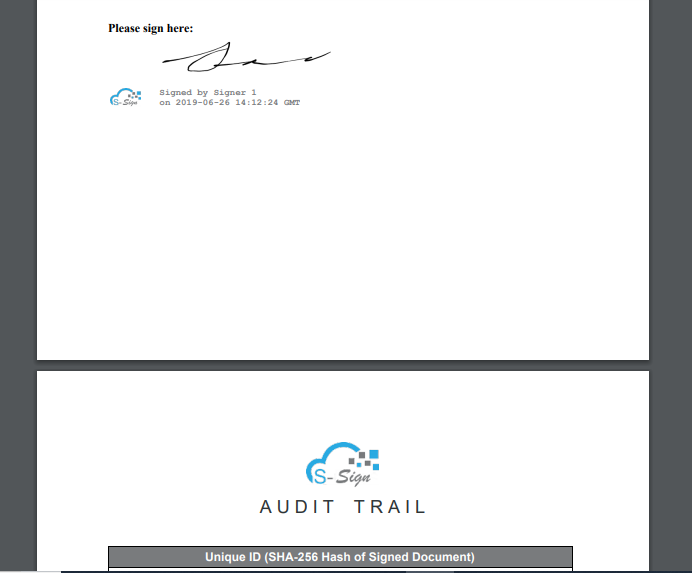
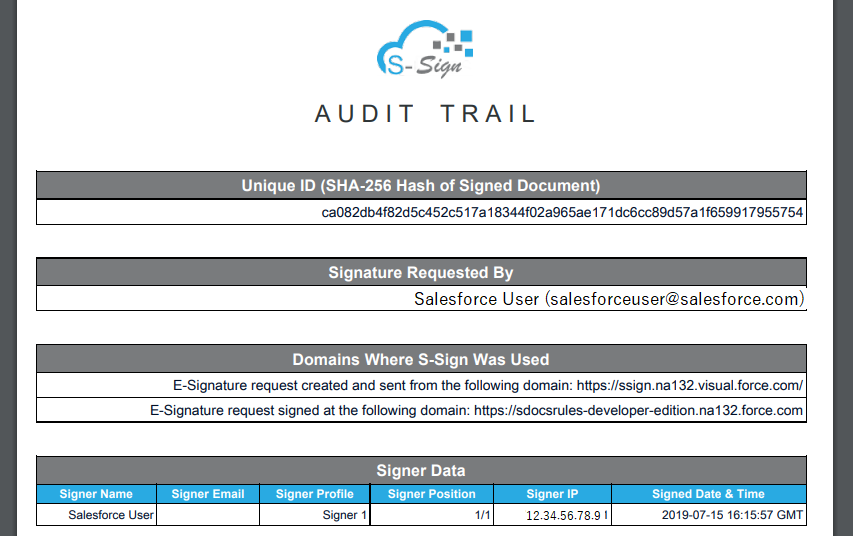
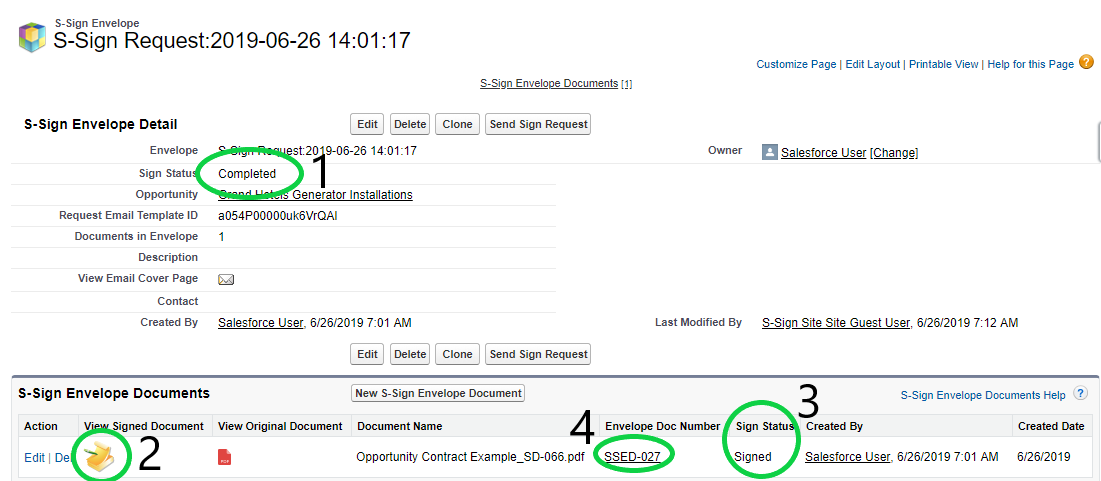
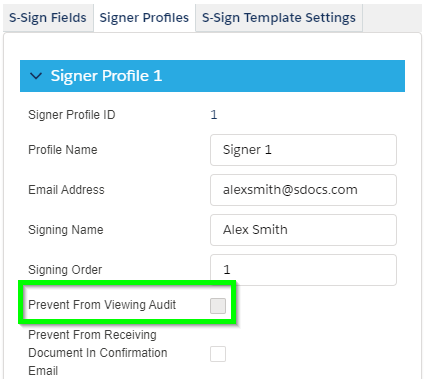
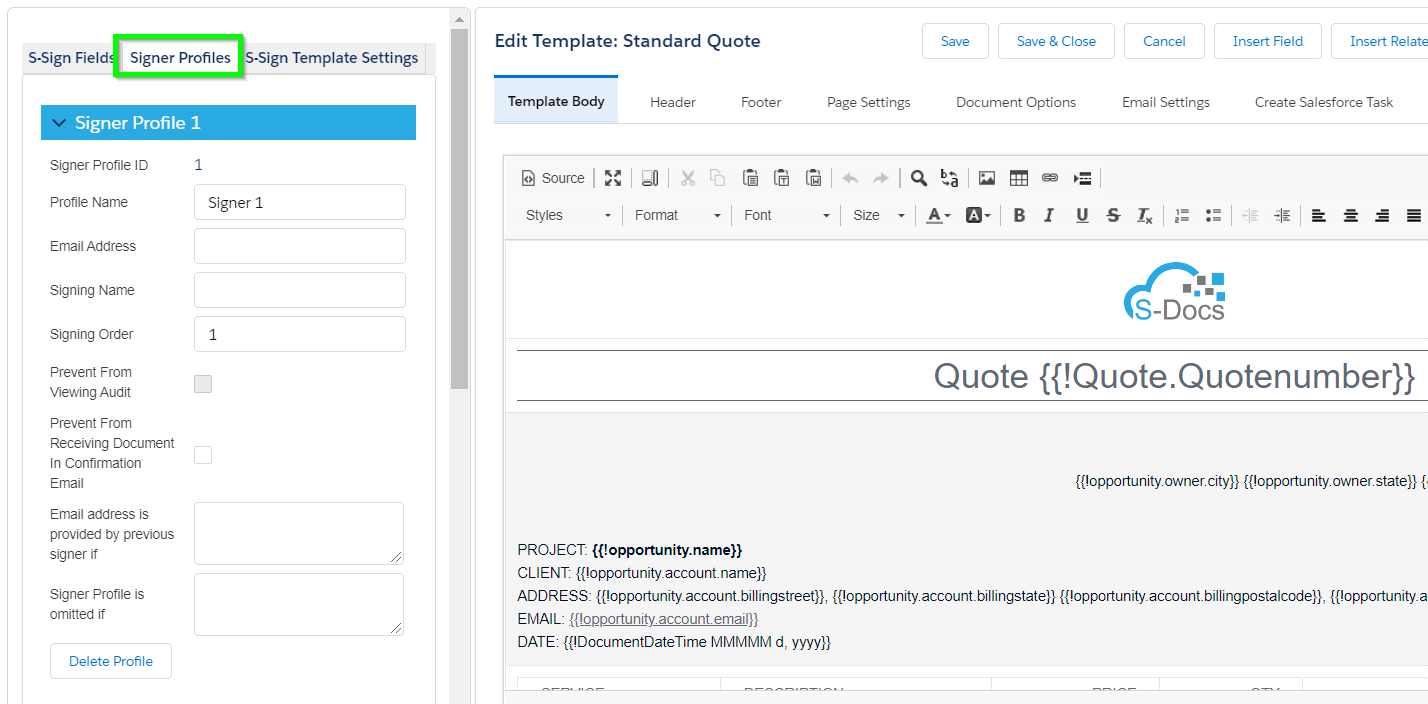
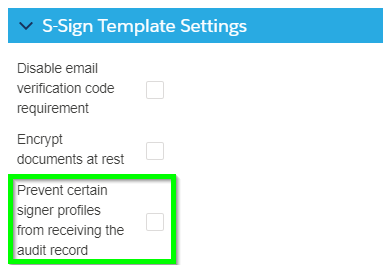
3. Prevent certain signer profiles from receiving the audit record: By default, after all signers have signed a document, an audit trail record will be attached to the end of the signed document which shows things like the signers' IP addresses and the date and time they opened/signed the document. If this option is checked, you can prevent the audit trail from being attached to the finished document for all or certain signers. To choose which signers can and cannot receive the audit trail, navigate to the Signer Profiles tab at the top of the S-Sign menu. There will be a checkbox that you can check/uncheck for the audit trail.

Note: We recommend leaving this option unchecked.


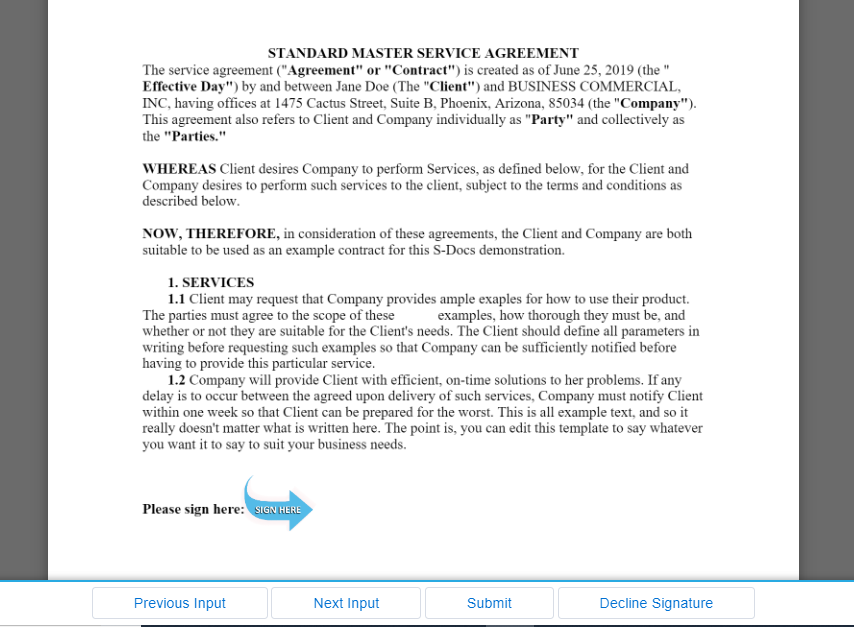
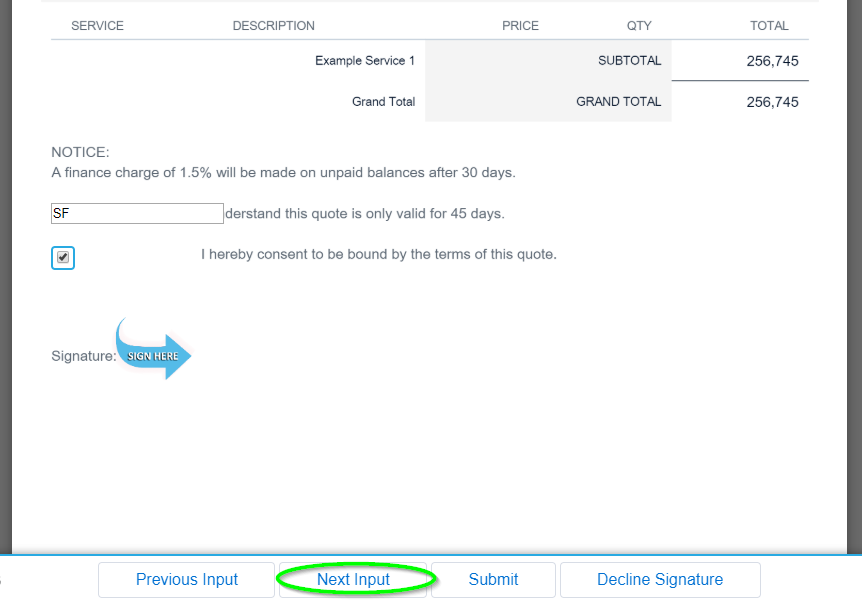
4. Allow the user to print the document and sign it physically: Checking this option will cause a Print button to appear at the bottom of the document that the user is signing.

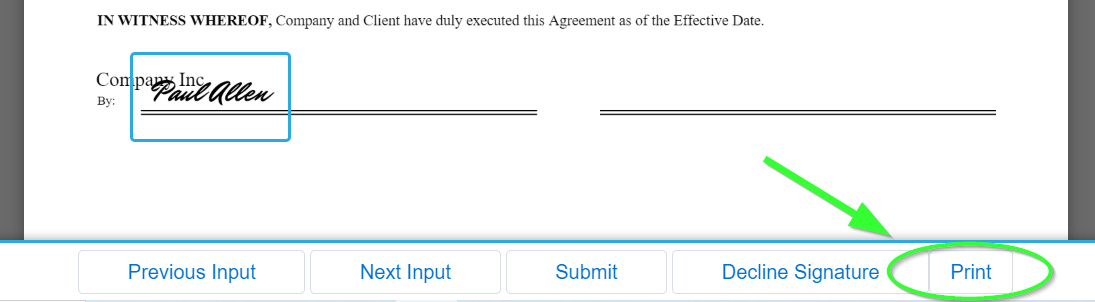
5. Allow signer to save progress: This option will allow signers to partially fill in the S-Sign input fields included in this document and then save their progress and come back to it later.
6. Default document signing order: If this document is included with other documents in a single S-Sign request, you can specify the order in which it should be signed here (using numerical values 0-9). If you leave this field blank and multiple documents are included in an S-Sign request, the documents will be randomly ordered.
7. Confirm signing order during generation: When you check this box, users generating an S-Sign request that includes this template will be able to manually edit the order that each document should be signed, even if the other templates don't have this box checked.
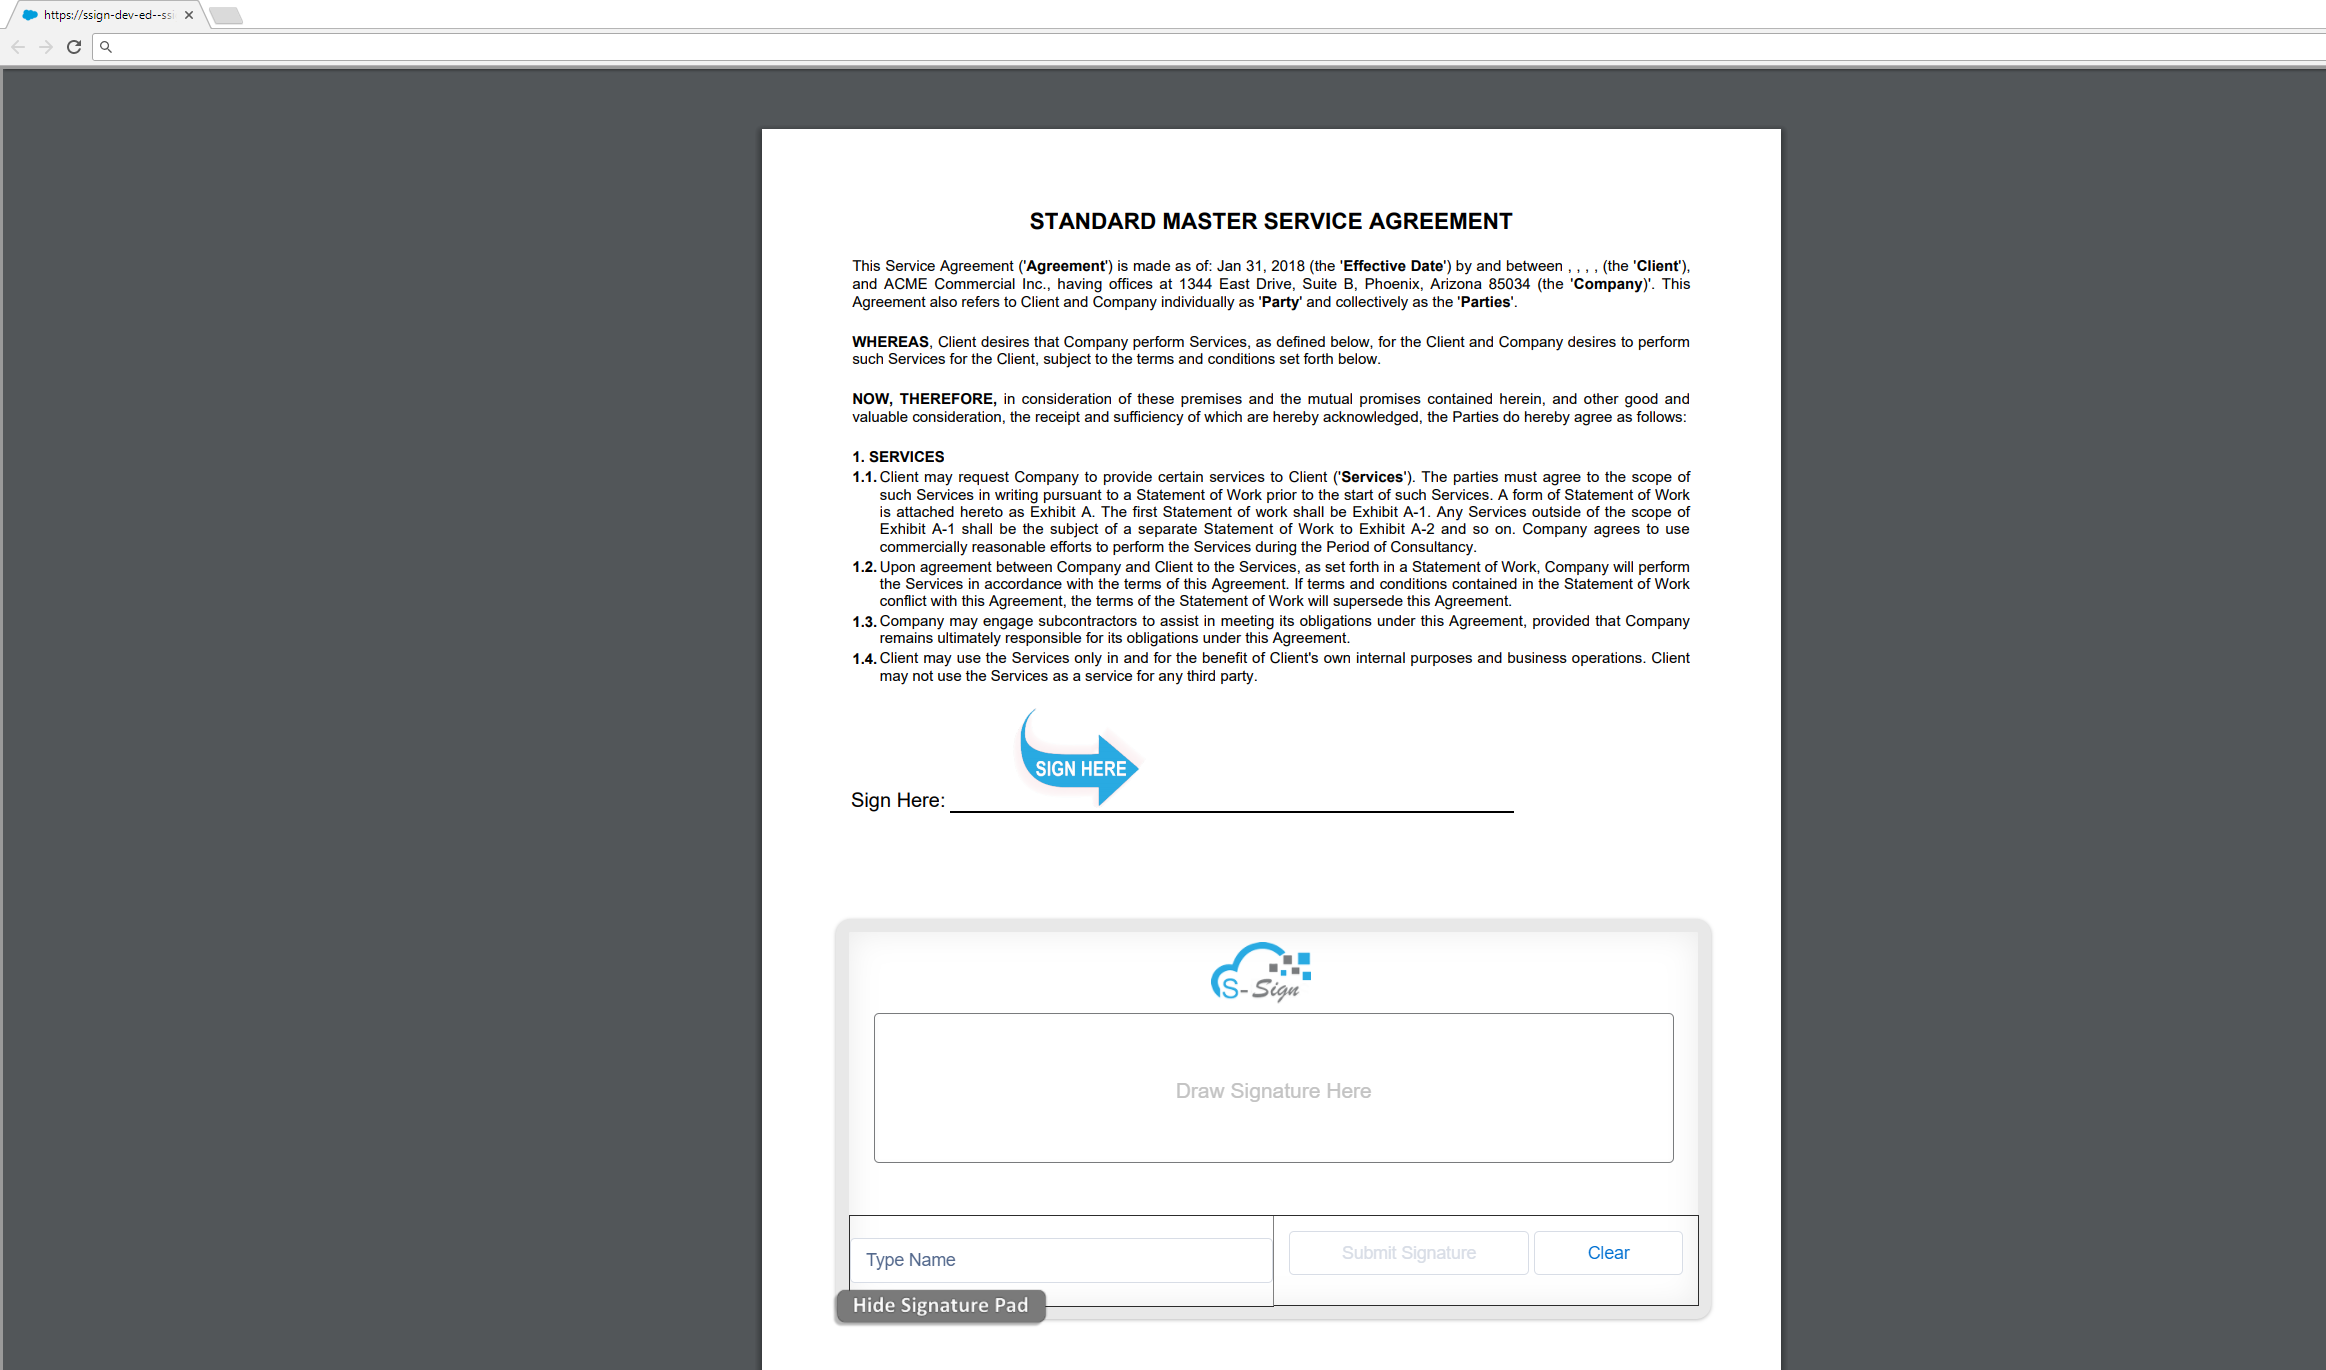
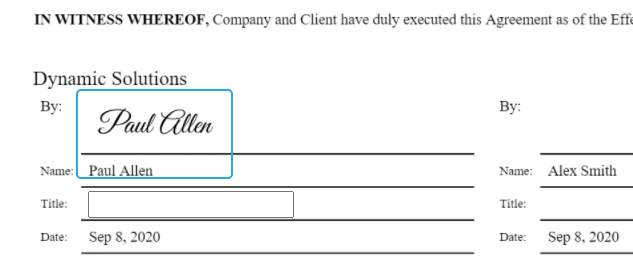
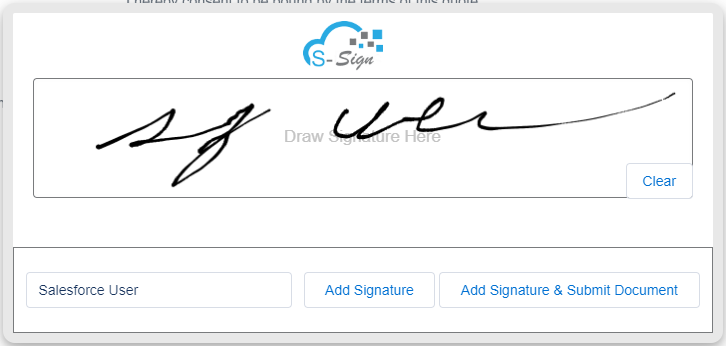
8. Signature image scale: This allows you to edit the size of the signature image as it will appear on the final document. By default it is set to 1, which is 358 by 102 pixels. The dimensions will update if you change the scale.
9. Mobile PDF Page Resolution: This option allows you to change the resolution of your S-Sign PDFs as they appear on mobile phones. The default resolution for mobile phones is 1.0, while the default resolution for desktops is 2.5. Increasing the mobile resolution can increase the visibility of smaller fonts, but may result in longer document load times.
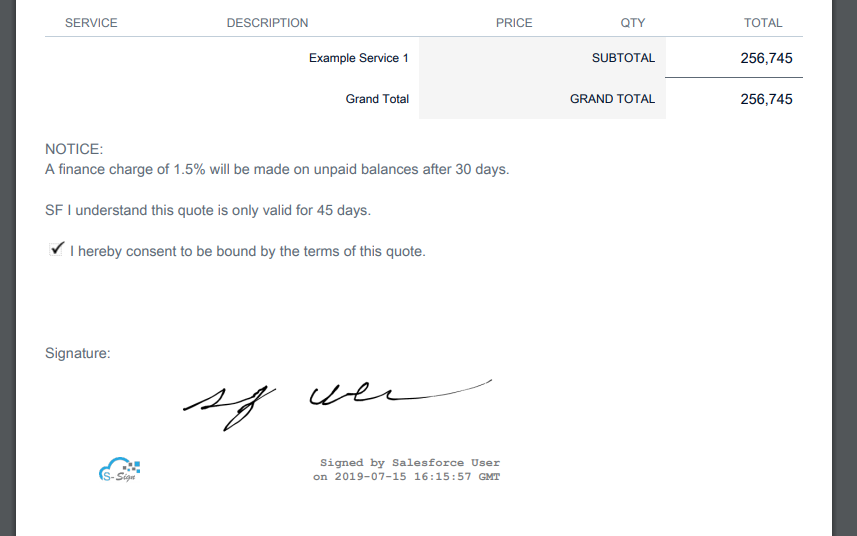
10. Timezone to be used in audit: This setting will affect the date and times listed in the document audit trail record. Older versions of S-Sign require you to input a timezone manually; if you are using an older version, S-Sign supports Salesforce Supported Timezones. Timezones should be written using Java Timezone IDs. For example, if you wanted to set the timezone to New York time, you should write America/New_York.
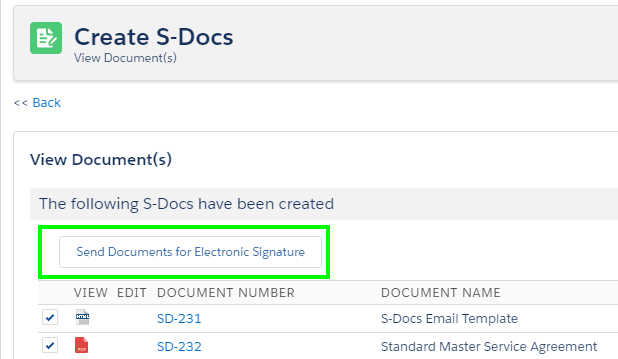
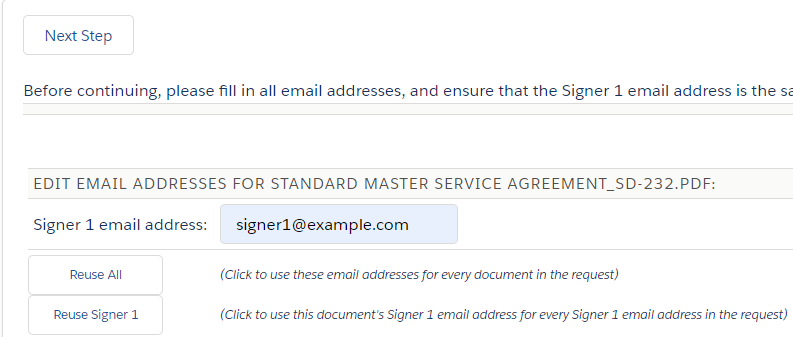
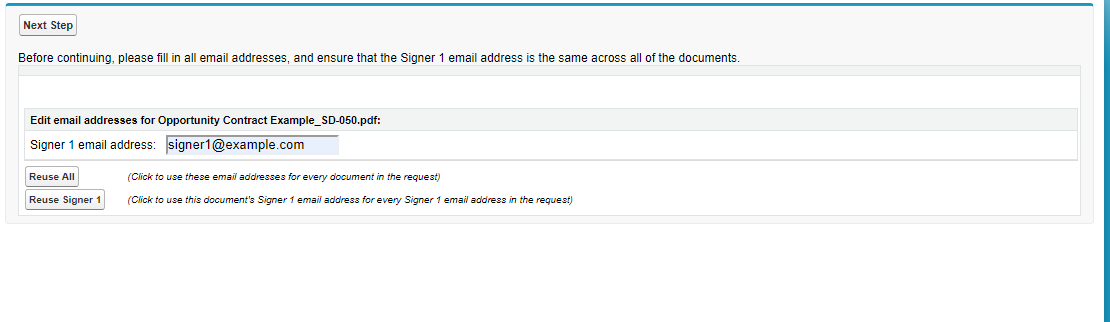
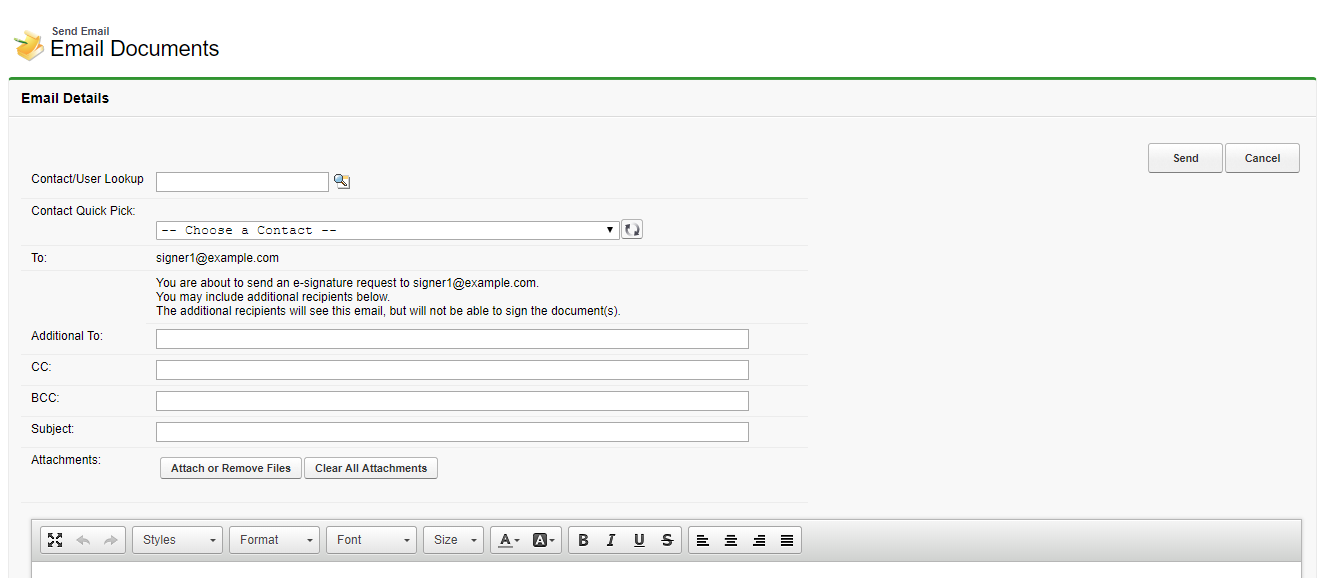
11. Always Show Profile Edit Page: By default, if an S-Sign document is generated and all signer profiles associated with that document have emails filled in, the user will be routed straight to the Salesforce email page when they click Send Documents For Electronic Signature. Conversely, if any signer profile emails are left blank, the user will be routed to the profile edit page when they click Send Documents For Electronic Signature, where they will be asked to fill in the necessary signer email addresses before proceeding to the Salesforce email page. Checking this option will route users to the profile edit page and allow them to edit signer emails every time they generate an S-Sign request, even if signer profile emails are already specified on the template.
12. Don't Allow Creation Of Contract If Other Active Contracts Exist On Base Record: This option will prevent additional S-Sign requests from being created on a certain record if other active requests already exist on that record. You can choose None, This Template, or Any Template.
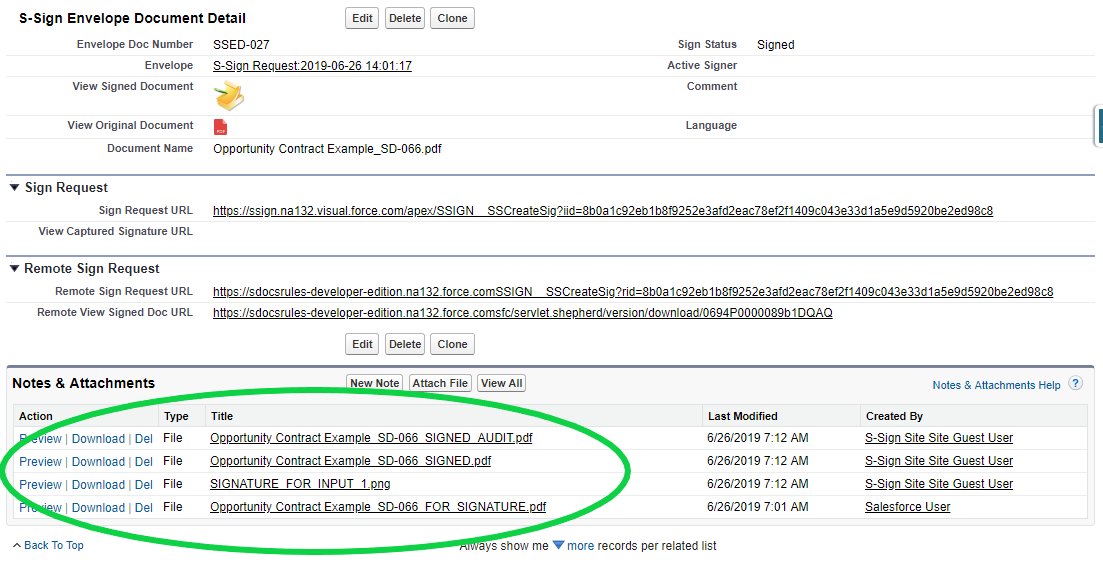
13. Clear attachments upon completion (except for signed doc w/ audit trail): When this box is checked, all of the files that S-Sign attached to the S-Sign Envelope Document will be deleted once the last signer signs this document (with the exception of the copy of the signed document that includes the audit trail, and with the exception of user-created files). Files that will be deleted include the unsigned document, signature images, and the signed document that doesn't contain the audit trail.
14. SSign Document(s) Saved to the Base Record: This option allows you to configure which documents will be saved to the base record (the record that the S-Sign request was generated from). You can choose from only the audit document, only the signed document, or both (by default, both are saved to the base record).
15. Signed Document Name: This option allows you to input a name to be used as the file name for the signed document file that does not include the audit trail. This field accepts merge fields and static text.
16. Signed Document with Audit Trail Name: This option allows you to input a name to be used as the file name for the signed document file that includes the audit trail. This field accepts merge fields and static text.
17. Redirect Signer to Page: This option will redirect signers to the URL that you specify here once they sign the document. This field accepts merge fields as well as static URLs.

S-Sign Notification Settings

The S-Sign notification settings menu will appear as follows.

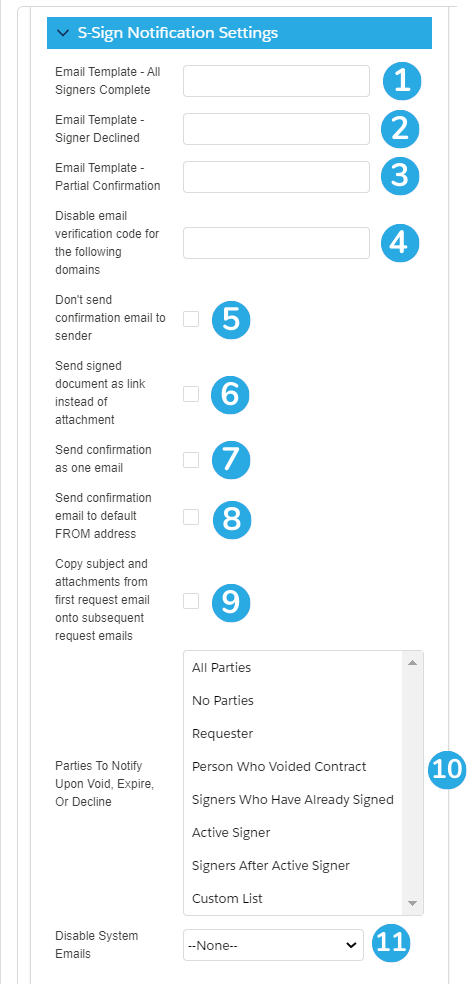
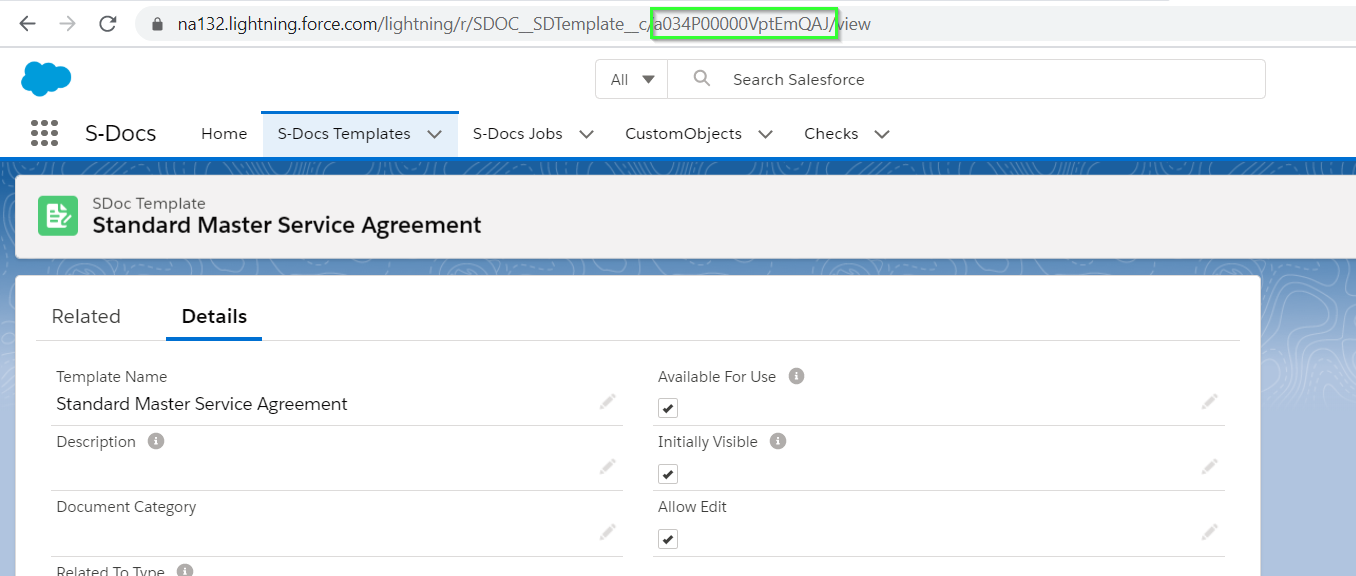
1. Email Template - All Signers Complete: You can specify a custom S-Docs HTML email template to be used for the email that is sent once all signers have finished signing. Paste the template ID here. Template IDs are found in the browser when on the template detail page.

2. Email Template - Signer Declined: You can specify a custom S-Docs HTML email template to be used for the email that is sent once all signers have finished signing. Paste the template ID here.
3. Email Template - Partial Confirmation: You can specify a custom S-Docs HTML email template to be used for the email that is sent if an S-Sign request has only been partially completed.

Note: These three templates support the following S-Sign fields:

      • [[DECLINE_REASON]]
      • [[REQUESTER_NAME]]
      • [[REQUESTER_EMAIL]]
      • [[REQUESTER_NAME]]
      • [[REQUESTER_EMAIL]]
      • [[SIGNER_EMAIL]]
      • [[SIGNER_NUMBER]]
      • [[NUM_SIGNERS]]
      • [[SIGNER_ROLE]]
      • [[NUM_SIGNERS_REMAINING]]
      • [[SIGN_LINK]]
      • [[SIGNED_DOC_URL]]
      • [[SIGNER_NAME]]
      • [[DOCUMENT_NAME]]
      • [[DOCUMENT_NUMBER]]
      • [[NUM_DOCUMENTS]]

4. Disable email verification code for the following domains: This option allows you to enter a comma delimited list of email domains that won't be asked to enter a verification code before viewing and signing documents. This is useful if there are a few domains that you trust, such as your company domain, but want all other signer domains to have to verify their identity. You can write the domains with or without the @ symbol. For example, let's say you trust domains with an @sample.com and @example.net email address. You could enter them like so:
[Option 1]: sample.com,example.net
[Option 2]: @sample.com,@example.net
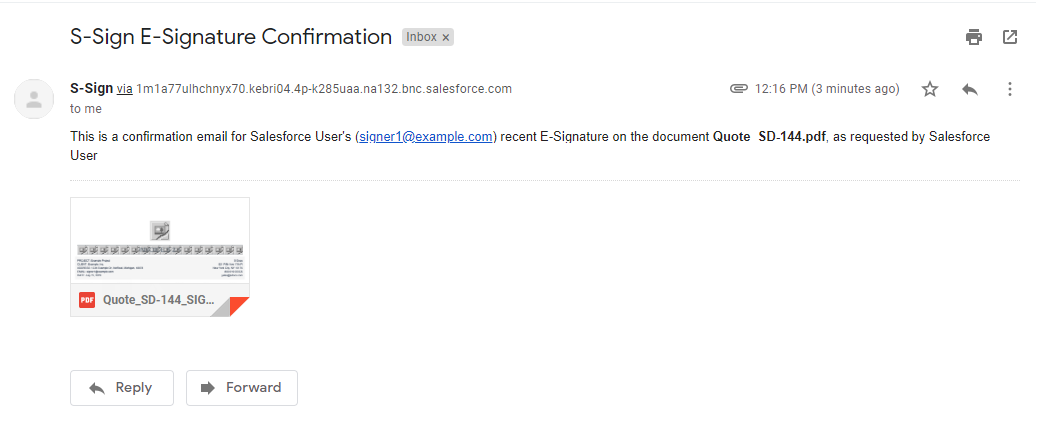
5. Don't send confirmation email to sender: If this option is checked, the sender of the S-Sign request will not receive a confirmation email once the document has been signed.
6. Send signed document as link instead of attachment: By default, signed documents are sent to users as attached PDFs after signing. Checking this option will send a link instead of an attachment. Users can click the link to re-verify their identity and download the document.
7. Send confirmation email as one email: If this option is checked, the final confirmation email will be sent as a single email with multiple recipients, rather than an individual email to each signer.
8. Send confirmation email to default FROM address: Checking this option will enable confirmation emails to be sent to the default "From" address specified under the Email Settings tab of your S-Sign request email template, even if this address is different from the address of the person who is actually sending the S-Sign request.
9. Copy subject and Attachments From First Request Email Onto Subsequent Request Emails: This option will copy all attachments that were present on the first S-Sign request email to all request emails that are sent after the first signer signs.
10. Parties To Notify Upon Void, Expire, or Decline: This option lets you pick who gets notified when an S-Sign request gets voided, declined, or expires.
11. Disable System Emails: This option will disable all emails related to S-Sign.

Expiration and Reminder Settings

By default, expiration and reminder emails are turned off. You can enable reminder emails in the S-Sign Configuration page. You can get to this page by clicking the App Launcher in the upper left corner, typing "S-Docs Setup" into the QuickFind bar, then clicking S-Docs Setup in the dropdown menu. From there, find and click on Go To S-Sign Setup Page.

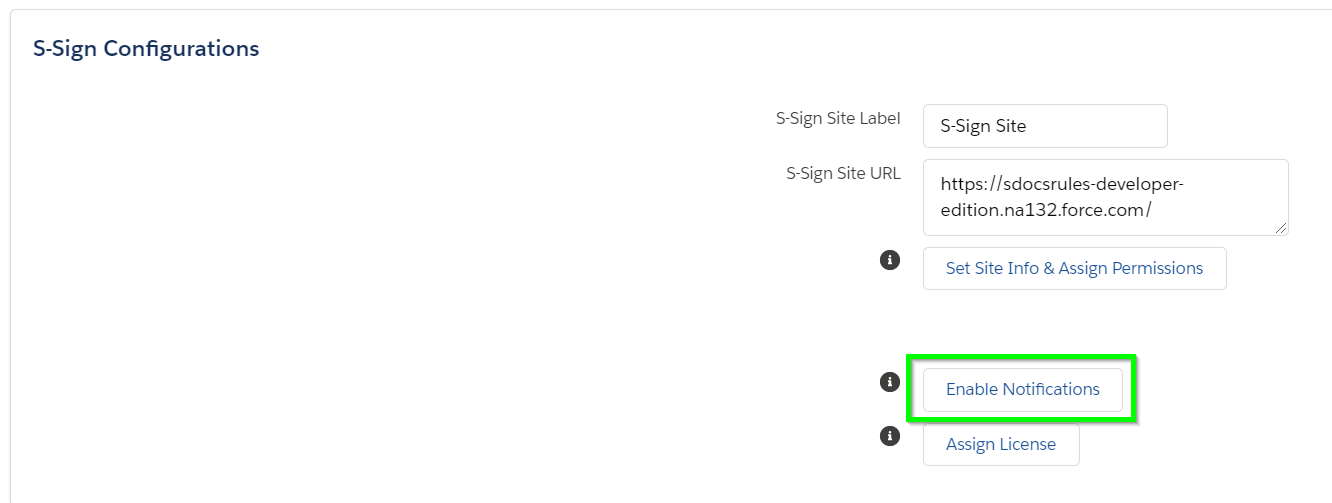
This will cause several additional options to appear under the "S-Sign Notification Settings" section of the S-Sign Settings Menu.

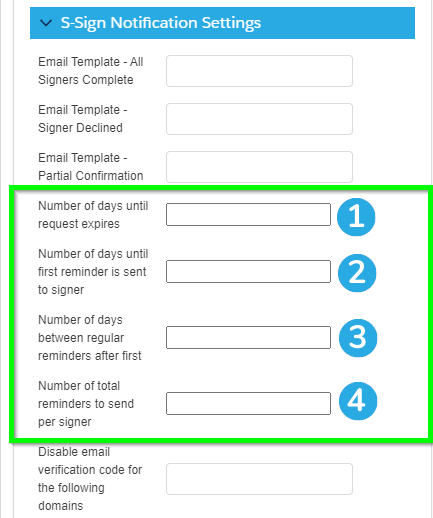
Note: Expiration/reminder values must be positive, whole numbers.

1. Number of days until request expires: This will set the number of days before the S-Sign request expires and can no longer be signed. By default, S-Sign requests do not expire.
2. Number of days until first reminder is sent to signer: This will set the number of days between the initial S-Sign request being sent and the first reminder email being sent.
3. Number of days between regular reminders after first: This will set the number of days between reminder emails after the first reminder email has been sent. By default, no reminders will be sent after the first unless you edit this field.
4. Number of total reminders to send per signer: This will set the total number of reminders that each signer will receive.

S-Sign Sign in Person Settings

Settings for signing in person are found below the notification settings.


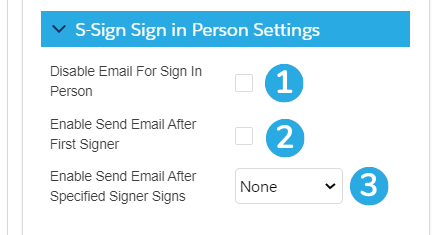
1. Disable Email For Sign In Person: Checking this box will disable the following for sign-in-person events:

1. Confirmation emails
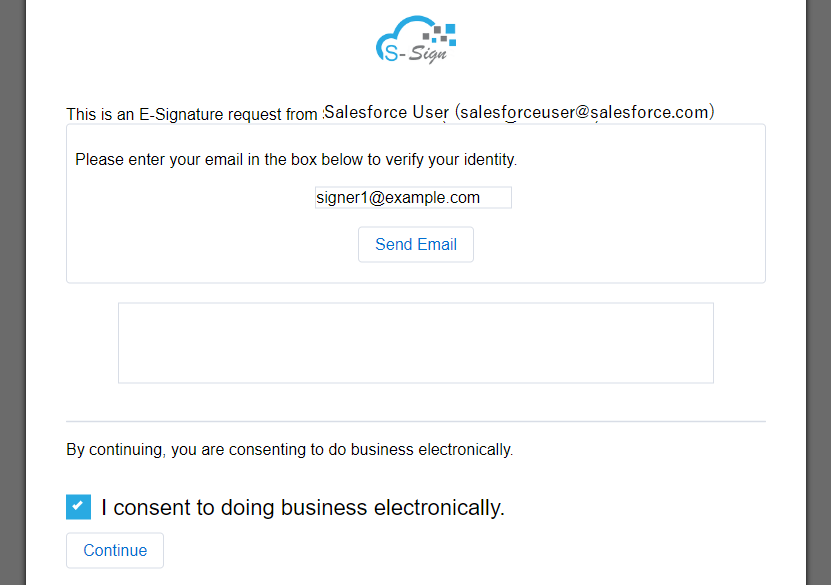
2. The verification code requirement (the signer will not be required to enter their email, receive a verification code, and enter the code in order to view and sign the document. They will only need to enter their name and check "I agree to do business electronically" to access the document)

Note: No emails will be sent to the signer even if an email is provided in their signer profile.

2. Enable Send Email After First Signer: By default, if there are multiple signers signing in person, S-Sign will treat it as if all signers are present in person. Checking this option will allow the first signer to sign in person, but all subsequent signers will receive S-Sign request emails so that they can sign remotely.

3. Enable Send Email After Specified Signer Signs: Checking this option will allow multiple signers to sign in person until a specified signer signs; all subsequent signers will receive S-Sign request emails so that they can sign remotely (this is known as S-Sign Mixed Mode). You can choose from your existing signer profiles or use a merge field (an input field will appear if you select the merge field option).

S-Sign Input Field Groups

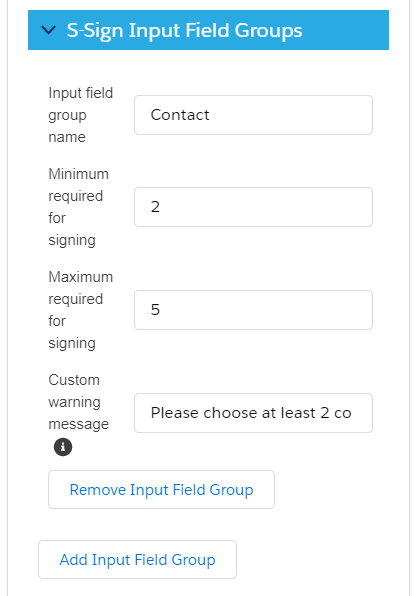
S-Sign input field group settings are found at the bottom of the S-Sign Template Settings menu.

The input field group feature allows you to assign S-Sign checkbox input fields to a group, and then set requirements for the group as a whole. For example, if we assigned several checkbox fields to "GroupA" in the example below, signers would be required to check at least 2 but not more than 4 options before submitting the document. Click here to learn more about input field groups.

You are now ready to tailor S-Sign to your org's unique needs and start saving time and money with our 100% native e-signature solution.
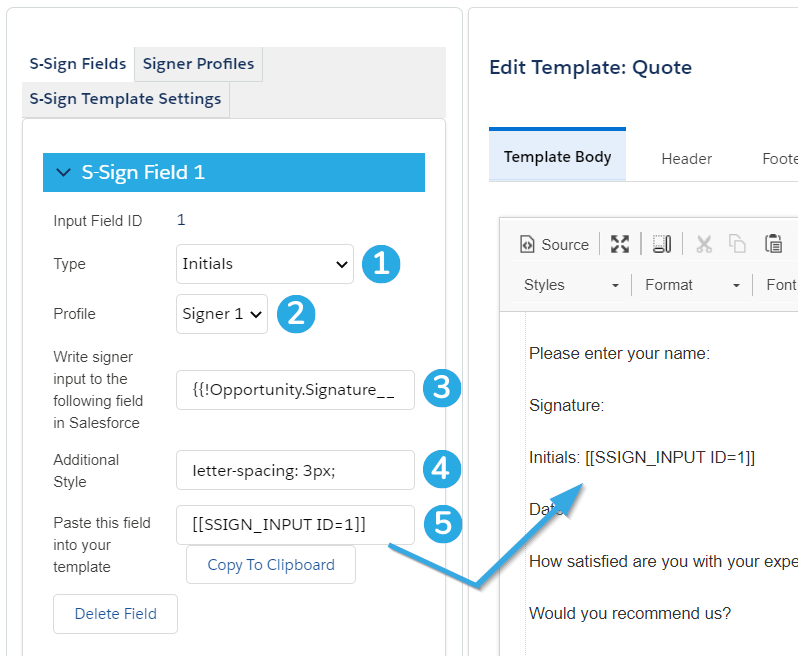
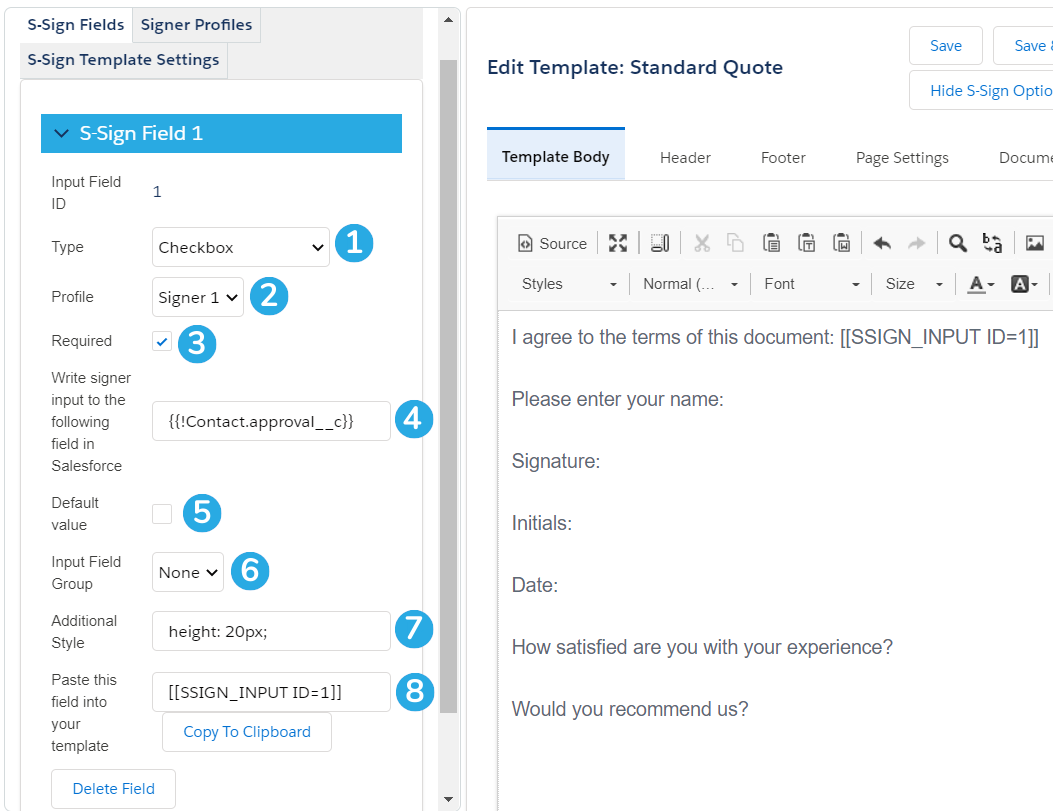
S-Sign User Guide – Salesforce Lightning

By Documentation, S-Sign No Comments

This article provides a comprehensive overview of creating and sending an e-signature request with S-Sign in Salesforce Lightning Experience, as well as explains what happens behind the scenes. To view this article for Salesforce Classic, click here.

Tutorial Video

Sending the E-Signature Request

Sending an E-Signature request with S-Sign is as simple as generating a document and sending an email. Once you have created an HTML E-Signature request template and a signable PDF template, navigate to a Salesforce record and click the S-Docs button. If you don't see the S-Docs button, you either need to add it to your page layout (if you're viewing select standard objects) or you need to create the button and add it to your page layout (if you're viewing a custom object).

Next, select your HTML E-Signature request template and your signable PDF template. You can tell which templates are S-Sign enabled by the S-Sign logo that appears next to the template names. Click Next Step to generate documents with these templates.

S-Docs will then recognize that you have generated an E-Signature document and offer a Send Documents for Electronic Signature button. Click this button to email the E-Signature document. Click here to learn about using S-Sign in person.

If you didn't specify the email of the signer in the template editor, you will be prompted to enter their email now. If your template requires multiple signers, you will be able to enter the email address of each signer here.

Upon clicking Next Step, you will be brought to the the email page. Here, you have the option to edit the usual email fields (To, CC, BCC, Subject).

Note that you also have the option to edit the body of the email.

Note that the PDF we generated is not included on this email as an attachment; this is because the email contains a link to an interactive webpage where the user can view and sign that PDF (this is the code you inserted into your HTML template when you created it). Click Send to send the document for E-Signature.

Note: Additional attachments (non-S-Sign documents or pre-generated documents) are not supported with S-Sign emails at this time.

What the Signer Will See

The recipient then receives the email that you created with your HTML template:

When the recipient clicks View and Sign, they will be prompted to verify their identity by entering a code and consenting to do business electronically.

They will then be taken to the signable document.

From here, the recipient can decline to sign, or they can sign the document by clicking Sign Here, which will bring up the signature pad.

The recipient can then type their name, draw a signature, and submit their information.

Once the recipient clicks Submit Signature, their signature is merged into the document, and both you and the recipient receive a confirmation email containing the signed document. The recipient is then  redirected to view the signed version of the document. The signed version of the document includes the signer’s name, their signature image, and the date and time at which they signed the document. Additionally, the audit trail for the document appears as a new page at the end.

Note: To learn how to customize aspects of an S-Sign request, such as the size of the signature image and who receives the audit record, please visit the S-Sign Templates Settings documentation.

Note: You can send multiple documents in a single e-signature request. Click here to learn how to do this.

Behind the Scenes - Before Signature

What happened in Salesforce while all of this was going on? Let’s take a step back in time to way before our recipient has signed the document. Immediately after you clicked Send Documents for Electronic Signature, an S-Sign Envelope record was created, which can be viewed under the Related tab on the object record that you created the e-signature request for.

Click on the blue link to view the S-Sign Envelope record. Under the Details tab, you can [1] view and track the sign status of your request; since the recipient hasn't opened the email yet, it's status is "Created." This will change to "Viewed" when the recipient opens the document, and "Signed" once they sign it. You can also [2] view the template ID used for the email, [3] the number of documents that need to be signed, and [4] the HTML email page itself.

Under the Related tab, you'll be able to see S-Sign Envelope Document records, one for each signable PDF that was included in our E-Signature request (in this case, only 1). You can [1] click on the PDF icon to view the document that is going to be signed, or [2] click on the Envelope Doc Number to view the document record. We'll click this number now.

On the S-Sign Envelope Document record, you'll be able to see more details. You can [1] view the Sign Status again, as well as [2] the current signer identity (this is useful when your documents require multiple signatures). Once the document has been signed, you'll be able to [3] view the finished product on this page, as well as [4] the original document before signature. Finally, you can [5] view the S-Sign request URL, as well as the signature image by itself.

Under the Related tab, only the original document is visible.

Behind the Scenes - After Signature

Now let’s take a step forward in time to when our recipient has signed the document. Again, head to the object record you generated the e-signature request from, and click on the S-Sign Request link under S-Sign Envelopes.

At this point, the S-Sign Envelope's status has been updated to "Completed."

Under the Related tab, a link has appeared to view the signed document.

When you click on the Envelope Doc Number, the Related tab now contains files for the document audit trail, the raw signature file, the signed document, and the original document.

The signed document file will also appear in the Notes & Attachments related list on the contact record.

That's all there is to it!

tracking

Text to Signature

By Documentation, S-Sign No Comments

Introduction

If you're not using a tablet or smartphone, it can be difficult and clumsy to draw a signature with a mouse or trackpad. Fortunately, S-Sign provides the option forgo any drawing at all with the Text to Signature feature. This feature allows you to sign a document by typing your name and replacing it with a cursive font.

Text to Signature works on S-Sign version 1.973 and above, so make sure you have the latest version installed before testing it out. You can check the version number by navigating to the Setup menu, typing "Installed" into the Quick Find / Search bar, and clicking Installed Packages.

If you don't have the latest version, reach out to a member of our sales team at sales@sdocs.com to obtain an installation link.

Use The Text-To-Signature Feature

Text to Signature is easy to use and requires no configuration on your part. When a user receives an S-Sign request and clicks Click Here to Sign, the signature capture window will open with a Text to Signature checkbox right below the area where they'd normally draw their signature.


When the user clicks Add Signature, their typed signature will be merged into the document.

They can then fill in any other necessary fields and submit the document.

That's all there is to it! Text to Signature is an easy-to-use alternative to drawing a signature designed to save your users time and provide more value to you.

Set A Default Font

You can set a default font for text-to-signature in the Custom Settings section of the S-Sign Configuration Page.

Using S-Sign in Person

By Documentation, S-Sign No Comments

Introduction

If you need your clients to sign documents in person, S-Sign has you covered. 

Before you begin, make sure you've configured S-Sign and created your S-Sign enabled template. If your documents aren't going to be signed in person, click here to learn how to use S-Sign with email.

Generate An In-Person S-Sign Request

Start by navigating to your object record and clicking the S-Docs button.

Select the document you wish to be signed and click Next Step.

Note: Since the document will be signed in person, you do not need to use an HTML template along with the PDF template.

Since you only selected a PDF template, an E-Sign Documents In Person button will appear in place of the email button. Click this button to proceed.

What The Signer Sees

After clicking "E-Sign Documents In Person," you will be redirected to the email verification page. The signer of the document will be required to enter a verification code before proceeding. This 6-digit code will be sent to them once they enter their email address.

After clicking Continue, the document will be displayed. The signer can then fill in all of the inputs required by clicking on the text boxes/check boxes or clicking Next Input and Previous Input to move between them.

The signature pad will open for the signature input. The signer can then draw their signature and type their name, then click Add Signature.

The signer can then review the document once more and click Submit when they are finished. The following screen will appear. The signer can click anywhere to view the signed document.

The final document will be displayed will all of the inputs filled in, the signer's signature merged into the signature area, and a date/time stamp.

The signer can also scroll down to view the document's audit trail.

In addition, the signer will receive a confirmation email with the signed document attached for their records.

That's all there is to it!

Creating S-Sign-Enabled Templates for S-Docs

By Documentation, S-Sign No Comments

In This Article:

  1. Introduction
  2. Configuring the HTML Template
  3. Configuring the PDF Template
  4. Legacy Instructions [For versions of S-Sign before 1.900]

Introduction

Creating S-Sign-enabled S-Docs templates can be done in almost no time. If you've just installed S-Sign into an org that's had S-Docs for a while, you can quickly enable S-Sign in any pre-existing S-Docs template. To learn how to create S-Docs templates, click here.

Sign requests consist of two types of S-Docs templates: PDF and HTML. The HTML template will be used as the body of the sign request email. The PDF template will be used to generate the documents that you would like to be signed.

Note: If you're using S-Sign in person, you don't need to include an HTML email template. Learn about using S-Sign in person.

Configuring the HTML Template

The HTML template is like any other S-Docs HTML email template, with two extra steps.

First, you need to enable S-Sign on the HTML template. To do this, navigate to the template editor for your HTML template. Navigate to the Advanced Options tab and check the Enable S-Sign checkbox. After that, your HTML template is S-Sign enabled.

Next, you need to place a link in the "Source" page of the Template Editor that looks like the following:

[code lang="html"]<a href="[[[SIGNLINK]]]" target="_blank">Click Here to Sign</a>[/code]

[[[SIGNLINK]]] is an S-Sign merge field that will be replaced with a link in the email that takes the recipient to a page where they can sign the document. You can also use the S-Sign merge field [[[DOCUMENTNAME]]] to display the name of the PDF document in the outbound email. Once out of the "Source" page of the template editor, it should look like this:


However, you can edit the source of this template to appear any way you want it to.

Configuring the PDF Template

Similar to the HTML template, the PDF template is like any other S-Docs PDF template with the exception that you need to enable S-Sign. Just as you did with the HTML template, go into the template editor, navigate to the Advanced Options tab and check the Enable S-Sign checkbox. Since it's a PDF template, the S-Sign panel will appear on the left of the template editor.

From there, you can select your S-Sign field type from the dropdown menu (signature, initials, text, checkbox, date, or picklist), and then paste the field tag into your template where you want the field to appear in the finished document. For example, if you want the signature box to appear after the words "Please Sign Here," you would paste the field tag like this:

That's it! Once you have modified the HTML template to include the [[[SIGNLINK]]] code and enabled S-Sign on both templates, you are ready to send out an E-Signature request using these two documents.

Legacy Instructions

Just like the current version, legacy S-Sign requests consist of two types of S-Docs templates: PDF and HTML. The HTML template will be used as the body of the sign request email. The PDF template will be used to generate the documents that you would like to be signed.

To enable the HTML template for E-Signature, you'll need to go to the "Advanced Options" tab of the Template Editor and select "SSIGN" for the "E-Sign Vendor" dropdown (just like with the current version). However, you do not need to do this for the PDF template.

Once you've made this change, you need to place a link in the "Source" page of the template editor that looks like the following:

[code lang="html"]<a href="[[[SIGNLINK]]]" target="_blank">Click Here to Sign</a>[/code]

[[[SIGNLINK]]] is an S-Sign merge field that will be replaced with a link that takes the recipient to a page where they can sign the document. You can also use the S-Sign merge field [[[DOCUMENTNAME]]] to display the name of the PDF document in the outbound email.

Similarly, the PDF template is like any other S-Docs PDF template, with the exception that you need to place the S-Sign merge field [[[SIGNATURE]]] wherever you'd like the recipient's signature to be placed. When you generate a document using this PDF template, [[[SIGNATURE]]] is replaced with a large image that says "Sign Here" until the recipient signs the document. Once the recipient signs the document, all instances of [[[SIGNATURE]]] will be replaced with the recipient's signature image. Hence, [[[SIGNATURE]]] can be placed in multiple locations of the document, but the recipient only signs once, and all instances of [[[SIGNATURE]]] will be replaced by the same image.

That's it! Once you have set the HTML template's "E-Sign Vendor" value to "SSIGN," modifed the HTML template to include [[[SIGNLINK]]], and modified the PDF template to include [[[SIGNATURE]]], you are ready to send out an E-Signature request using these two documents.

S-Sign User Guide – Salesforce Classic

By Documentation, S-Sign No Comments

This article provides a comprehensive overview of creating and sending an e-signature request with S-Sign in Salesforce Classic, as well as explains what happens behind the scenes. To view this article for Salesforce Lightning Experience, click here.

Sending the E-Signature Request

Sending an E-Signature request with S-Sign is as simple as generating a document and sending an email. Once you have created an HTML E-Signature request template and a signable PDF template, navigate to a Salesforce record and click the S-Docs button. If you don't see the S-Docs button, you either need to add it to your page layout (if you're viewing select standard objects) or you need to create the button and add it to your page layout (if you're viewing a custom object).

Next, select your HTML E-Signature request template and your signable PDF template. You can tell which templates are S-Sign enabled by the S-Sign logo that appears next to their names. Click Next Step to generate documents with these templates.

S-Docs will then recognize that you have generated an E-Signature document and offer a Send Documents for Electronic Signature button. Click this button to email the E-Signature document. Click here to learn about using S-Sign in person.

If you didn't specify the email of the signer in the template editor, you will be prompted to enter their email now. If you have specified multiple signer fields in your template, you will be able to enter the email address of each signer here.

Upon clicking Next Step, you will be brought to the the email page. Here, you have the option to edit the usual email fields (To, CC, BCC, Subject) and edit the body of the outbound email. Note that the PDF we generated is not included on this email as an attachment; this is because the email contains a link to an interactive webpage where the user can view and sign that PDF (this is the code you inserted into your HTML template when you created it). Click Send to send the document for E-Signature.

Note: Additional attachments (non-S-Sign documents or pre-generated documents) are not supported with S-Sign emails at this time.

What the Signer Will See

The recipient then receives the email that you created with your HTML template:

When the recipient clicks View and Sign, they will be prompted to verify their identity by entering a code and consenting to do business electronically.

They will then be taken to the signable document.

From here, the recipient can decline to sign, or they can sign the document by clicking Sign Here, which will bring up the signature pad.

The recipient can then type their name, draw a signature, and submit their information.

Once the recipient clicks Submit Signature, their signature is merged into the document, and both you and the recipient receive a confirmation email containing the signed document. The recipient is then  redirected to view the signed version of the document. The signed version of the document includes the signer’s name, their signature image, and the date and time at which they signed the document. Additionally, the audit trail for the document appears as a new page at the end.

Note: To learn how to customize aspects of an S-Sign request, such as the size of the signature image and who receives the audit record, please visit the S-Sign Templates Settings documentation.

Note: You can send multiple documents in a single e-signature request. Click here to learn how to do this.

Behind the Scenes - Before Signature

What happened in Salesforce while all of this was going on? Let’s take a step back in time to way before our recipient has signed the document. Immediately after you clicked Send Documents for Electronic Signature, an S-Sign Envelope record was created, which can be viewed on the object record that you created the e-signature request for.

Let’s view this S-Sign Envelope record, where you can view and track the request. The record has a related list of S-Sign Envelope Document records, one for each signable PDF that was included in our E-Signature request (in this case, only 1). It has a sign status of “Created,” meaning it hasn’t been signed yet. Additionally, the S-Sign Envelope itself has a status of “Created." When the signer opens the document, this status will change to "Viewed," and when they sign it, it will change to "Signed."

Now let’s view the S-Sign Envelope Document. To do this, click on the Envelope Doc Number.

Since the document contained by this S-Sign Envelope Document hasn’t been signed yet, we only see links for the signature request and for viewing the original document. Additionally, the Notes & Attachments related list only contains the original document.

Behind the Scenes - After Signature

Now let’s take a step forward in time to when our recipient has signed the document. Again, head to the object record you generated the e-signature request from, and click on the S-Sign Request link under S-Sign Envelopes.

At this point:

  1. The S-Sign Envelope's status has been updated to “Completed”
  2. The “View Signed Document” link appears
  3. The S-Sign Envelope Document status has been updated to "Signed"
  4. You can click on the Envelope Doc Number to view more information

Upon clicking on the Envelope Doc Number, the Notes & Attachments related list now contains information like the document's audit trail, the signed document, and the raw signature image itself.

That's all there is to it!

tracking

Top