All Posts By

Admin

S-Docs with Salesforce Lightning

By Documentation No Comments

Introduction

This guide discusses how to configure and use S-Docs in Salesforce Lightning Experience and how to edit a template in Lightning. You can also view the S-Docs Quick Install and Configuration Guide for Salesforce Lightning Experience for a comprehensive overview of installing and configuring S-Docs in Salesforce Lightning Experience.

Create the S-Docs Button and Add it to an Object's Page Layout in Lightning

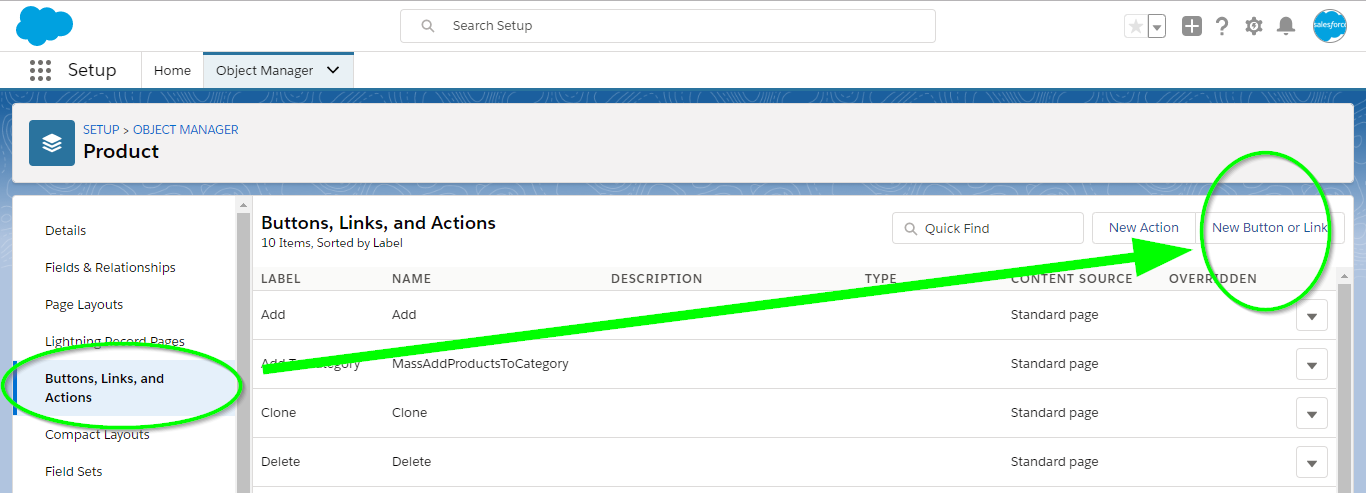
If you have not already created an S-Docs button and added it to your page layout, you will need to add a custom button (Note that the S-Docs button comes prepackaged for many standard objects, such as Opportunities, Contacts, and Accounts; however, you still need to add the button to your page layout for these standard objects). To create a new button, you'll need to go to Setup > Object Manager > ObjectNameHere > Buttons, Links & Actions.

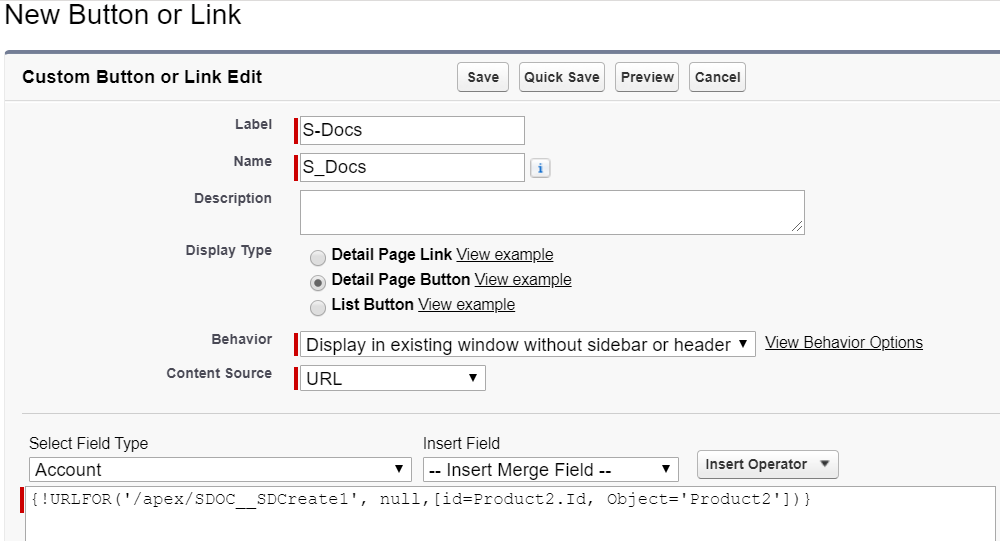
Click on New Button or Link and fill in the fields as in the following screenshot. You'll need to modify the button link per your object's API name. In this case, our object is a Product (API name Product2), so we used:

{!URLFOR('/apex/SDOC__SDCreate1', null,[id=Product2.Id, Object='Product2'])}


Note: If you encounter problems with your S-Docs button in lightning, add the lightningnav='true' parameter to your button URL. This step usually isn't necessary, but it can fix problems in lightning should they arise.

{!URLFOR('/apex/SDOC__SDCreate1', null,[id=Product2.Id, Object='Product2', lightningnav='true'])}

Add The S-Docs Button to your Object's Page Layout

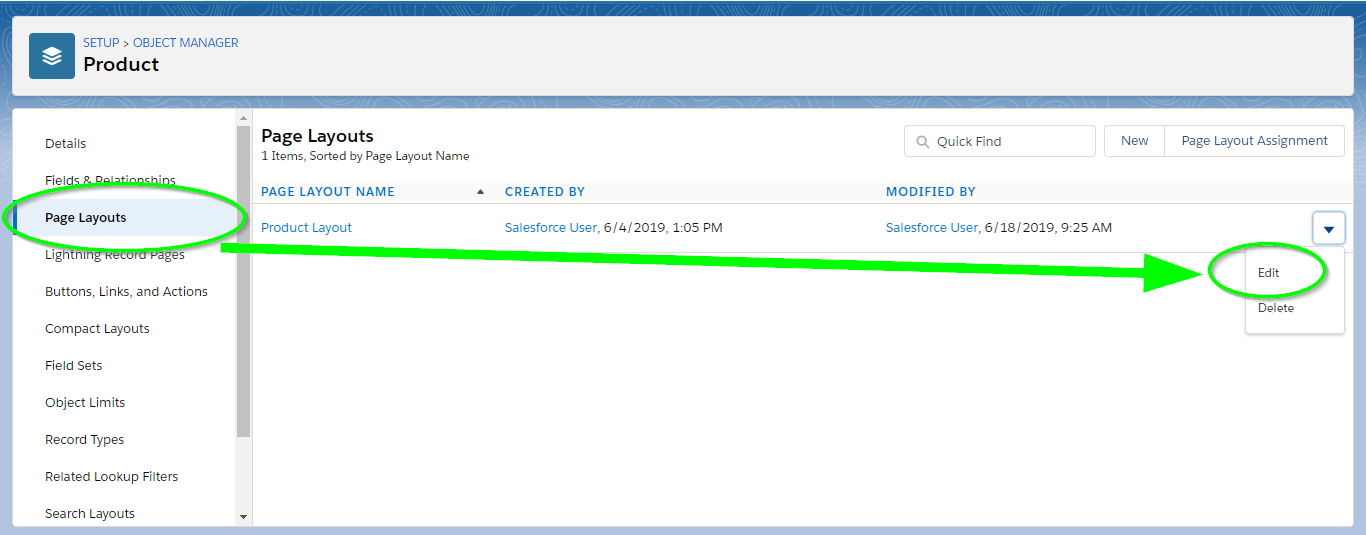
Then, you'll have to add your new button to your page layout. Staying within the Object Manager for your object, click Page Layouts on the sidebar, and then click Edit.

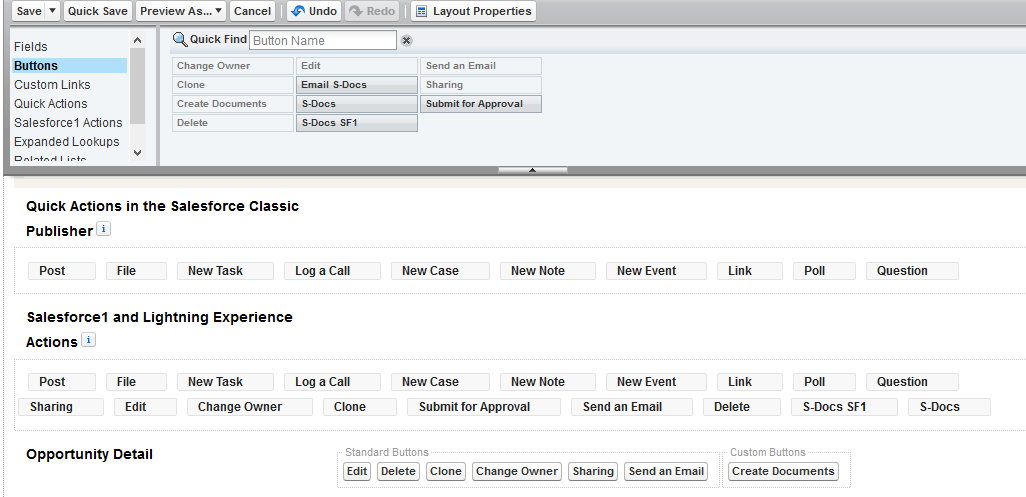
Select the button from the Mobile & Lightning Actions box in the toolbar and add it to the Salesforce Mobile and Lightning Experience Actions box in the page layout.


Click Save and you're all set! You can now generate S-Docs in Lightning.

Using S-Docs in Salesforce Lightning - Generating Documents

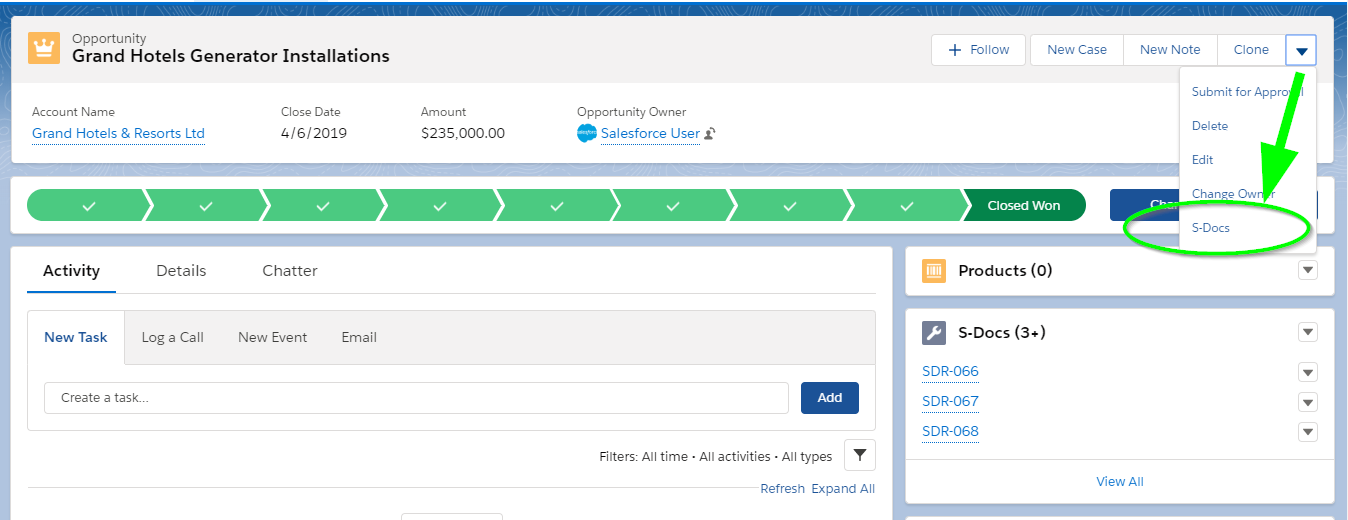
To generate an S-Doc for a record, go to that record’s page and click the S-Docs button:


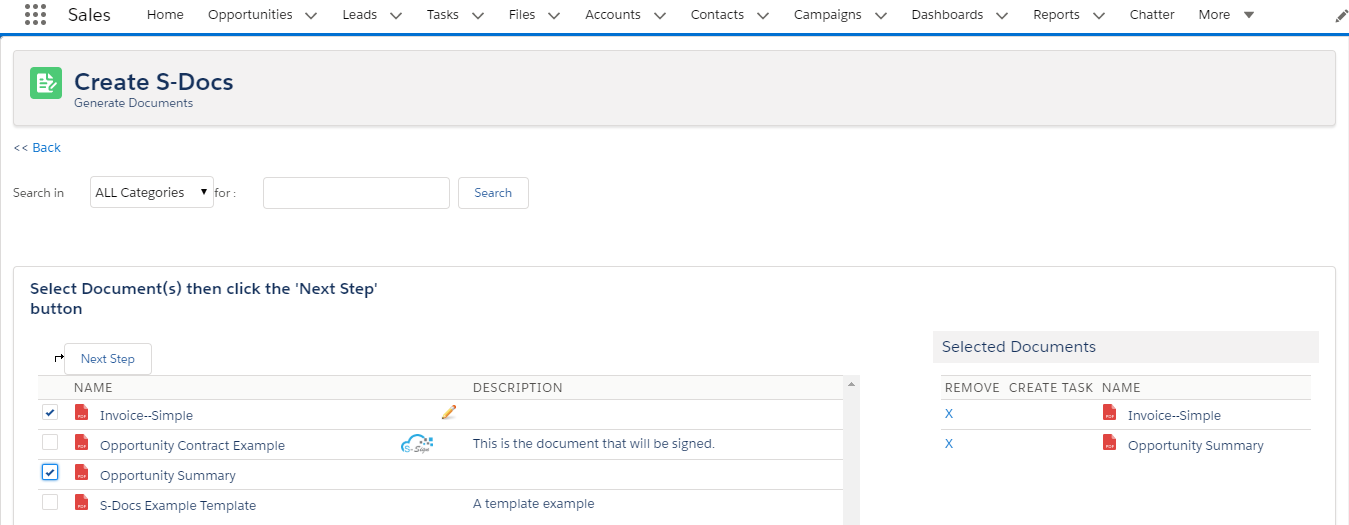
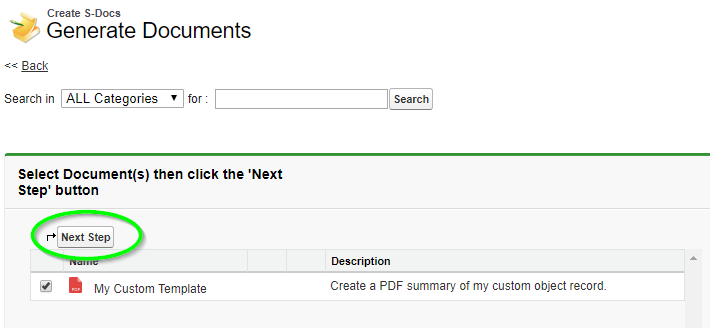
Then, select the templates you would like to use. Click Next Step to generate documents derived from the templates you selected:

Once you have generated your documents, you will see the “View Document(s)” page.

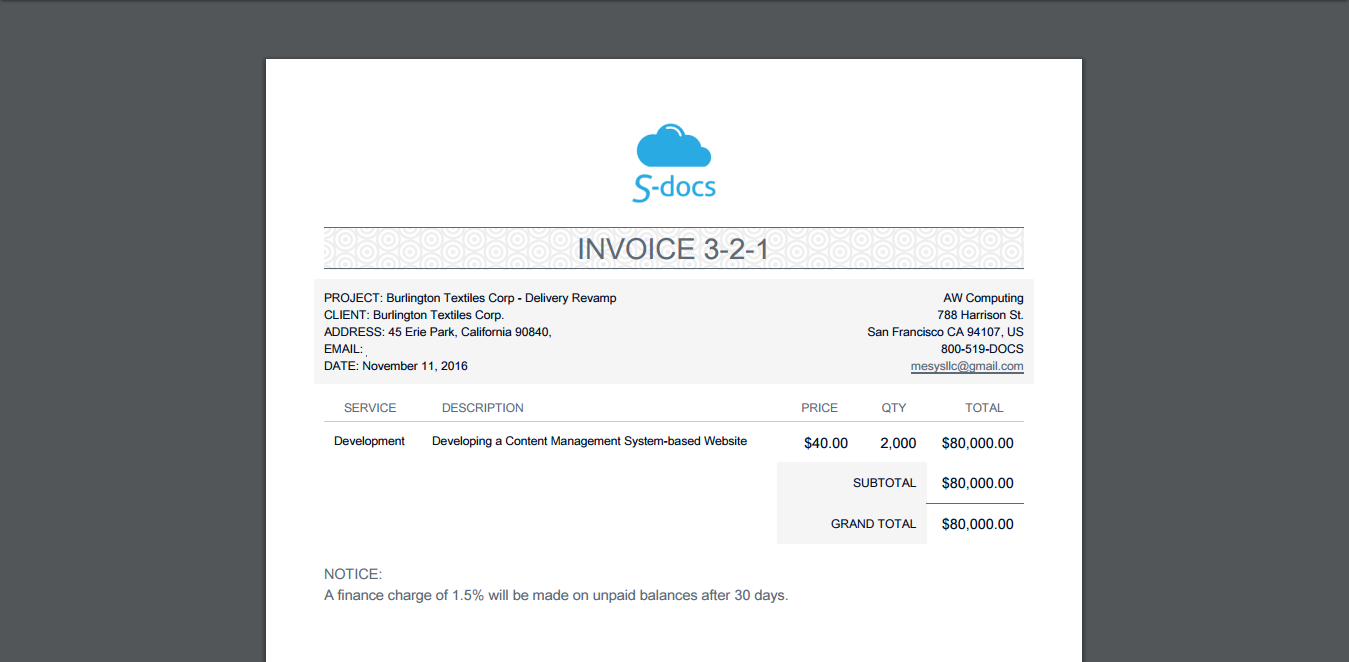
Clicking the "View" icons will bring up your documents in a separate tab:

using-s-docs-in-lightning-4

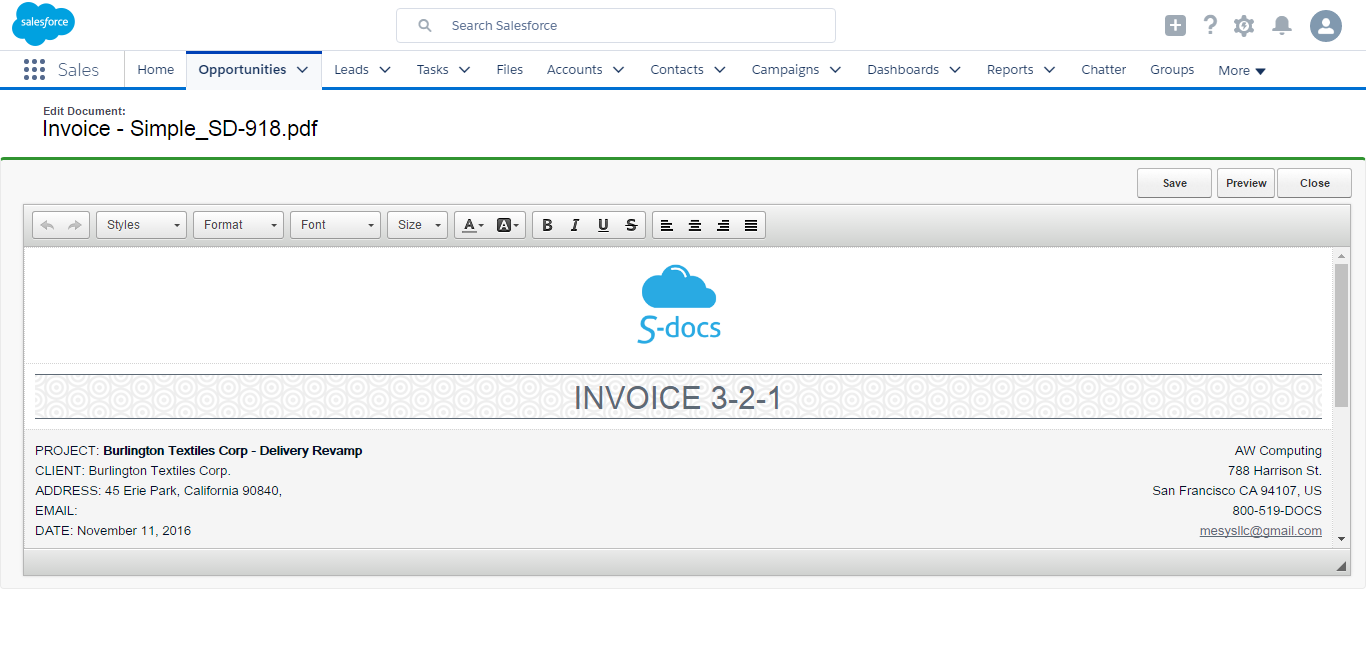
Let’s return to the “View Document(s)” page. If “Allow Edit” is enabled for a particular template, you can click the pencil icon corresponding to that document to edit it after it’s been generated:

using-s-docs-in-lightning-5

Emailing S-Docs

After you make your edits, you can click Preview to preview the final document, Save to save and return to the “View Document(s)” page, and Close to discard your changes and return to the “View Document(s)” page.

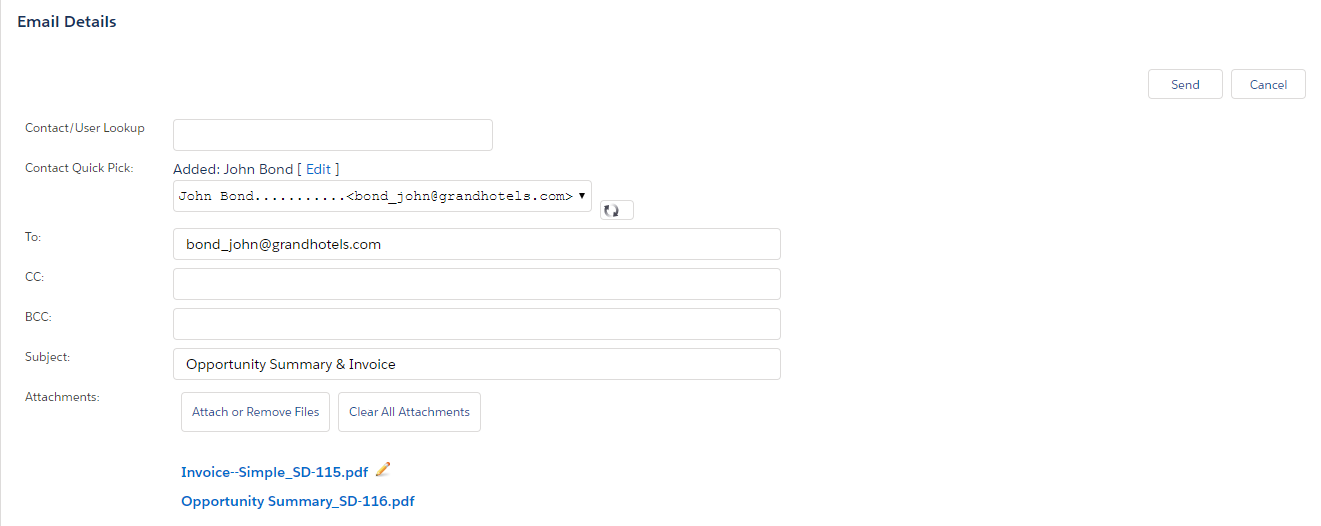
On the “View Document(s)” page, you can click Email Selected Docs to email your documents. Your documents will be included as attachments on an email. Here, you can edit the email fields as desired, scroll down to edit the body of the email, and click Send to send your email or Cancel to return to your record’s page.

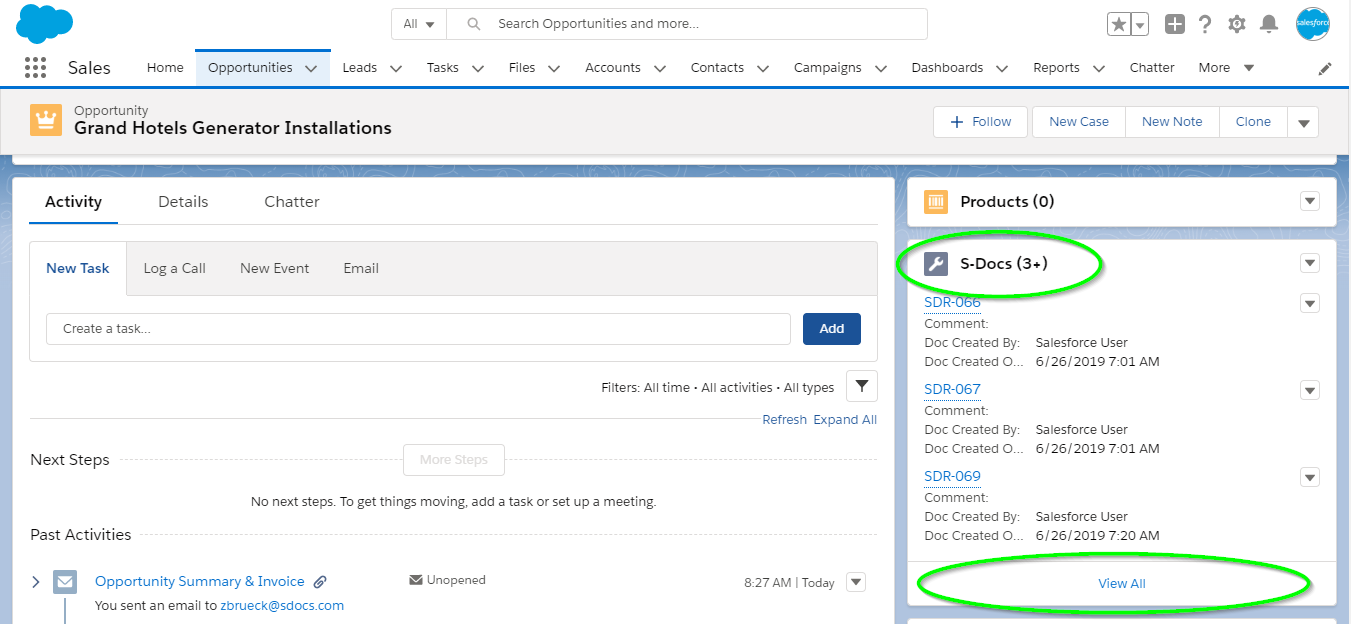
Once you return to your record’s page, you will notice that the S-Docs you generated now appear in the S-Docs related list. You can click View All for a more in-depth look at your S-Docs’ details.

On the following page, you can click the document icon in the “View” column, the mail icon in the “Email” column, or the pencil icon in the “Edit” column to respectively view, email, or edit the corresponding document.

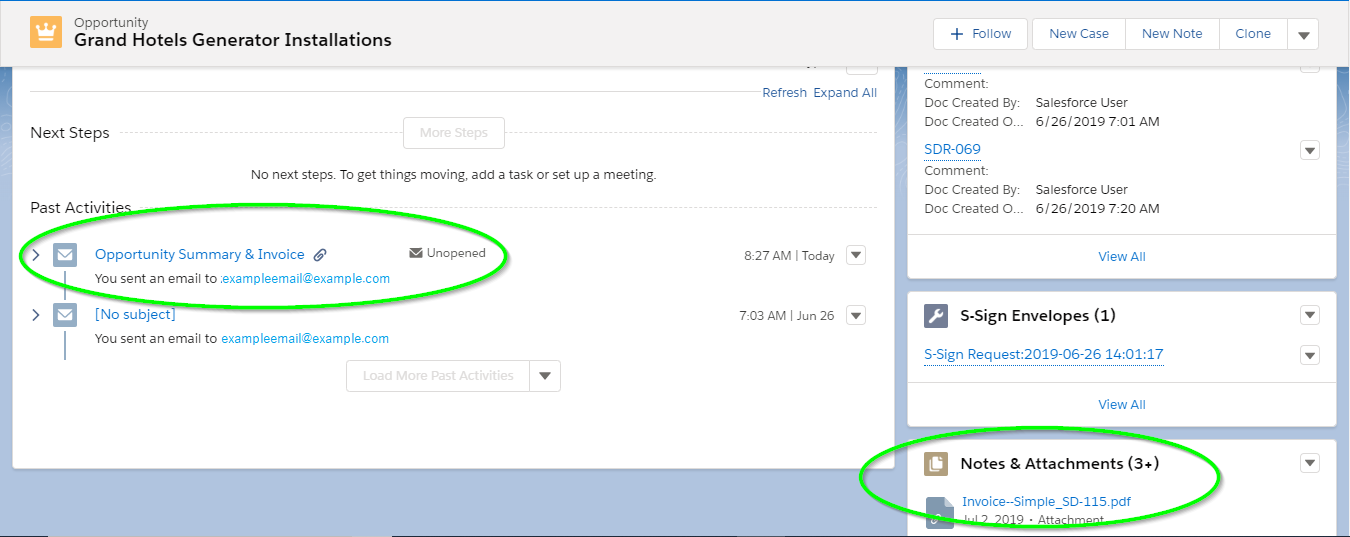
Now, going back to the record we generated S-Docs for, if we scroll down to the bottom of the page, we will see that the email we sent was recorded in the “Past Activity” section. Additionally, the Invoice template was saved in the Notes & Attachments section, but not the Opportunity Summary. This is because “Auto-Create Attachment” is enabled for the Invoice template but not the Opportunity Summary.

(If you’re an end-user of S-Docs who is just generating documents and not editing templates, you can ignore the following note).

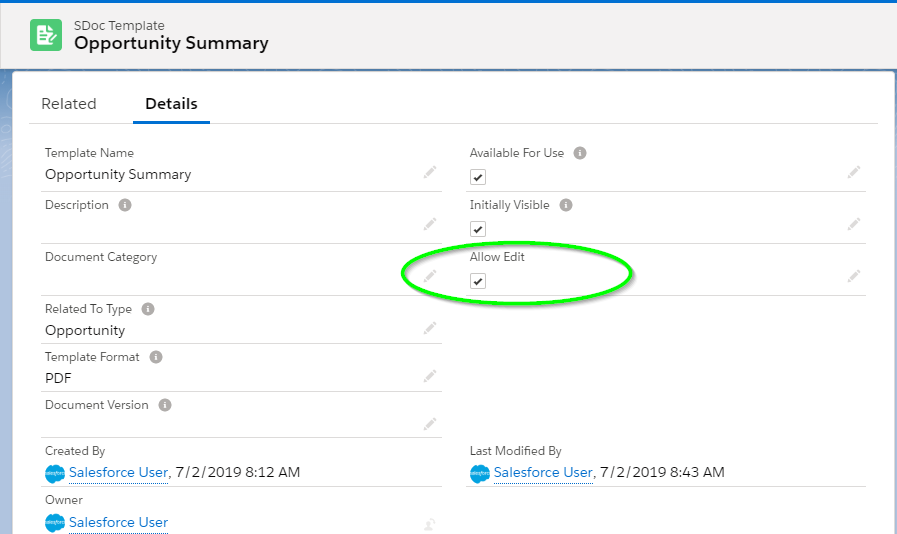
Note: In the S-Docs related list and “View Document(s)” page, the pencil icon will not show up for S-Docs that do not have Allow Edit enabled (found on the template record detail page).

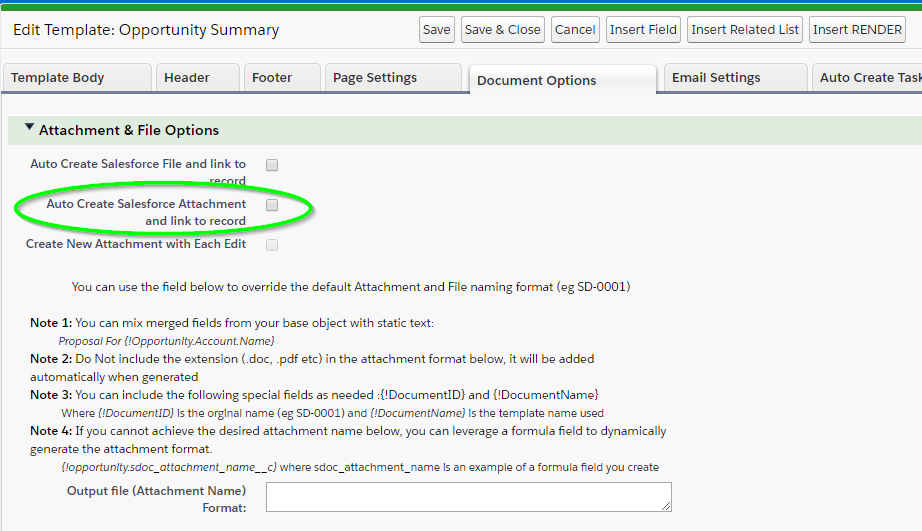
Additionally, note that if the Auto-Create Salesforce Attachment and link to record box (found under the "Document Options" tab of the template editor) is not checked on a template, the documents created with that template in the S-Docs related list will be regenerated each time they are viewed, emailed, or edited. For example, if this box was not checked for an account summary template, and you opened an account summary document from 6 months ago, the document would be regenerated and the current account info would be displayed, rather than the account info from 6 months ago.

Editing S-Docs Templates in Salesforce Lightning

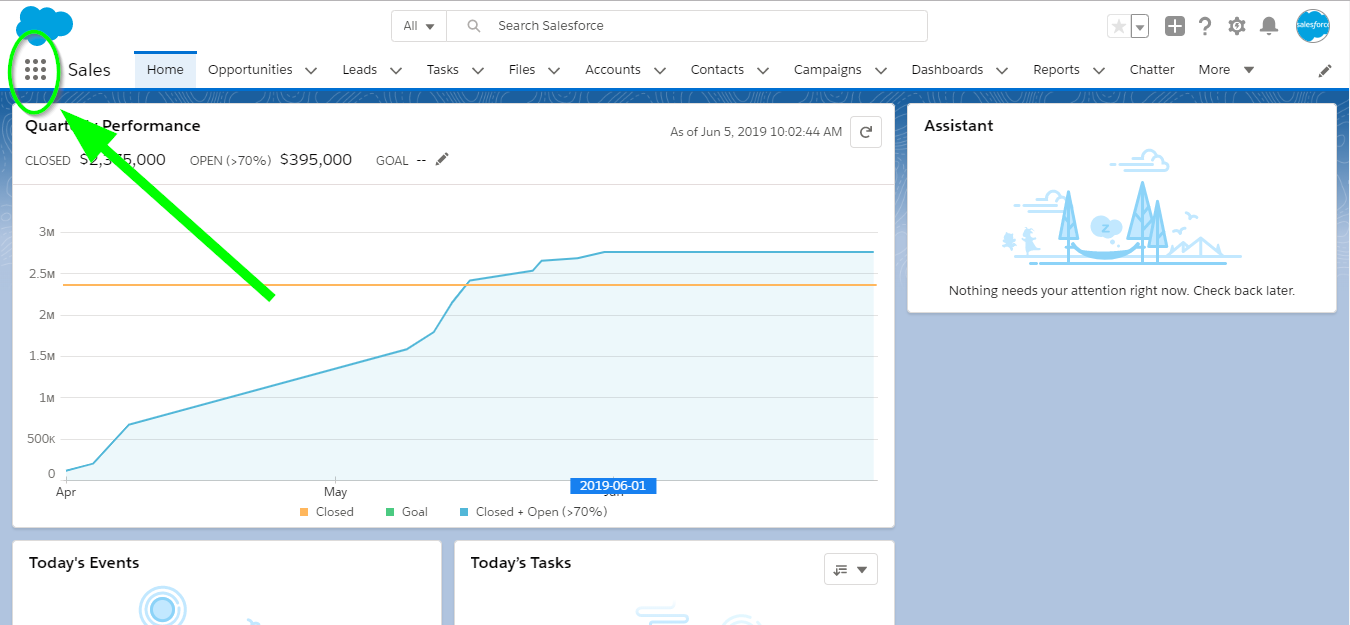
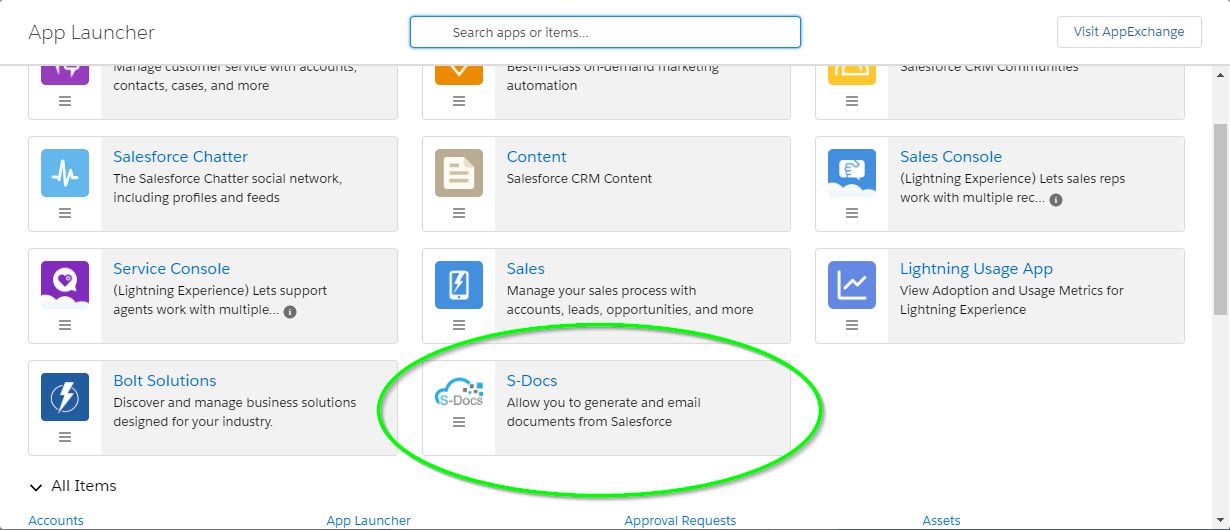
Editing templates in Lightning works just the same as in Classic. The only difference is getting there! To get there, select the S-Docs app from the app launcher.

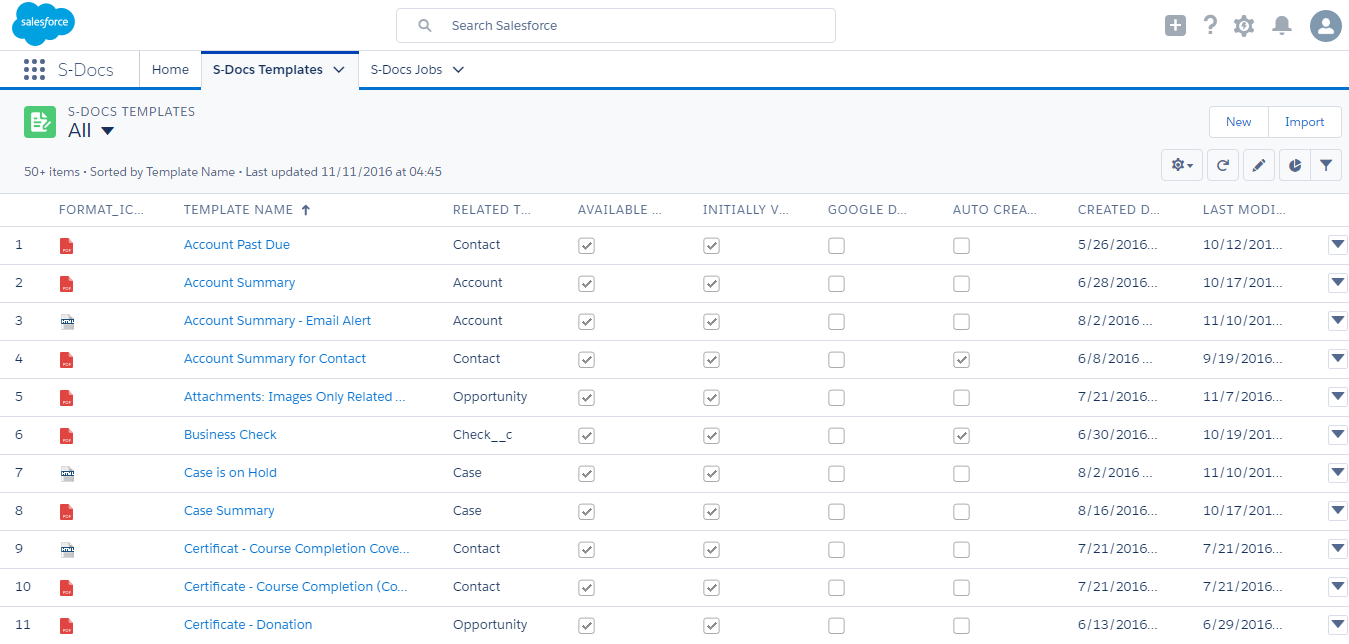
Then, click the “S-Docs Templates” tab. From here, you can select any template you’d like to edit by clicking on its name.

editing-templates-in-lightning-2

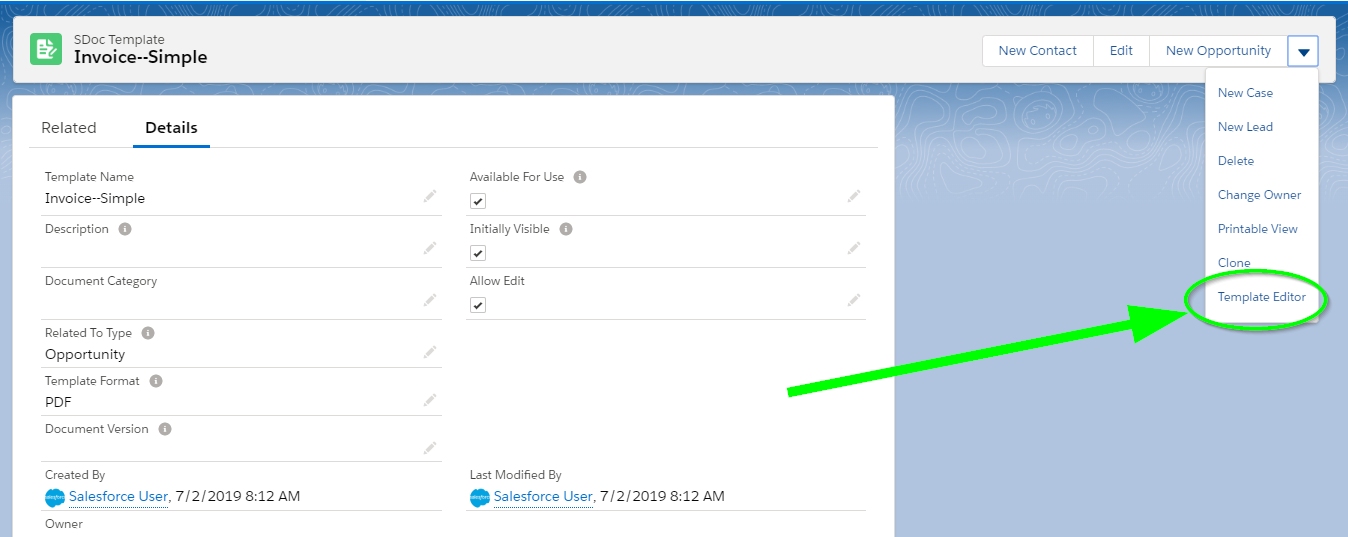
Once you select a template, you can edit its fields or head over to the template editor to edit the contents of the template itself.

And there it is! Editing your template in Lightning works exactly the same as editing your template in Classic. If you wish to learn more about editing S-Docs templates, please see our overview of the template editor.

Using S-Docs with Communities

By Documentation No Comments

Introduction

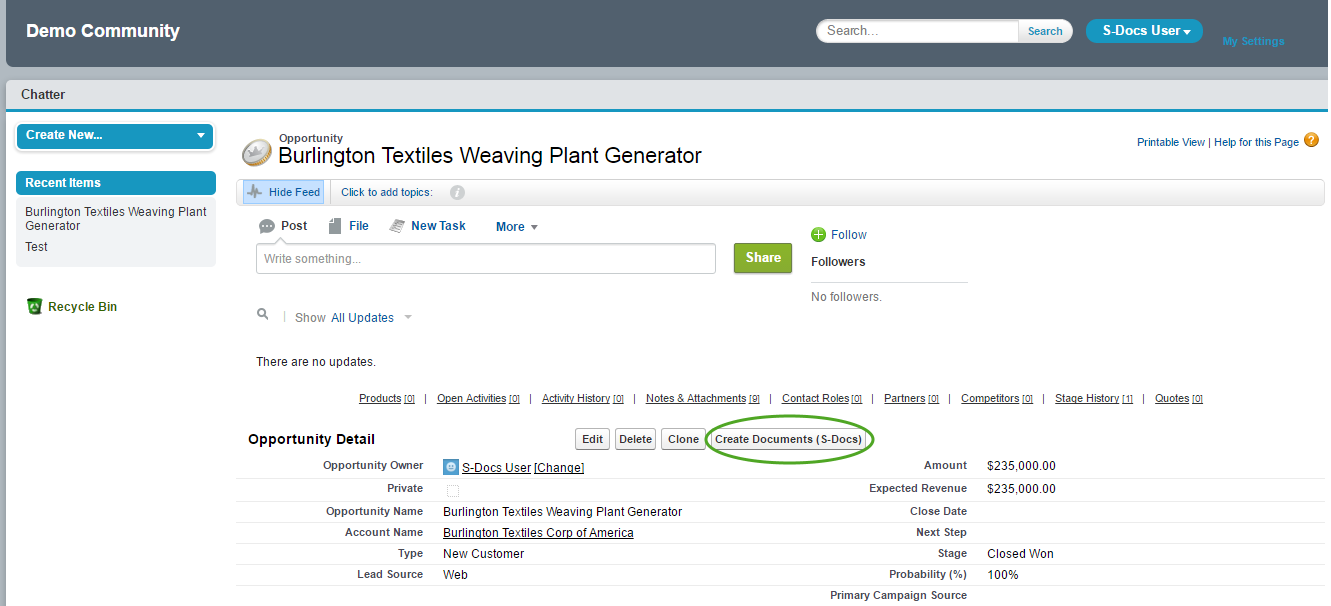
S-Docs can be used in Salesforce communities too! In this guide, we will be setting up this functionality for a particular Salesforce object (you will need to follow the steps in this guide for each object you are enabling S-Docs with communities for). To do so, all we have to do is create a button that will show up for your community users and add it to an object’s page layout.

communities 01
This button is not unique to communities; it will also exist in our production org and operate exactly the same as an ordinary S-Docs button. This means if we already have an S-Docs button, we will be replacing it with a new button that can be used by community users as well as users in our production org.

communities 02

Step 1: Create the S-Docs for Communities Button

In this step, we will be creating a button that will enable the use of S-Docs with Salesforce communities for a particular object. In this example, we will be creating the button for an opportunity.

  1. You will first need to navigate to the “Buttons, Links, and Actions” page for the Salesforce object you would like to create a communities button for.
Note: If you’re creating the button for a custom object, please follow the instructions for part (a). If you’re creating the button for a standard object, please follow the instructions in part (b).

a.) Creating the button for a custom object

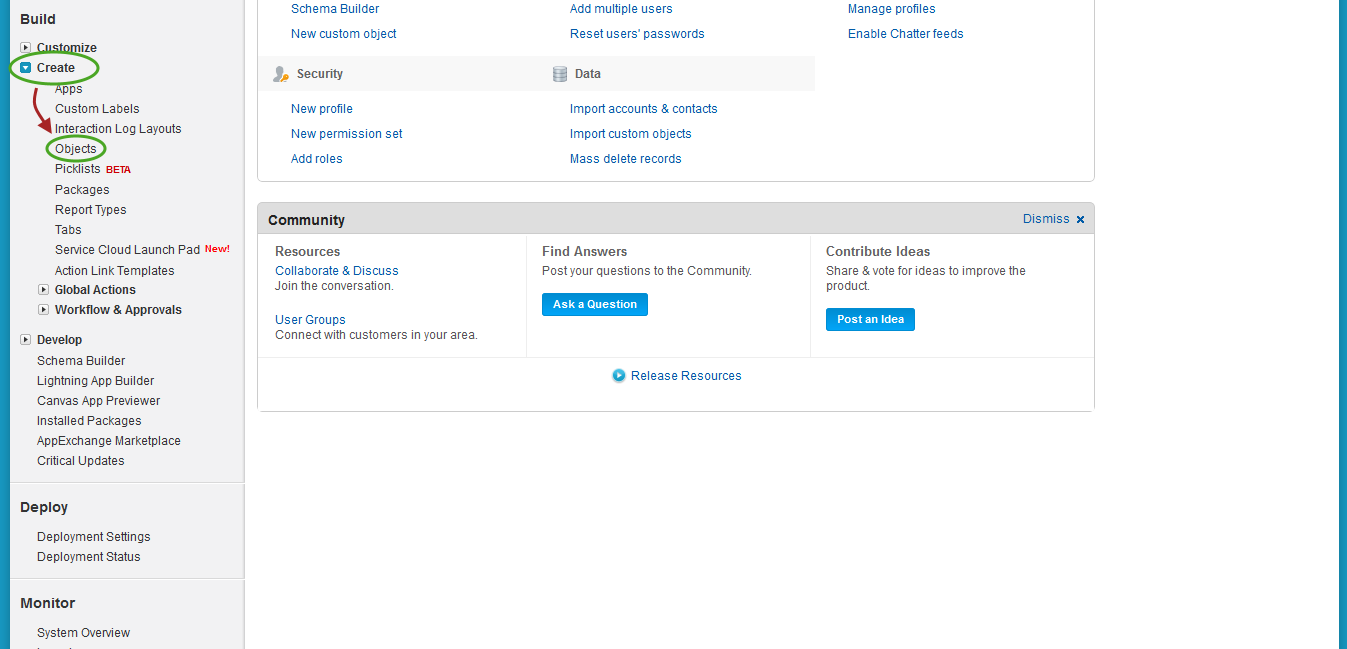
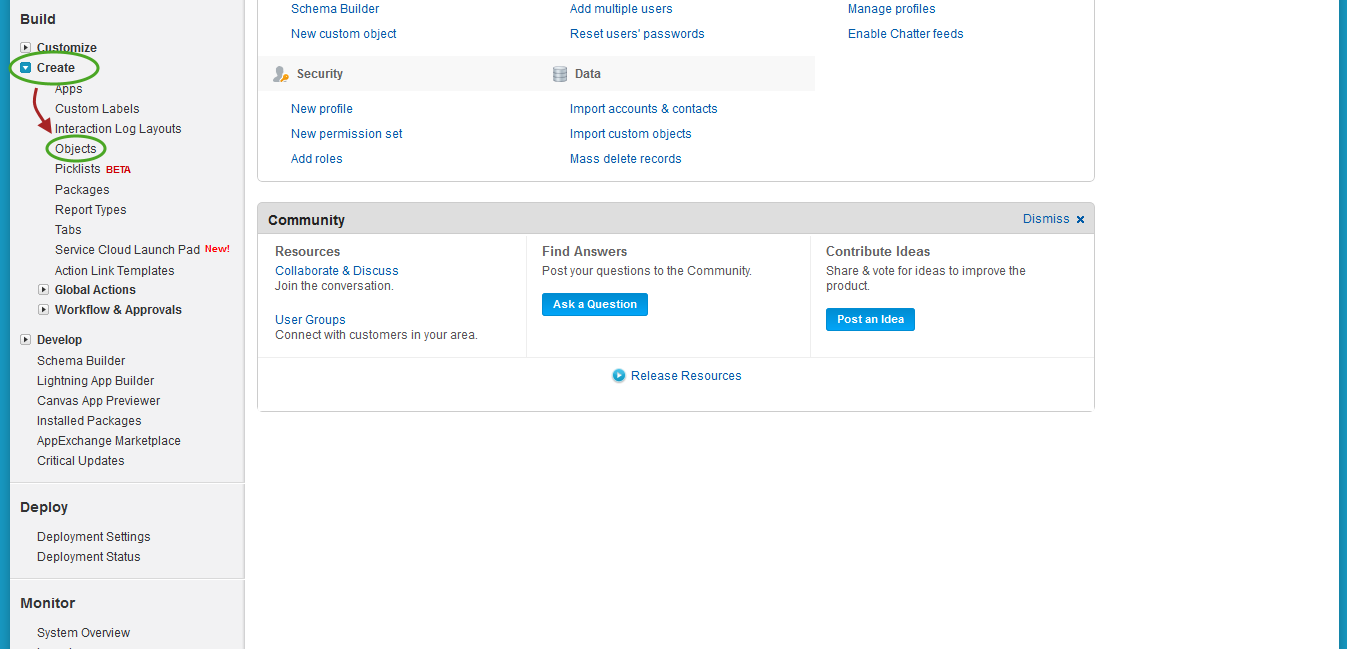
Navigate to Setup > Build > Create > Objects.

communities 03
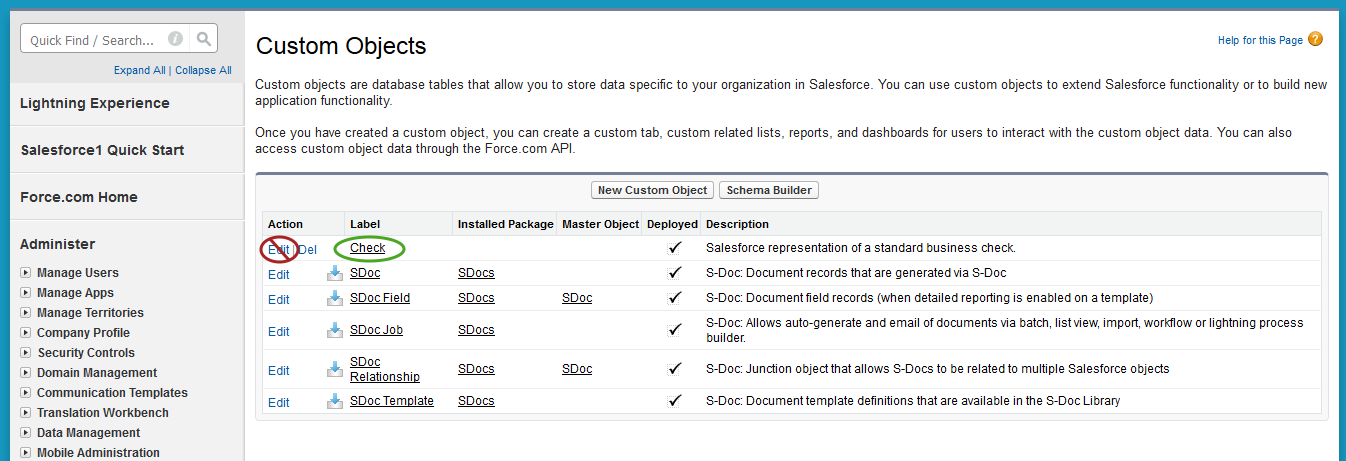
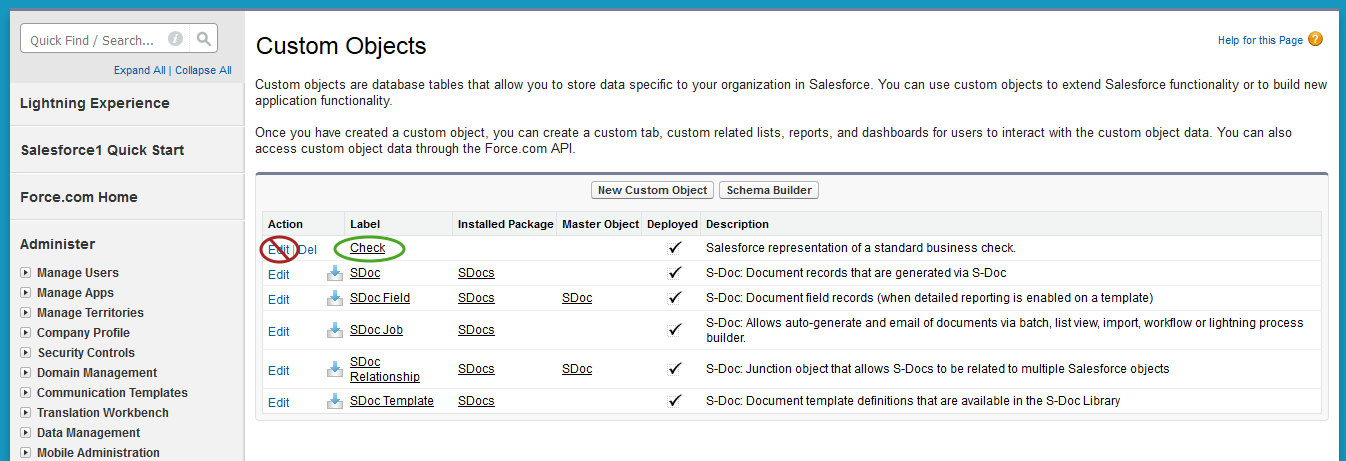
Find the name of the custom object you would like to create the button for and click the name of this object (do not click the Edit button). In this example, we will be creating the button for the Check object, a custom object representing the data for a standard business check.

communities 04
Next, a page will display for your custom object.

Please take note of the API Name at this point, as you will require it in later steps.

The API Name is often just the “Object Name” appended with __c (note the two underscores), but sometimes this is not the case, so please take note of that here. In the case of our custom Check object, we will note that our API Name is Check__c.

communities 05
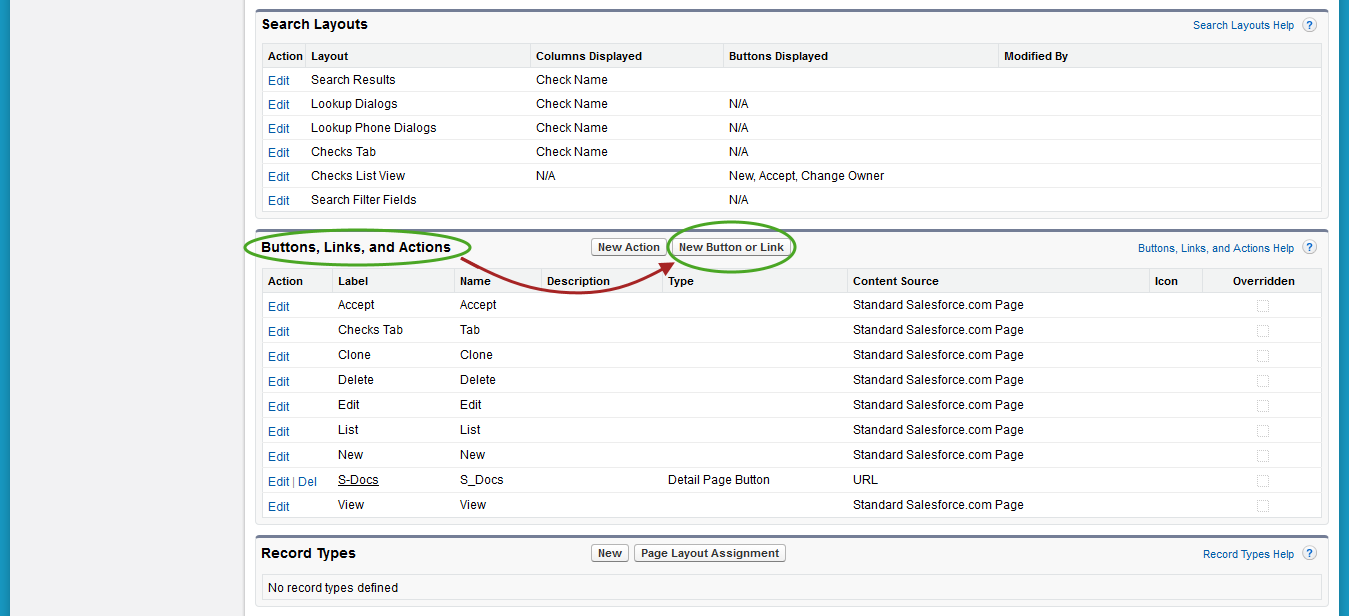
On the page for your custom object, scroll down to “Buttons, Links, and Actions” and click New Button or Link.

communities 06
This concludes part (a).

b.) Creating the button for a standard object

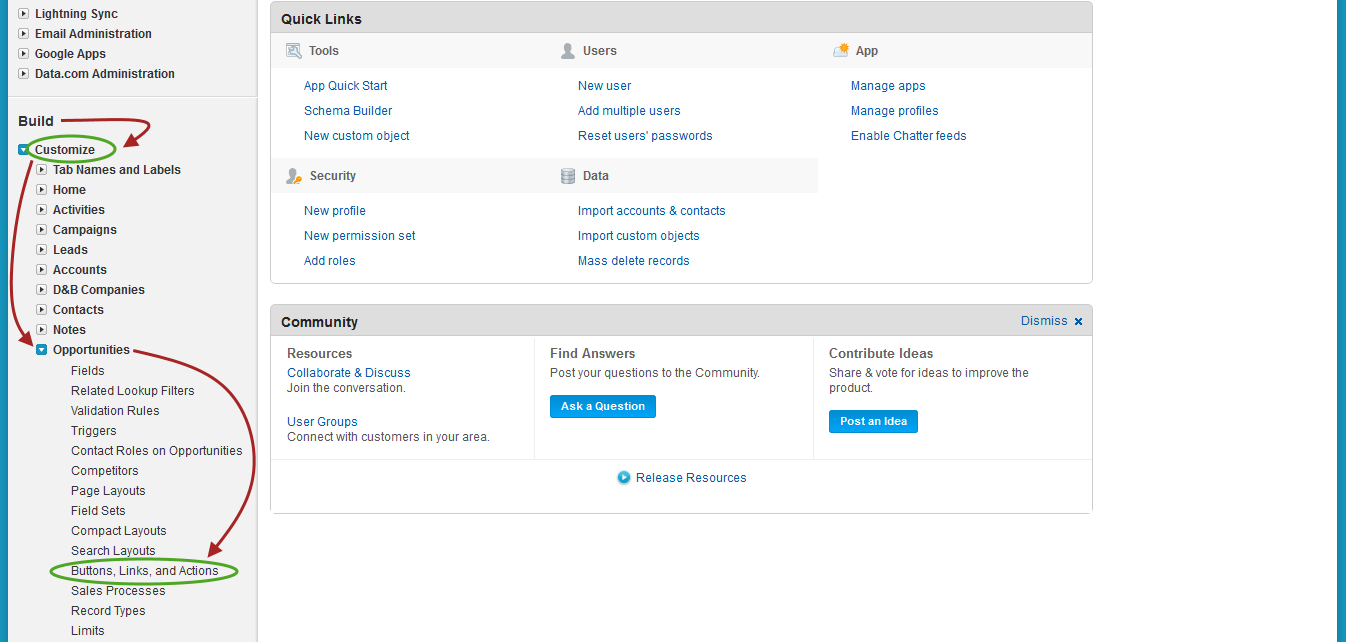
Navigate to Setup > Build > Customize > YourObjectNameHere > Buttons, Links and Actions. In this example, we will be finding the “Buttons, Links, and Actions” page for an Opportunity.

communities 07
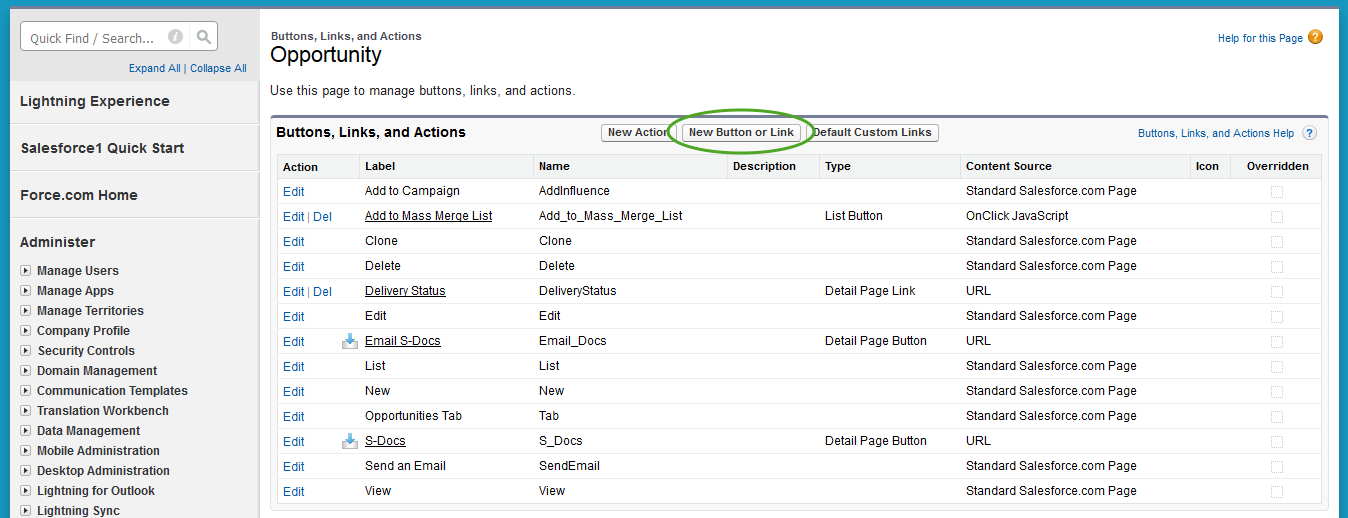
Once you’re on the “Buttons, Links, and Actions” page for your standard object, click New Button or Link.

communities 08
This concludes part (b).

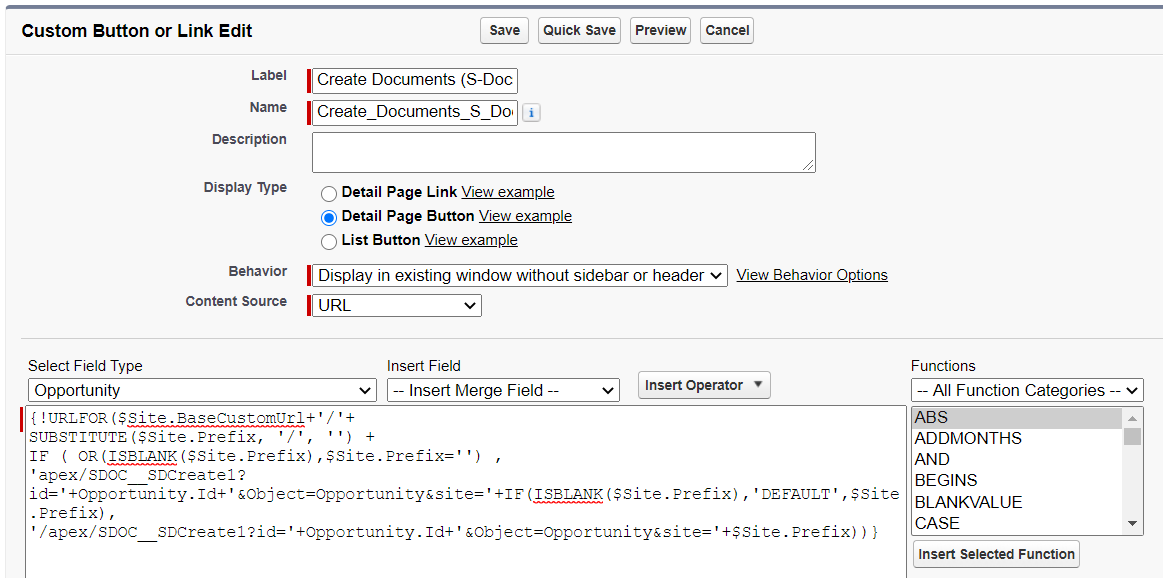
  1. We will now complete the “New Button or Link” page. Here is how the finished page might appear:


Here’s what to fill in:

Label: Create Documents (S-Docs)
Name: Create_Documents_S_Docs
Display Type: Detail Page Button
Behavior: Display in existing window without sidebar or header
Content Source: URL

Finally, paste the following code into the “Custom button or link editor.”
[code lang="html"]{!URLFOR($Site.BaseCustomUrl+'/'+
SUBSTITUTE($Site.Prefix, '/', '') +
IF ( OR(ISBLANK($Site.Prefix),$Site.Prefix='') ,
'apex/SDOC__SDCreate1?id='+ChangeToYourObjAPIName.Id+'&Object=ChangeToYourObjAPIName&site='+IF(ISBLANK($Site.Prefix),'DEFAULT',$Site.Prefix),
'/apex/SDOC__SDCreate1?id='+ChangeToYourObjAPIName.Id+'&Object=ChangeToYourObjAPIName&site='+$Site.Prefix))}[/code]
Again, please make sure that both appearances of “ChangeToYourObjAPIName” have been changed to your object’s API name. Click Save to finish the button.


Step 2: Add the S-Docs for Communities Button to the Page Layout

Now, all we have to do is add the button we just created to our object’s page layout.

  1. You will first need to navigate to the “Page Layout” page for the Salesforce object you would like to add the button to.
Note: If you’re creating the button for a custom object, please follow the instructions for part (a). If you’re creating the button for a standard object, please follow the instructions in part (b).

a.) Adding the button to a custom object’s page layout

Navigate to Setup > Build > Create > Objects.

communities 10
Find the name of your custom object and click the name of this object (do not click the Edit button). In this example, we will be adding the button to a Check’s page layout.

communities 11
On the page for your custom object, scroll down to “Page Layouts” and click Edit next to “YourObjectName Layout.”

communities 12
This concludes part (a).

b.) Adding the button for a standard object.

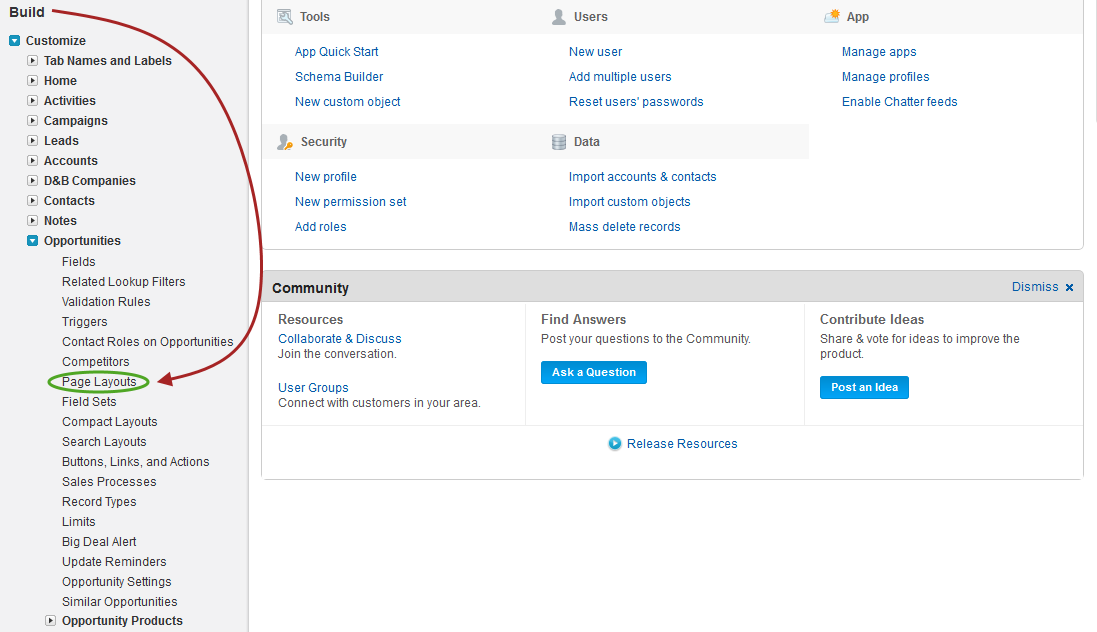
Navigate to Setup > Build > Customize > YourObjectNameHere > Page Layouts. In this example, we will be finding the “Page Layouts” page for an Opportunity.

communities 13
Now click Edit next to “YourObjectName Layout.” (There may be other layouts, such as “YourObjectName Layout SDoc”. Do not edit these; only edit “YourObjectName Layout.”)

communities 14
This concludes part (b).

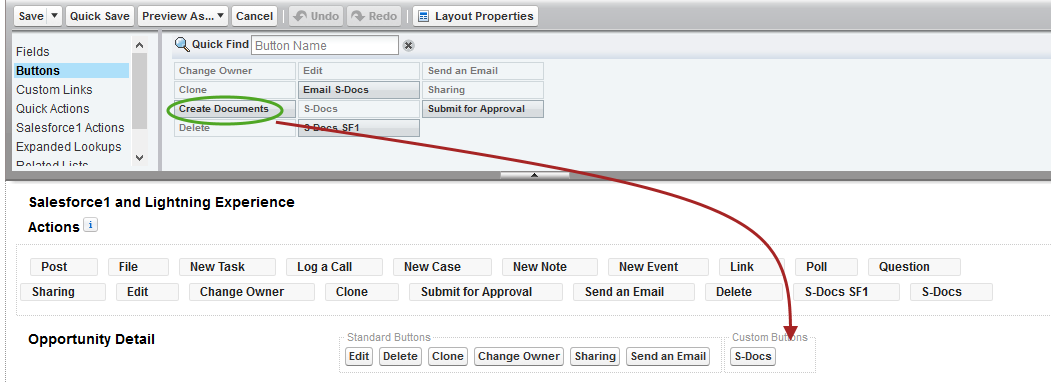
  1. Now we can add the button to the page layout. Drag the button you created in Step 1 into the “Custom Buttons” box. If there is already an S-Docs page button here, you may remove it from the “Custom Buttons” box by dragging it into the toolbar you pulled your Create Documents (S-Docs) button from. Your new button works the same as the old S-Docs button, except now it can be used by communities in addition to users within your production org.

communities 15
Here’s how the finished page will appear.

communities 16
Click Save and you’re all done! You should now have an S-Docs button on your object’s page that can be used by users in your communities, as well as users in your production org.

Configuring S-Docs with Custom Objects – Salesforce Classic

By Documentation No Comments

Introduction

S-Docs works great with the custom objects and even the Force.com platform edition, which is entirely comprised of custom objects. Your documents can span many relationships to include data from formula fields, rich text, parent records, child, grandchild and related objects--all within the same document.

Since every organization creates different custom objects to meet their unique requirements, you need to configure S-Docs to recognize which custom objects you want to leverage with S-Docs.

To learn how to configure S-Docs with custom objects in Salesforce Classic, you can watch the following tutorial video, which will walk you through the process. You can also refer to the written instructions below the video, which provide a detailed, step-by-step guide to configuring S-Docs with custom objects. Timestamps from the video are provided in the table of contents. To view the same guide for Salesforce Lightning Experience, click here.

For the purposes of this guide, we assume your custom object is named CustomObj and has an API name of CustomObj__c. (Note: the API name has two underscores.) Whenever you see "CustomObj" in this document, you can replace it with the name of your custom object. S-Docs can also integrate with other AppExchange apps. (Note: there are a few setup differences.) This document will walk you through the step-by-step configuration process. It is intended for Salesforce.com administrators who are familiar with standard configuration tasks.

Sample templates can be found here.

Tutorial Video

Step 1: Add a lookup field to allow relationship linking [00:56]

This step allows you to associate the S-Doc with the Custom object, so that users can see a related list of all S-Docs created on your Custom Objects page layout.

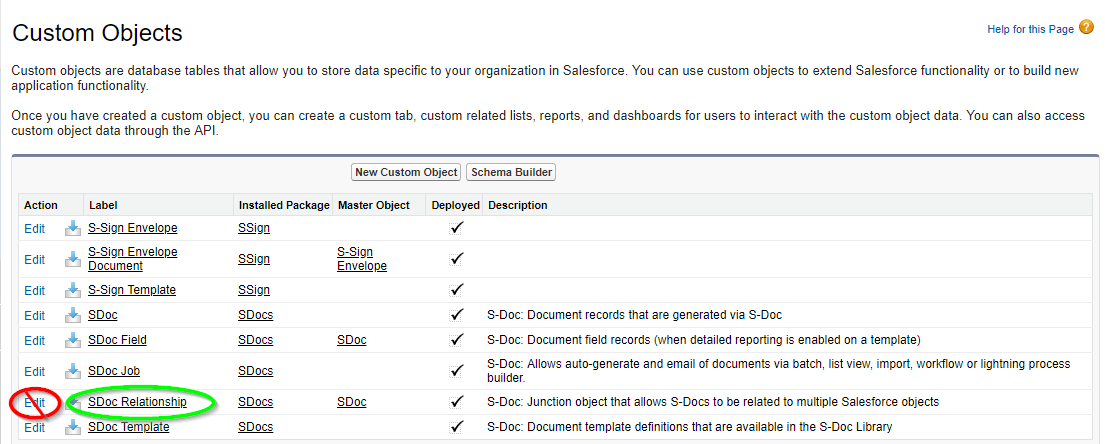
  1. Navigate to Setup ➤ Build ➤ Create ➤ Objects.
  2. Select SDOC_Relationship. Do not select Edit.
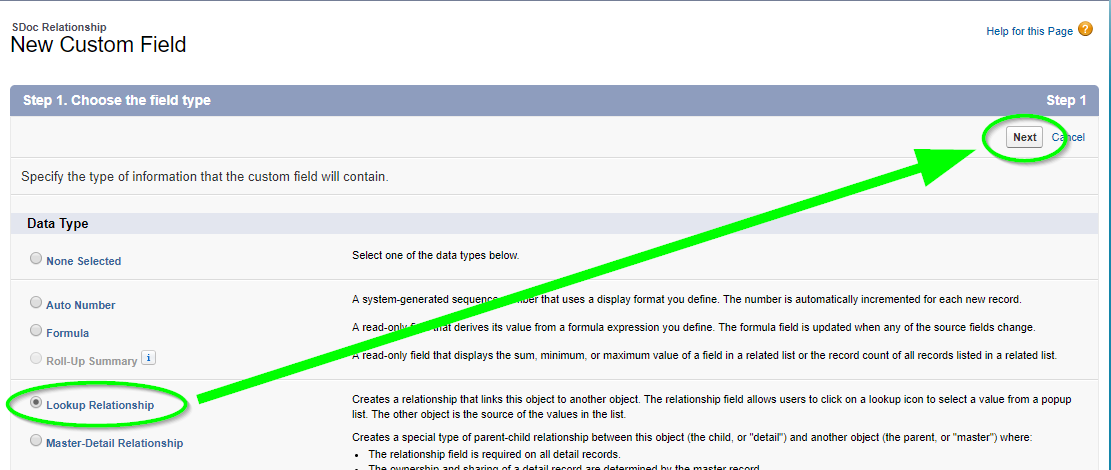
  3. Under Custom Fields and Relationships, click the New button.
  4. Follow the New Custom Field steps:

Step 1 of 6 - Pick Lookup Relationship. Click Next.
Step 2 of 6 - Select your Custom Object (e.g. CustomObj__c) from picklist values, then click Next.
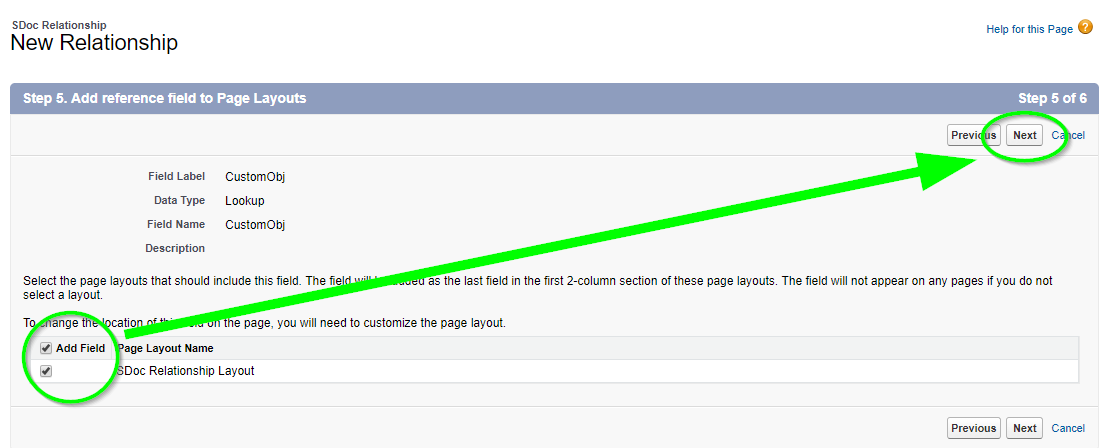
Step 3 of 6* - Field label and field name should be your custom object name without the “__c.”  In our example it would be "CustomObj." Click Next.
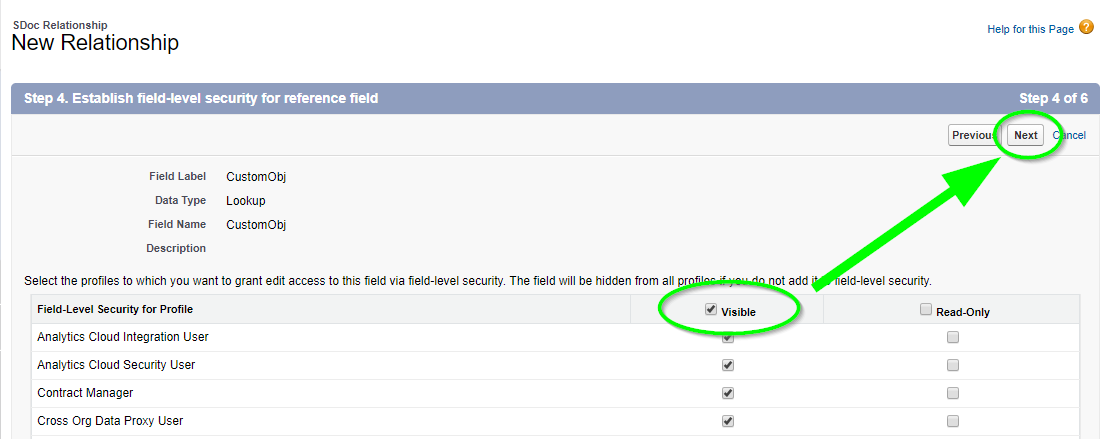
Step 4 of 6 - Checkbox should be visible for all users. Click Next.
Step 5 of 6 - Checkbox should add the field for the layout.
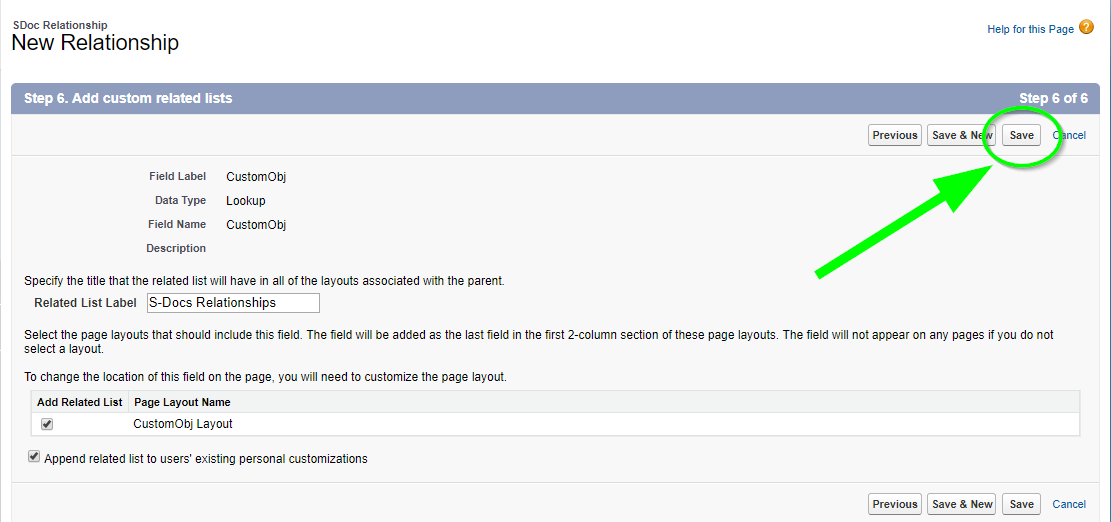
Step 6 of 6 - Accept default. Click Save.

*Note: If you are using S-Docs with another AppExchange managed package, your field name in step 3 above will need to accommodate for the double underscore in the field name, which is not allowed by Salesforce. Since your API name includes the domain name of the package followed by two underscores and then the object name (e.g. package__CustomObj__c), you will need to replace the first double underscore with “_u_” and remove the remaining “__c.” In our example, your field name should be set to: package_u_CustomObj.

Step 2: Create a button to place it on your Custom Object page Layout [02:17]

Just like using S-Docs with other objects, you need to place an S-Docs button on the record detail page layout. Users click the button to initiate creating a document from the record detail page.

Create the S-Docs button.

  1. Navigate to Setup ➤ Build ➤ Create ➤ Objects.
  2. From the list of custom objects, click on your Custom Object link. Do not click on the Edit link.
  3. From the custom object definition page, scroll down to the “Buttons, Links, and Actions” related list, and click  New Button or Link.
  4. Button Label: Choose a label (e.g. "S-Docs")
  5. Display Type: Detail Page Button
  6. Behavior: Display in existing window without sidebar or header
  7. Content Source: URL
  8. Use the following URL (note that double underscores are used in three places):
    {!URLFOR('/apex/SDOC__SDCreate1', null,[id=CustomObj__c.Id, Object='CustomObj__c'])}
     

    Note: If you are using S-Docs with an object within another AppExchange managed package, your button syntax should include the entire object API name that includes the domain (e.g. package__CustomObj__c). Note that double underscores are used throughout. Your button syntax should therefore look similar to the following:
    {!URLFOR('/apex/SDOC__SDCreate1', null,[id=Package__CustomObj__c.Id, Object='Package__CustomObj__c'])}

  9. *Optional* You can have users save clicks by enabling the “One-Click” feature. Enabling this will bypass the document creation wizard. An administrator simply needs to change the button definition to include a list of pre-selected S-Docs template names that will be automatically generated. Placing this button will let users create all the documents encoded in the button without any additional interaction. The button syntax uses a parameter called “doclist,” which is followed by one or more template names to be auto-generated. Here is an example of the button syntax (replace the highlighted values with your own template names):
    {!URLFOR('/apex/SDOC__SDCreate1', null,[id=CustomObj__c.Id, Object='CustomObj__c', doclist='Template1,Template2'])}
  10. Click Save

Step 2b: Place button on your page layout [03:08]

  1. Navigate to the page layout: Setup ➤Build ➤ Create ➤ Objects.
  2. Click on your object name from the Label column (do not click on the Edit link).
  3. Scroll down to the page layout related list section, and click the Edit link next to the page layout where you want to add the S-Docs button (you will repeat this for each page layout that you want the S-Docs button to appear in).                                         
  4. From the Salesforce page layout screen, click Buttons, located in the top left toolbar menu. Once clicked, the right panel will display available buttons, where you should see your new button.
  5. Click and begin dragging the S-Docs button that you just created into the lower portion of the page (your custom objects Detail Page Layout). Once you drag the button over the Custom Buttons section, you will see a green checkbox (indicating OK to drop) and you can release the button.
  6. Be sure to click Save to apply the changes to the page layout and repeat steps 3-6 for any other layouts where you would like to add the button.

To use this new S-Docs button, you first need to add your custom object as an available picklist value in the "Related to Type" field on the S-Docs template detail page, and then create at least one template to use with your custom object. The next two steps describe this process.

Step 3: Add Your Custom Object API Name  to the "Related to type" field on the "SDoc Template" object [03:42]

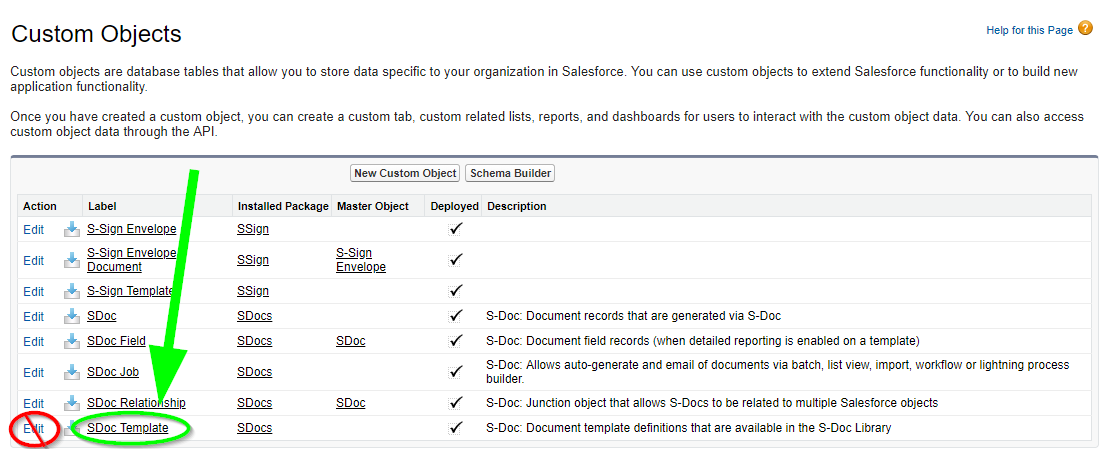
  1. Navigate to Build ➤ Create ➤ Objects.
  2. Click on the SDoc Template link (not the Edit link).
  3. Scroll down to the "Custom Fields and Relationships" section. Click on the Related to Type link.
  4. Scroll down to the "Values" section and click on the New button.
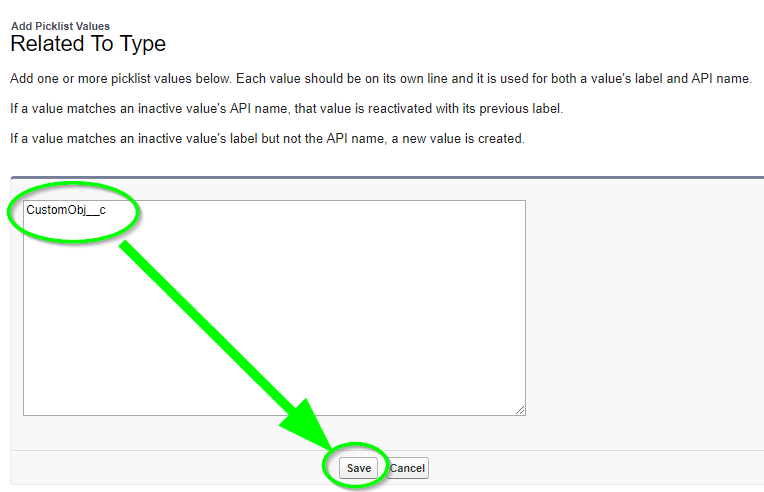
  5. Add your custom object’s API name (e.g. CustomObj__c)  as a picklist value, then click Save.
    Note: if you are using S-Docs with another AppExchange managed package, then your custom object API name should include the domain name of the package followed by two underscores and then the object name (e.g. package__CustomObj__c). You should use the entire API name for the S-Docs picklist value.

As a reminder, you should substitute your object’s API name (not use the example CustomObj__c shown above).

Step 4: Create your Custom Object Template [04:32]

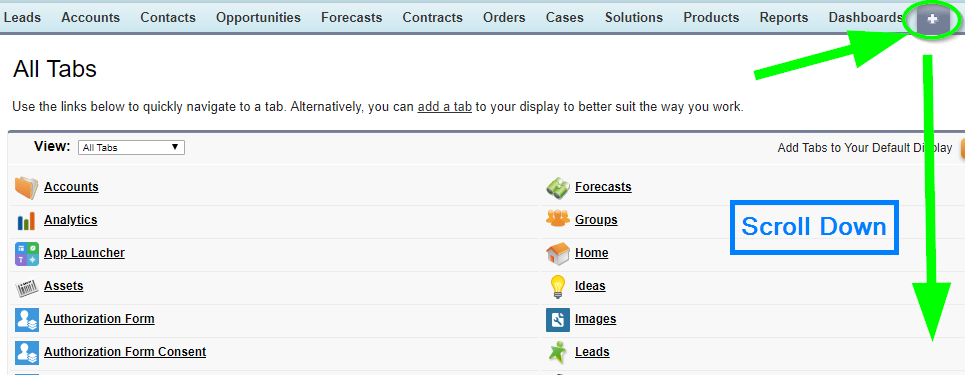
  1. Go to the S-Docs template home page by clicking on All Tabs (+ icon), and then selecting S-Docs Templates.
  2. Click the New button from the S-Doc template object home page.
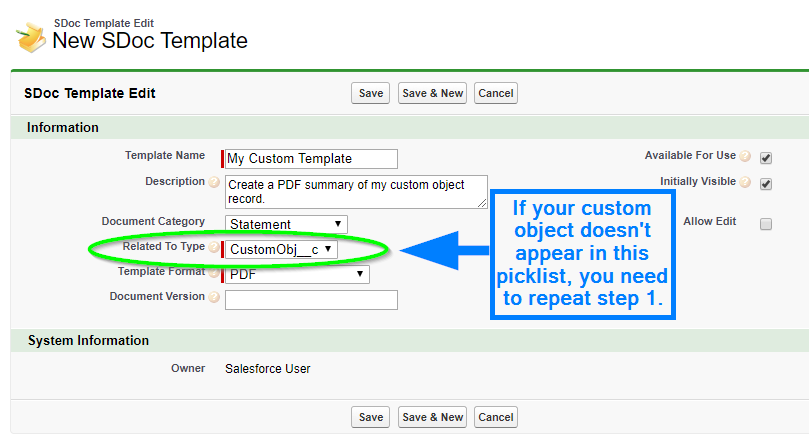
  3. Create your Custom Object template record. Be sure to select your Custom Object name from the “related to type” picklist values. Before you can first use this template, you should confirm you have also checked the Available for Use and Initially Visible checkboxes.
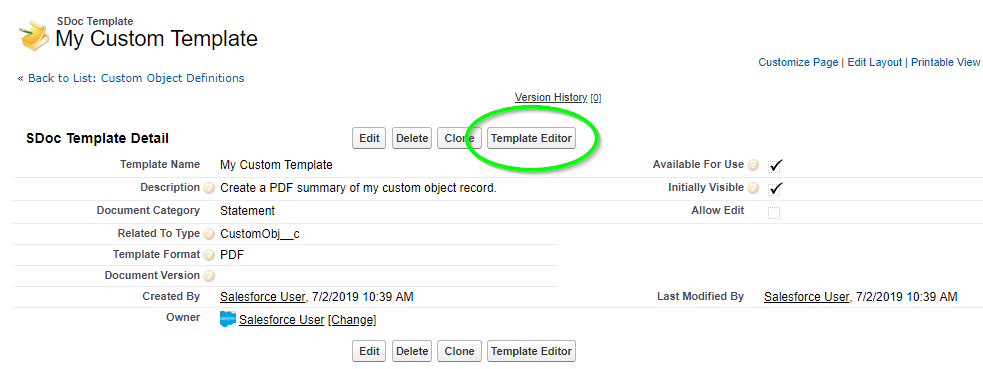
  4. Click Save, then click the Template Editor button.
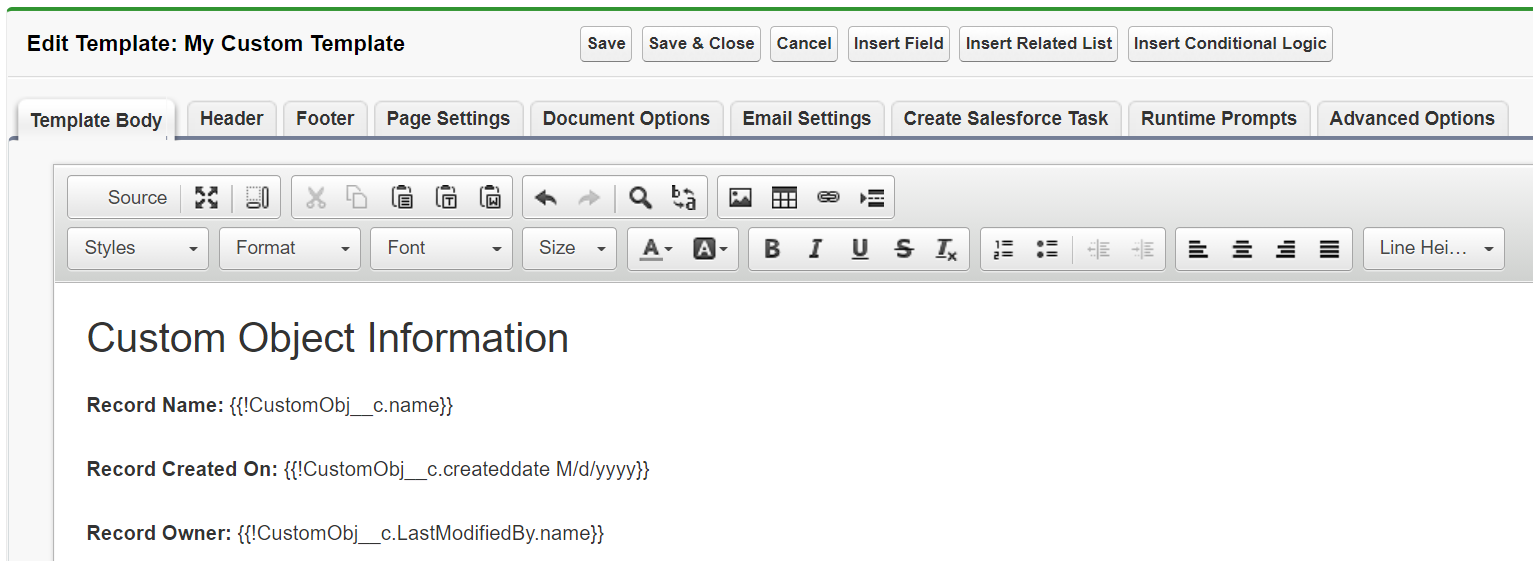
  5. Once in the editor mode, you can design your quote template using the WYSIWYG editor. The editor allows you to add text, format styles, insert tables, insert images and merge Salesforce data by using the Insert Field and Insert Related List buttons.
  6. You can also edit the template HTML directly by clicking on the Source button. You can also paste pre-made template code here. Sample templates are available here.
  7. Once your template is saved, you can test it by opening a sample custom object record, clicking on the S-Docs button, selecting your new template, and then clicking on Next Step.
  8. Click on the View PDF icon or the document number to view or download the document.
  9. The document will open in another tab with all of the fields filled in.

Conditionally show a field value on a document

By Documentation, General Solutions, S-Docs Cookbook No Comments

Introduction

If you need to conditionally show or hide certain field values on your documents, S-Docs has you covered; this document will explain this simple process.

To explain this feature, let's assume we're building an S-Docs template for a sales quote. In this quote, we would like to waive charges for a particular product if the customer is "Gold" tier; that is, if their tier is equal to Gold, we don't want a charge to be displayed; otherwise, the charge should be displayed. This is a common request and there are several options.

Option 1: Salesforce Formula Fields

Use a Salesforce Formula Field. To accomplish this you should simply create a formula field on the Salesforce object for your template that does all the work for you. You then drop that formula field into your S-Docs template.

For example, you could create the following Salesforce formula field on your base object:

[code lang="html"]IF( Tier__c=’Gold’, 'No Charge', Fee__c)[/code]

If the Customer’s Tier is Gold, then the text ‘No Charge’ would appear; otherwise the Fee would be displayed. You would then just insert this new formula field into you S-Docs Template using the template editor’s Insert Field button, just like any other merge field.

Alternatively, if your output format is MS Excel, you have the option of using an Excel Formula.

Option 2: The S-Docs Render Feature

Leverage the S-Docs RENDER feature. S-Docs provides a RENDER feature that will evaluate an expression, and if it is true, will display all of the content until the ENDRENDER tag is found. You can use the Insert RENDER button to utilize this feature, or write the statements yourself. The example below shows how to meet the same requirement above. ‘No Charge’ will be displayed for Gold tier, and the Fee will be displayed for all other Tiers. Note the use of two equals (==) vs not equals (!=) as the comparator.

[code lang="html"]<!--RENDER='{{!CustomObject__c.Tier__c}}'==’Gold’ -->
No Charge
<!--ENDRENDER-->
<!--RENDER='{{!CustomObject__c.Tier__c}}'!='Gold' -->
{{! CustomObject__c.Fee__c}}
<!--ENDRENDER-->[/code]

Here is an example to insert a paragraph under a conditional statement.

[code lang="html"]<!--RENDER='{{!Opportunity.Account.ShippingState}}'=='CA' -->
Pursuant to California Code Section 2930-2935, the ARD administers the program through a primary contractor, currently
...
<!--ENDRENDER-->[/code]

Important considerations when using the RENDER feature:

Note: If any fields in your render statement contain words and have a field type anything other than a basic string type (rich text, textarea, longtext, function, etc.) you will need to add the  merge field attribute render. For example, if your merge field looked like this: {{!MyTestField}}
The field with the attribute added would look like this: {{!MyTestField render}} Within a render statement, it would look like this:
<!--RENDER= '{{!MyTestField render}}' == 'Test' -->{{!Opportunity.closedate M/d/yyyy}}<!--ENDRENDER-->
Note that this attribute should only be added to merge fields within render tags (e.g. enclosed by <!-- and -->). In the above example, the attribute  is not added to the {{!Opportunity.closedate M/d/yyyy}} because this merge field is outside of the render tags.
Additionally, note that the Insert RENDER button will not add this attribute automatically. This functionality was added in version 4.48
  1. It currently supports ==,!=, >, <, =>, =<, CONTAINS, and NOT CONTAINS for the comparison operator.
  2. The right hand side can contain a field value or a hard-coded value:  e.g.

[code lang="html"]<!--RENDER='{{!Contact.Language__c}}'=='French'-->
Bonjour {{!Contact.firstname}},
<!--ENDRENDER-->[/code]

OR,

[code lang="html"]<!--RENDER='{{!Account.Owner.name}}'=='{{!Username}}'-->
You own this account.
<!—ENDRENDER-->[/code]

3. You can use a check box field (Boolean) without an operator if you are checking if it is checked (true), e.g.

[code lang="html"]<!--RENDER='{{!Account.IsGoldCheckBox__c}}'-->
Contact me at {{!Account.owner.phone}} if you have questions
<!—ENDRENDER-->[/code]

But if you want to check if it’s unchecked (false) you need to specify an operator.

[code lang="html"]<!--RENDER='{{!CustomObject__c.IsGoldCheckBox__c}}' == 'false'-->
Contact us at service@sdocs.com if you have questions
<!—ENDRENDER-->[/code]

There is no limit on the number of Render statements you can have on a template, but each must be terminated by its own ENDRENDER tag (<!—ENDRENDER-->) 

Discussion

If you have only a few conditional statements, leveraging Salesforce’s formula fields (Option 1) provides a simple, powerful and familiar way to handle conditional data within S-Docs without adding complexity or having to learn any specialized syntax.

However, you may not want to alter your schema, because your organization has schema-level change restrictions, or perhaps you need to create too many formula fields just to handle document generation. You therefore have the option of handling this requirement within the S-Docs template as shown in Option 2.

Limitations of the S-Docs Rendering Service

By Developer's Guide, Documentation No Comments

General limitations of S-Docs Capabilities:

  • S-Docs runs on the Salesforce Platform and is bound by all Execution Governors and Limits placed on the Salesforce platform. These limits have been known to change with each Salesforce release and can have a wide impact on S-Docs that results in errors when generating and viewing S-Docs. Those errors can appear if the generated document:
    • Is too many pages long, too large in terms of file size, too complex in terms of logic within a template, takes an extended amount of server time to generate, requires too many database queries, database queries take too long to execute and a wide variety of other causes.
  • S-Docs typically supports up to 50-100 documents in mass merge documents. The upper limit is driven by Salesforce governor limits and is dependent on your template's complexity.
  • Salesforce Execution Governors also affect emails, notifications, and processes that S-Docs may run. Please visit this link for a complete and updated list of Salesforce Governor Limits.
  • S-Docs emails are subject to the following Salesforce email limitations.
  • Javascript and Dynamic CSS is not supported.

PDF Output:

When using the S-Docs rendering service for PDF output, please be aware of the following additional considerations and limitations:

  • The PDF rendering service renders PDF version 1.4
  • Fillable PDFs are not supported
  • Password-protected PDFs are not supported
  • The rendered PDF file either displays in the browser or is downloaded, depending on the browser’s settings. Specific behavior depends on the browser, version, and user settings, and is outside the control of S-Docs
  • If images outside of Salesforce are used in the S-Docs template directly, or dynamically through a merged image field, you must whitelist the URL domain (using Setup > Remote Site Settings) to avoid broken image icons in the PDF
  • The final document will render the markup and data, but it might not render formatting contained within the contents of rich text area fields, or image fields added to the template unless you specify them as containing markup
  • Long lines of text that don’t have break points, such as a space or dash, can’t be wrapped by the PDF rendering service. This most commonly happens with very long URLs and multibyte character strings. When these lines are wider than the page, they increase the width of the page’s content beyond the edge of the PDF page. This causes content to “flow” off the side of the page, cutting it off
  • PDF templates support CSS 2.1. Some CSS attributes, such as word-wrap, are CSS 3, and are therefore not supported
  • PDF rendering doesn’t support JavaScript-rendered content
  • Fonts supported (specified as font-family): Arial Unicode MS, sans-serif, serif, courier. Web fonts and other fonts are not supported. S-Docs provides additional support for MICR fonts.
  • Bold, italicized, or underlined text is not supported in PDF files that use Unicode fonts (if you have selected template contains international characters)
  • If the PDF file fails to display all of the page’s text, particularly multibyte characters such as Japanese or accented international characters, make sure you check off Template contains international characters in the “Document Options” tab of the template editor. If merged field values are failing to render correctly, also set the “Unicode enforcement level” to Strict to override any font settings that are being applied to merged fields.
  • “Arial Unicode MS” is the only font supported for extended character sets that include multibyte characters
  • The maximum response size when creating a PDF file must be less than 15 MB
  • The maximum file size for a generated PDF file is 60 MB
  • The maximum total size of all images included in a generated PDF is 30 MB
  • PDF rendering doesn’t support images encoded in the data:URI scheme format

PDF-Upload:

Note: Limitations to PDF files in general also apply to the PDF-Upload feature in addition to the limitations listed here.
  • PDF is the only file type supported
  • Pre-existing templates cannot be switched to the PFD-Upload template format
  • PDF-Upload templates cannot be switched to a different template format
  • The Header, Footer, Page Settings, and Auto Create Task tabs are not available
  • PDFs must be the traditional 8.5 x 11 inch size; landscape PDFs are not supported
  • The page count upper limit is currently around 15 pages. Keep in mind that certain contents increase template size and complexity (such as images or large amounts of text), which may have an effect on the page number limitation
  • To export templates and transfer them between orgs, use the S-Docs Template Migrator instead of manually exporting and importing the template data.
  • Component templates are not supported
  • Related Lists are not supported
  • Render statements need to be written out (the Insert RENDER button is not supported)
  • Nested renders are not supported
  • Named queries are not supported
  • SOQL queries are not supported

DOCX & PPTX Output:

Upper Limits

These limits are upper limits only; depending on the complexity of your document, you may run into limits on the file size or processing time well below these limits. Nonetheless, we estimate that at least 80% of DOCX/PPTX templates should be able to reach these upper limits. For DOCX templates that exceed these limits, other formats such as DOC can be used to fulfill your use case.

  • Your uploaded template has an upper limit of 10 related lists
  • Your uploaded template has an upper limit of 10 pages for DOCX and 10 slides for PPTX. Generated documents have an upper limit of 20 pages for DOCX and 20 slides for PPTX

What DOCX/PPTX supports without limitations:

  • Merge fields and merge field formatting like format-date, format-number, etc.
  • RENDER feature
  • Salesforce Lightning
  • Salesforce Console
  • Embedding images referenced via URL (e.g. images from rich text fields, or <img src=...>) into the DOCX/PPTX for documents generated on SDCreate3
  • Named queries
  • One-click and zero-click buttons
  • Email

What DOCX/PPTX supports, with limitations:

  • S-Doc Jobs
    • Documents generated via S-Docs Jobs must have a final size of less than ~120 KB
  • Mass merge batch document generation
    • For DOCX/PPTX templates less than ~120KB (same as the limitation on S-Doc Jobs)
  • Mass merge combine-all into single printable DOCX
    • Each document in a single printable DOCX/PPTX has a limitation of 120KB because those documents are generated by S-Docs Job. See the above limit
  • Embedding images referenced via URL (e.g. images from rich text fields, or <img src=...>) into the DOCX/PPTX for documents generated via SDBatch or S-Doc Jobs
    • Rich text image fields are fully supported if the document isn't generated using an S-Docs Job (via an S-Docs button). If they are generated via S-Doc Job, the ~120KB limit still applies per document
  • Runtime prompts
    • If your runtime prompt merge field result has rich text formatting, like bold red text, it won't show up in the final template
  • Related lists
    • Simpler related lists are supported, but more complex related list qualities like using <td> cells as column prefixes are currently not supported
  • Rich Text Fields
    • Line breaks, images, and ordered/unordered lists are retained. Note that if a list begins on line 1 of the rich text field, a blank line will be inserted above it. All other formatting (such as bold text and alignment) is removed
    • Fonts and font sizes will not be pulled from Salesforce rich text fields into your DOCX document - they will simply match Microsoft Word's "Normal" style. If you want your document to display the font from your rich text field, you can either change Microsoft Word's "Normal" style to match the desired font/font size, or use the font-family and font-size merge field attributes

What DOCX/PPTX does not support:

  • Generating DOCX/PPTX without creating an Attachment or File
  • The Live Edit feature
  • "Related To Type" of OpportunityLineItem, QuoteLineItem, or any other standard Salesforce object that does not support Notes & Attachments
    • We recommend using DOC for these objects
  • Percentages as units of measurement in images
    • However, absolute sizes (i.e. inches, centimeters, pixels) are fully supported

XLS/XLSX Output

  • DOCX & PPTX limitations also apply to XLS/XLSX output.
  • XLS supports related lists, but not multiple sheets
  • Related lists are not currently supported for the output type XLSX
  • Size limitation: For very large, text-dense XLSX templates, you may hit a file size limitation.

Parameters for Apex Buttons & Calls to Create S-Docs

By Documentation No Comments

Introduction

The following parameters can be appended to an Apex button or to the end of an S-Doc creation call.

Note: These parameters are case-sensitive.

Template Editor Parameters

Parameter

Values

Function

rpRichText= True by default, false to disable rich text fields.

For templates that have a very large number of runtime prompts, this will replace all rich text editors for runtime prompts with regular text areas to decrease loading times.

Note that this parameter needs to be added to the URL for the S-Docs template editor button, and not the S-Docs button.

showCVJSON=

True to enable, false to disable (disabled by default).

Example:
{
"Checkbox__c": "true",
"Date_Created__c": "{{!Opportunity.CloseDate}}",
"Type_Picklist__c": "Three",
"Type_Text__c": "{{!Opportunity.Name}}",
"Decimal_Value__c": "12.34",
"Integer_Value__c": "1234"
}

This parameter allows you to preset Content Version file attributes in the Template Editor. It will add the Content Version Field Assignment JSON field to the Document Options tab in the Template Editor. You can input a JSON map of Content Version field API names and values into this field, as shown in the example to the left.

Template Selection Parameters

Parameter

Values

Function

categoryfilter=

Comma-delimited list of values from the S-Doc Template category field.

Example: categoryfilter='Contract'

This will only display templates with the Category field set to the specified categories after a user clicks the S-Docs button.
searchfilter=

Comma-delimited list of values from S-Doc Template Name or Description fields.

Example: searchfilter='Discount'

This will only display templates with the specified values present in the Name or Description field after a user clicks the S-Docs button.
additionalFields= Comma-delimited list of Salesforce field API names.
Example: AdditionalFields='Industry__c'
You can also add preset values to filter these additional fields.
Example: AdditionalFields='Industry__c:Textiles'

Allows you to display fields from the template detail page as custom columns on the "Select template(s)" page that is displayed after a user clicks the S-Docs button. This parameter also allows you to set custom filters for those columns.

For example, say you have two custom fields on your template, Region__c and Industry__c, and you've added AdditionalFields='Region__c,Industry__c' to your S-Docs button. These fields will then show up as columns on the template list view displayed on the "Select template(s)" page. Additionally, search fields will show up for these fields on the "Select template(s)" page so the user can apply a filter/search on one or both of these fields in order to see only the templates that match the supplied criteria.

AFIncludeNulls= True to enable, False to disable. This parameter is used in conjunction with the additionalFields= parameter. When set to true, this parameter will include fields with null values.
AFPicklist= True by default, false to hide the picklist (choosing false will enable the intended functionality of this parameter). This parameter will hide the picklist that is shown on the template selection page when using the AdditionalFields= parameter, making it so that users cannot edit filters that have been applied.
showHeader= True to enable, False to disable. This will hide the header on the S-Docs template selection and document creation pages.
sidebar= True to enable, False to disable. This will hide the sidebar on the S-Docs template selection and document creation pages.

Document Generation & Email Parameters

Parameter

Values

Function

prepemail= 1 to enable, 0 to disable (disabled by default). This will create but not automatically send an email.
sendemail= 1 to enable, 0 to disable (disabled by default). This will create and automatically send an email.
doclist= Comma delimited list of S-Docs template names or IDs.
Example: doclist=Template1,Template2
This will automatically generate the documents specified in the parameter and route the user to the "Generated Documents" screen. It's also used for specifying which documents to generate when using S-Docs with the Salesforce Process Builder.
oneclick= True to enable, False to disable (enabled by default). This parameter modulates the doclist parameter; if it is set to "false," the doclist parameter will not automatically generate documents, but will simply route the user to the template selection page with the documents pre-selected.
autodownload= True to enable, False to disable (disabled by default). This parameter will automatically download the document(s) to the user's device after generation is complete. Note that this parameter is not supported for DOCX, PPTX, or XLSX documents.
previewFirst= True to enable, False to disable (disabled by default). This parameter will prevent attachments, files, and S-Doc Relationships from being created when a document is generated. Upon generation, a Generate and Save button will replace the Email Selected Docs button. Clicking this button will create the attachments, files, and S-Doc Relationship. Users can also click Cancel Preview to return to the base record.
aid= Comma delimited list of IDs for attachments on a record’s “Attachments” related list. For attaching attachments to your email.
fid= Comma delimited list of IDs for files from your "Files" tab. For attaching files to your email.
did= Comma delimited list of IDs for documents from your “Documents” tab. For attaching documents to your email.
autoopen= To open in the same browser tab: 1 to enable, 0 to disable (disabled by default).
Example: autoopen='1'To open in a new browser tab: newtab
Example: autoopen='newtab'Note that your popup blocker must be disabled for Salesforce in order for the newtab value to function properly.
This will automatically open the document after generation. Note that this shouldn’t be used on calls to create S-Docs via automation.
useExistingNoContactRecord= True to enable, False to disable (disabled by default). By default, when an email is sent by S-Docs to an address that isn’t listed under a contact in your org, S-Docs creates and immediately deletes a contact record called “No Contact Record.” If you have validation rules in place that require multiple contact fields be completed, you can create your own No Contact Record and use this parameter. The record should have a last name of No Contact Record (first name not required) and an email address of this.email@is.invalid
attParentId2= A single Salesforce record ID
Example: attParentId2='a0C4N00003LcItc'
When you click Attach or Remove Files on the S-Docs email page, the menu will show all attachments and files of the base record used to generate the documents by default. When you use this parameter and specify another record ID, this page will also show all of the attachments and files of that additional record. Note that additional attachments are not supported for S-Sign email templates at this time.
attParentId2FilterAtt= SOQL Query filter for the list of attachments related to the attparentID2 record. Allows you to set filter criteria for which attachments are displayed from the record  specified by the attParentId2 parameter.
attParentId2FilterFile= SOQL Query filter list of files related to the attparentID2 record. Allows you to set filter criteria for which files are displayed from the record specified by the attParentId2 parameter.
hideContactLookup= True to enable, False to disable (disabled by default). Allows you to hide the Contact Lookup window that appears on the S-Docs Email Page.
generatedFields= Comma delimited list of Salesforce field API names.
Example: generatedFields='Base_Object_Type__c,Name' would show the related list object and the template name in columns on the generated document page table.
Allows you to display fields from your template(s) as custom columns on the "Generated Documents" page that is displayed after a user generates their documents (after users select their template(s) and click "Next Step").This parameter is similar to the additionalFields parameter, however fields specified with that parameter appear on the select templates page, while fields specified with this parameter appear on the generated documents page.
autoBox= 1 to enable, 0 to disable (disabled by default). This parameter will automatically upload generated documents to Box if you have enabled S-Docs Box Integration.
UIlanguage= Admin-defined language name (see article: Translate the S-Docs UI). This will translate the user interface of S-Docs (see article: Translate the S-Docs UI).
GenAtEmail= True to enable, False to disable (disabled by default). This parameter adds a button to the S-Docs email page that allows you to generate & attach a new document to your current email.
language= Salesforce Language ID. This parameter will allow merge fields and field labels to be translated (provided that the translate keyword is used in the merge fields in the template). (See article: Translate Merge Fields and Field Labels)
replyToMostRecentEmail= True to enable, False to disable. This will include the most recent email’s text in the body email on the S-Docs email page.
useAttNameForDocName= True to enable, False to disable. Will display the attachment name instead of the document name on the generated documents page.
quickPickJunctions= Contact Quick Pick picklist.
Example (single junction):
quickPickJunctions=Contact_Junction_Obj_API_Name,
Base_Obj_Lookup_API_Name,
Contact_Lookup_API_Name
Example (multiple junctions):
quickPickJunctions=Contact_Junction_1__c,
Opportunity_1__c,Contact_1__c;
Contact_Junction_2__c,Opportunity_2__c,Contact_2__c;
This is used to notify the S-Docs email page of a junction object between Contact and the base object that a document was generated from. It adds the junction object’s contacts to the email contact quickpick list.
customRedirect= Custom VisualForce page URL. This will redirect users to a custom VisualForce page in your org after their documents finish generating. The IDs for the documents that generated with this parameter will be visible in the URL after "sdocsIds="
editorWidth=

String (number of pixels).

Example: editorWidth='500'

Adjusts the width of the rich text editor on the S-Docs email page. It is useful mainly if you’re using Salesforce on a phone or tablet.
prefillRTP=

Runtime Prompt merge field names paired with values (MergeField,Value)

Example: If you want to prefill 2 Runtime Prompts whose merge fields are named "patientAge" and "patientBirthdate," your syntax would look something like:

prefillRTP=patientAge,23;patientBirthdate,1997-06-04

This parameter allows you to prefill Runtime Prompt answers, which can be useful for templates that need to be used with one-click automation and also contain Runtime Prompts.

Note: Date type Runtime Prompts should be formatted as yyyy-MM-dd

Note 2: Checkbox type Runtime Prompts can include multiple values in a comma-delimited list

Note 3: If all Runtime Prompts are filled in using this parameter, the Runtime Prompt interface will be skipped during document generation

Live Edit Parameters

Parameter

Values

Function

SDEditSameTab= True to enable, False to disable (false by default)

If a template has the Live Edit feature enabled, this will cause a pencil icon to appear next to the document once a user generates it (e.g. after clicking Next Step during the document generation process). By default, clicking this pencil will open the Allow Edit live editor in a new tab.

This parameter causes the Live Edit live editor to open in the same tab as the "View Documents" page. This parameter also replaces the Close button in the Live Edit live editor with a Return to Record button.

customSave= Override to replace the current Save button, newbutton to add a new Save button.

Example: customSave='Override'

This will modify the Save button on the S-Docs Allow Edit live editor (which allows users to edit a document after it has been generated).Override will replace the Save button with a button that saves the document and redirects the user to a specified URL.

Newbutton will retain the original Save button and add a new button that saves the edited document and redirects the user to a specified URL.

Both of these need to be enabled in Custom Settings > SDocsSettings and added to the URL in specified SDEdit Custom URL.

color=

Color hex number without the pound (#) symbol.

Example: color=FFFFFF

This can be added to the SDEdit Custom URL (In Custom Settings > SDocs Settings) to change the button text color.
backgroundColor=

Color hex number without the pound (#) symbol.

Example: color=FFFFFF

This can be added to the SDEdit Custom URL (In Custom Settings > SDocs Settings) to change the button background color.

S-Sign Parameters

Parameter

Values


Function

autoSSign= 1 to enable, 0 to disable (disabled by default). This will generate an S-Sign e-signature request and navigate the user to the Email page. For sign in-person use cases, the signing experience will open after generation.
showSSignInPerson= True to enable, False to disable (enabled by default). Allows you to hide the E-Sign Documents In Person button.
ssignParams= Language that is supported by a downloaded translation template (see article: Translate the S-Sign UI). This will translate the user interface of S-Sign (see article: Translate the S-Sign UI).

General Parameters

Parameter

Values

Function

lightningnav= True to enable, False to disable (disabled by default). If page navigation is not working properly when creating documents in Salesforce Lightning or Mobile, this parameter will fix most navigation issues.

Special Merge Fields in S-Docs

By Developer's Guide, Documentation No Comments

Introduction

Suppose you’re developing an S-Doc template for a contact. Including merge fields for a contact’s name or phone number is pretty straightforward. However, what if you want to include data outside the scope of the contact object, such as the date the document itself was generated? Or, perhaps you find that {{!Contact.Id}} displays an 18-character ID when you’d really like to display a 15-character ID. No problem! To provide you with an increased range of easy-to-use templated data, S-Docs includes a special set of merge fields, shown in the following table.

Special Merge Fields

Merge Field Rendered Text in Output Document
{{!DocumentID}} S-Doc ID of the document you generated (e.g. SD-174; this is not a Salesforce ID).
{{!DocumentName}} Name stored in the “Template Name” field on your
S-Doc template record detail page.
{{!DocumentObject}} Type of Salesforce object that this document was generated for.
{{!DocumentDate}} Date that this document was generated. (See Formatting Dates for information on formatting dates in merge fields).
{{!DocumentDateSOW}} Start of week date for the document that was just generated.
{{!DocumentDateEOW}} End of week date for the document that was just generated.
{{!DocumentDateTime}} Date and time that this document was generated.
{{!DocumentFormat}} Filetype of this document (PDF, DOC, etc.).
{{!ObjectId18}} 18-character ID of the Salesforce record this document was generated for.
{{!ObjectId15}} 15-character ID of the Salesforce record this document was generated for.
{{!UserFirstName}} First name of the user who generated this document.
{{!UserLastName}} Last name of the user who generated this document.
{{!UserName}} Full name of the user who generated this document.
{{!UserOrganizationName}} Organization name of the user who generated this document.
{{!UserLoginName}} Salesforce username of the user who generated this document.
{{!UserEmail}} Email address of the user who generated this document.
{{{!UserSignature}}} Salesforce email signature of the user who generated this document.

Advanced Template Features

By Developer's Guide, Documentation No Comments

Introduction

S-Docs provides many advanced features for merging data into your S-Doc Template. In most cases described in this document, they require editing of the template source code, which can be easily accessed by clicking on the Source button on the S-Docs Template Editor page.

The template source is based on HTML with specific tags that indicate the S-Docs engine will apply specific mergers or functions.

Merge Fields Functions

You can apply multiple functions to merge field data by adding a space and a specific syntax (function) to the end of the field name. For example, {{!opportunity.amount}} will return an unformatted numeric value as it is stored in the Salesforce database; adding {{!opportunity.amount #,###.##}} will return the same value, but formatted to include commas and two decimal places.

Please take note of the following:

  • All functions require a space between the merge field name and the function.
  • When using merge fields within other tags, you may need to escape the HTML in order for the merge to happen properly.
  • Be careful when using the Graphical UI editor to change the appearance of the merge field tag. Care must be taken that styling changes do not interject the merged field syntax. E.g. {{!Opportunity.<style= You may need to click on Source to validate that merged fields do not contain any characters.
Function Name Usage & Examples Notes
Format Number

Format number function provides formatting numbers without having to create formula fields. Only the following EXACT patterns/values are supported for a number format:

#,###.##  (Typical Currency with cents)

#,###     (Comma delimited whole number)

#.###     (EU formatting)

#.###,##

{{!Opportunity.amount #,###.##}}

43222300.8 ➤ 4,222,300.80

{{!Opportunity.amount #,###}}

43222300.8 ➤ 4,222,301

{{!Opportunity.amount #.###}}

43222300.8 ➤ 4.222.301

  • Larger numbers will still follow the pattern even if they exceed the 4 digits shown in the pattern. Rounding is applied when precision exceeds formatting.
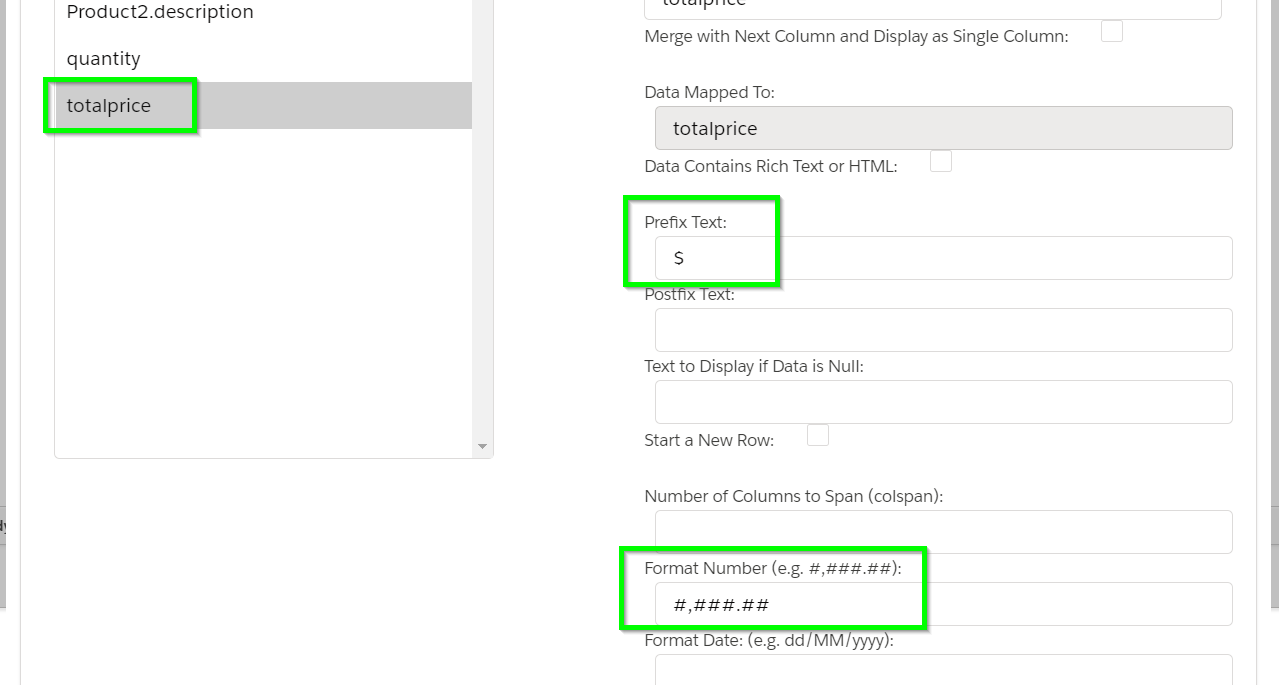
  • If you need to include a currency symbol, you can add it just before the merged field. E.g . ${{!Opportunity.amount #.###}}

Format Date

Format date allows Salesforce date and datetime fields to be formatted into any valid java pattern.

{{!opportunity.createdDate MM/dd/yyyy}}

2018-10-28 ➤ 04/04/2017

{{!opportunity.createdDate MMMMM}}

2018-10-28 ➤ October

{{!opportunity.datetime__c MM/dd/yy hh:mm:ss TZ:America/New_York}}

2018-10-28 ➤ 10/28/2018 12:56:32 EST

  • Patterns are case sensitive. E.g. MM=month while mm=minutes. Reference to available patterns.
  • Times are formatted per the database time (GMT).
  • Time zones must be written using Java time codes.
  • Only Salesforce-supported time zones are accepted.
  • Long descriptions (e.g. Month, day of week) are in English. You can use formula fields if needed to meet a specific requirement.
Display Checkboxes

The checkbox attribute allows you to map checked/unchecked checkbox images to boolean fields.

{{!opportunity.checkbox__c checkbox="true"}}

Displays a checkbox with a dotted white border; includes a black checkmark if checked.

{{!opportunity.checkbox__c checkbox="black"}}

Displays a checkbox with a solid black border; fills in with black and includes a white checkmark if checked.

{{!opportunity.checkbox__c checkbox="radio"}}

Displays a radio button.

  • When this attribute is added, the merge field will display as the checkbox in its current state on the record once the document is generated.
Check Fonts

MICR E-13B font (Magnetic Ink Character Recognition) is used for banking and more specifically for generating checks.

{{!Check__c.RoutingNumber__c MICR="11"}}

To adjust spacing between MICR characters:

{{!Opportunity.Description MICR="[FONTSIZE (REQUIRED)],[SPACING (OPTIONAL)]"}}
e.g.
{{!Opportunity.Description MICR="20"}}
{{!Opportunity.Description MICR="20,-5"}}

{{!Opportunity.Description MICR="20,5"}}


  • The output is a series of images that can be used in PDF generation of checks. Only digits and ‘t,’ ’o,' ’a,’ ’d,’ are transformed. Other characters are ignored.
  • The number following MICR represents the font width. E.g.  MICR="16" will be larger than MICR="8".
  • Spacing defaults to 0 if it is not specified. As shown, negative spacing values are allowed. The lower the spacing value, the closer together MICR characters.
Capitalize

Transforms data to all uppercase characters.

{{!contact.billingStreet ToUpperCase="true"}}

123 Main Street, Apt 3 ➤ 123 MAIN ST, APT 3

Lowercase

Transforms data to all lowercase characters.

{{!contact.billingStreet ToLowerCase="true"}}

123 MAIN ST, APT 3 ➤ 123 Main Street, Apt 3

Right to Left (RTL)

Reverses the character string in the output. This is useful for RTL languages like Hebrew when generating to a PDF.{{!account.greeting__c RTL="true"}}

שלום➤ םולש


  • Using the RTL merge field attribute will transform merge field data only, not static text.
  • To apply RTL for both merge fields and static text,  use the following style in the template source:

<rtl>reverse</rtl>

  • When using <rtl> tags, there is no need to add the RTL attribute to your  merge fields. You can wrap an entire template in <rtl> tags to transform both merge field data and static text.
  • Note that <rtl> tags will not work properly with text that breaks across two lines in the generated document. You should use separate <rtl> tags for each line if text breaks across two lines.


Translate

Uses Salesforce Translation Workbench feature to return the picklist value based on the users locale/language. settings{{!product2.color translate="true"}}

BLUE ➤ BLEU

  • This feature leverages Salesforce toLabel() function within a SOQL query. It is particularly useful for orgs that have Translation Workbench enabled. Translate keyword will cause an error if used on field types that do not support toLabel().

Translate can be used only on fields and field labels.

  • For related list translations, or lookup fields, you should use direct SOQL query. If you set the class to "none" then only the data is returned – not in a table format.  Here is an example usage from the S-Docs template source:

<!--{{!
<LineItemsSOQL>
<class>none</class>
<soql>Select tolabel(color__c) From product2 where id='{!ObjectID15}' and toLabel(color__c) =’BLEU’</soql>
<column>color__c</column>
</LineItemsSOQL>
}}-->

  • Additionally, for fields merged within related lists, you may find the substitute column attribute feature useful.
Display Picklist Field Values Instead of API Names

The Display attribute will render picklist field values as the field value (the value shown to users on records). By default, S-Docs renders the field value API name.

{{!Opportunity.PicklistField__c Display="true"}}

  • In most cases, picklist field values are identical to their API names. This attribute covers instances when the two differ.
Create New Lines for Multi-Select Picklist Values

The msnl attribute will replace the semicolons between values from a multi-select picklist with new lines.

{{!Opportunity.Multi_Select_Picklist_Field__c msnl="true"}}

Insert Line Breaks After A Specified Character Count

The breakeverynchars attribute will insert a line break after the character number that you specify

{{!Opportunity.Long_Field__c breakeverynchars="10"}}

This Is A Long Field Of Text ➤ This Is A
Long Field
Of Text

  • Negative, zero, or blank values will not insert any line breaks.

By default, S-Docs merges related lists into your template in the form of a table, where each record returned is generated as a row in the table. This means the table grows linearly with the number of records returned. In order to meet more specific formatting requirements, S-Docs has a variety of advanced attributes that can be leveraged.

Feature Name Description
DirectSOQL Allows you to execute a custom SOQL query within your template and merge the resulting data into your document at runtime. DirectSOQL supports aggregates and subquery functions.
Render Provides ability to show/hide sections of a template based on a condition.

Displaying Related Lists & SOQL Line Items Without Table Formatting

To remove the table formatting in a related list or SOQL table, you can place <class>none</class> at the beginning of your related list / SOQL code. For example, the following code will display account team members as a comma-delimited list rather than as a table:

[code lang="html"]<!--<lineitemsSOQL>
<prefix>The Account Team Members are: </prefix>
<class>none</class>
<soql>
SELECT user.name FROM accountteammember WHERE accountid='{{!account.id}}'
</soql>
<column postfix=", ">user.name</column>
<postfix>. Please see page 3 for their contact information.</postfix>
</lineitemsSOQL>-->[/code]

In this example, <class>none</class> removes all the table formatting. The prefix attribute adds a comma and a space between each account team member, but if we did not have this prefix attribute here, the items returned by the SOQL query might look something like this: Jack JohnsonJohn JacksonSarah McCleanJohn Paulson. This is because using <class>none</class> will make your SOQL query or related list return raw data with no spaces or table formatting, all on the same line.

Alternatively, if you need to format your related list data in an entirely new way, you can also generate a template component that formats your data and then merges it into your final document. Click here to read more about this feature.

Related List Column Attributes

Related lists contain columns that can optionally include additional attributes (shown in bold below). These attributes provide a powerful way to dynamically manipulate data to meet your requirements.

Note: Attributes must always be double quoted, e.g. format-date="MM/dd/yyyy"
Example: <column format-date="MM/dd/yyyy">createddate</column>
Column Attribute Values Description & Usage Syntax  Example and notes
substitute Comma delimited list of key-value pairs.

Allows for replacing values with other values whenever a match is made. It checks the value against a series of values. If it is equal to a value, it returns the corresponding  result. If it does not match, no substitution is made unless a final catch-all value is provided in the list.

Substitute functionality can be useful for translating values to different languages for a template. While you may be able to do the same using a Salesforce formula field, this can drastically reduce the number of formula fields you would need to create.

<column substitute=" value1tomatch, value1ToSubstitute, value2ToMatch,Value2ToSubstitute,

…,

OptionalCatchall-substitution">Field__c

</column>

If the substitute list contains an odd number of values, then the last value will be the catch-all that is substituted when no matches are made.

  • Substitute a checkbox for German language. values:substitute="true,Ja,false,nien"
  • Matches are made ignoring case sensitivity and white spaces are trimmed, but the substitute values are exact.
  • For checkbox fields use true and false as the value to match on.
  • For organization purposes you can optionally use parenthesis to organize your list, e.g.:

substitute= " (1,one),(2,two),(3,three)"

  • If your value is null, you should not
    use the substitute attribute but rather use the  nullprefix= attribute that will
    allow you to insert a value whenever null data is encountered for that field.
  • If you are matching a numeric value, the precision needs to also match.

<column substitute "2.00,2">quantity</column>

  • Example:  Use Substitute feature to correctly display the full month Name of field that contains the month number:

<column substitute="1, Januar,
2, Februar,
3, März,
4, April,
5, Mai,
6, Juni,
7, Juli,
8, August,
9, September,
10,Oktober,
11,November,
12,December,
unknown">MonthNumber__c</column>

replaceall Comma-delimited list of key-value pairs.

Allows for replacing values with other values. This is very similar to the substitute feature, with the following two exceptions:

1) substitute matches against (and replaces) the ENTIRE string, where as replaceall matches against (and replaces) all substring appearances of the specified string.   

2) There is no "else" condition in replaceall (since we're replacing substrings, an "else" condition would be nonsensical)

This attribute supports regexs.

<column replaceall="replaceThis1,replaceWithThis1,replaceThis2,replaceWithThis2,...replaceThisN,replaceWithThisN">

Regex Syntax: start your replaceall string      with [regex] (including brackets)

For example, say you want to replace all        "a) This is a test", "b) This is a test", etc. with " a) This is a test", " b) This is a test" but NOT replace anything that looks like "1. This is a    test", "2. This is a test", etc. (i.e. you want to       indent a) b) c) but not 1. 2. 3. and the data   structure / related list formatting prohibit     simpler solutions like using <li></li>). To    achieve this, you could use the following:       <column replaceall="[regex]([a-zA-Z]\)),     &nbsp;&nbsp;&nbsp;&nbsp;$1">

  • If the data value is "Burlington
    Textiles Corp," but you want it to be "Boston Textiles Corp," use <column replaceall="Burlington,Boston">
showcolumn Conditional statement Allows you to conditionally hide a column.

<column showcolumn="{{!Object.Fieldname}} == 'FieldValueThatTriggersColumnHiding'">...</column>

Note that the column will be hidden if the syntax resolves to true.

If your table has a header row, you will need to apply the same condition to the header row as a RENDER statement:

<!--RENDER='{{!Object.Fieldname}}' == 'FieldValueThatTriggersColumnHiding'--><th>Column Name</th><!--ENDRENDER-->

  • You can conditionally hide an entire column in your related list if the Opportunity record's StageName
    field has a value of 'Prospecting' or 'Closed' by using the following: <column showcolumn="{{!Opportunity.StageName}} == 'Prospecting'|| {{!Opportunity.StageName}} == 'Closed'">...</column>
type "rtf", "checkbox", or "radio"

If your field contains markup that you wish to preserve and display in your document, you can specify type="rtf"

This is useful for inserting blocks of information that already contains formatting/markup.

If you want to display a checkbox or radio button image (checked and unchecked) rather than the database values of true/false or yes/no, you can use type ="checkbox" or ="radio"


<column type="rtf">Your content goes here.

</column>

  • When using type ="checkbox" the checkbox images have a class called "sdcheckbox." If needed, you can modify the CSS treatment of the checkbox. E.g.

<style type="text/css">
.sdcheckbox {
width: 10px;
height: 10px;
border: 1px solid #73AD21;
}
</style>


header String. Allows you to specify a header text. <column header="YourHeaderHere">
  • Example: <column header="Grand Total">will place "Grand Total" over that column as a header.
format-number Number. Allows you to format your column’s numbers to automatically include commas and periods.

<column format-number="#,###.##">


  • Format number supports these four types:#,###

#,###.##

#.###

#.###,##

  • For example, if a number in your column was stored as 123456 and
    you chose the 2nd type listed above, the number would appear as 1,234.56
format-date Date, Date/Time. Format date allows Salesforce date and datetime fields to be formatted into any valid java pattern.

<column format-date="MM/dd/yyyy">

  • To turn a date into just a day, month, or
    a year, you can use <column format-date="MMMMM"> (for days, use D, and for years, use Y)
mergenext Any value. Allows you to merge a cell with the cell to the right of it. <column mergenext="true">
  • If you have a currency symbol column and an amount column,
    like           $        |        12

                            $        |        4

  • You can merge these two columns together and the resulting column will be

$12

$4

  • Prefix and postfix are useful to put any spacing between cell values.

Note: mergenext is not supported when using group-by functionality.

colspan Any value. Allows you to create a column that spans across multiple columns. <column colspan="4"> <column
colspan="1">
has no effect; by default, a column
already spans 1 column.
<column
colspan="4">
Will make this column span 4 columns total (i.e. this column will be 3 columns longer than it would normally be).
This works the same as the HTML
colspan attribute.
newrow Any value. Allows you to specify when to end the current row and create a new one. <column newrow ="4"> <column newrow="true">
Will create a new row for each record in this column. For example, instead of seeing
cell 1 | cell 2 | cell 3
you will see
cell 1
cell 2
cell 3----<column newrow="3">
Will create a new row after the 3rd
record of each row, e.g.
cell 1 | cell 2 | cell 3
cell 4 | cell 5 | cell 6
cell 7 | cell 8 | cell 9
This attribute is useful for creating documents such as mailing labels.
prefix Any value. Allows you to put a string at the beginning of each column. <column prefix="YourStringHere">

<column prefix="$"> would put a
dollar sign at the beginning of each
column like so:$                12

                            $                4

nullprefix Any value. If the content of a column is "null," this will swap null with a string or character of your choice at the beginning of your column. <column nullprefix="YourStringHere"> <column nullprefix="N/A"> will make columns with "null" values appear as
N/A.
postfix Any value. Allows you to put a string at the end of each column. <column postfix="YourStringHere">

<column postfix="dollars"> would put "dollars" at the end of each column like so:12                dollars

4                  dollars

nullpostfix Any value. If the content of a column is "null," this will swap null with a string or character of your choice at the end of your column. <column nullpostfix="YourStringHere"> <column nullprefix="N/A"> will make columns with "null" values appear as
N/A.
allprefix Any value. This replaces the need to use both prefix and nullprefix in the same template if they have equal values. If your template has both prefix and nullprefix set to the same value, you can replace them with this attribute. <column allprefix="YourStringHere"> <column allprefix="$"> will put "$" at
the beginning of each column
regardless of if the value is null or not.
allpostfix Any value. This replaces the need to use both postfix and nullpostfix in the same template if they have equal values. If your template has both postfix and nullpostfix set to the same value, you can replace them with this attribute. <column allpostfix="YourStringHere"> <column allpostfix="€"> will put "€"
at the end of each column regardless
of if the value is null or not.
abfprefixouter Any value. Allows you to put a string at the beginning of each column except the first one. The string will appear on the outside of the prefix attribute's contents. <column abfprefixouter=","> <!--{{!
<lineitemsSOQL>
<class>none</class>
<soql>SELECT productcode FROM opportunitylineitem WHERE Opportunityid ='0061U0000078tEw'
</soql>
<column abfprefixouter=", ">productcode</column>
<postfix>.</postfix>
</lineitemsSOQL>
}}-->This example would create a list of products that looks like:product1, product2, product3.
startIndex Any numerical value. Allows you to offset the beginning row number when you include the rownum column in your related list. <column startIndex="3"> Note that numbering starts at the number equal to the startIndex number + 1.


<lineitems>
<class>table646</class>
<listname>opportunitylineitems</listname>
<column startIndex="3">rownum</column>
<column>PricebookEntry.Product2.name</column>
<column>PricebookEntry.Product2.description</column>
<column>unitprice</column>
<column>quantity</column>
<column>totalprice</column>
</lineitems>
}}-->

This example would output a table with row numbers beginning at 4.

render Comma-delimited list of render conditions & output values. Allows you to conditionally render different values in your related list columns. <column render="CONDITION_1,output_value_1,CONDITION_2,output_value_2...DEFAULT OUTPUT VALUE IF ALL RENDERS EVALUATE TO FALSE"> Notes:

  • This feature is only supported with <lineitemsSOQL> statements
  • You must use <soql>...</soql> tags and include any field specifed in your subsitute="..." attributes in your SOQL query
  • You should not specify a field between the <column></column> tags. Doing this may cause issues
  • You can use RECORD.Field_Name to use related list record data fields within the render="..." attribute

Examples:

<column render="RECORD.Product_Type__c STARTSWITH Vacuum && RECORD.Product_Type__c ENDSWITH Cleaner,RECORD.Vacuum_Name__c,Not a Vacuum"></column>

  • If the Product's Type field starts with Vacuum and ends with Cleaner, the column will output the name of the vacuum, otherwise the column will output "Not a Vacuum."

<column render="RECORD.Title==null,No Title Available,RECORD.Title"></column>

  • If the Contact's title field is blank, the column will output "No Title Available," otherwise it will output the Contact's title.

You can also use nested render statements:

<column render="RECORD.Country__c == usa,[RENDER1]RECORD.City__c == new york,S-Docs HQ,[RENDER2]RECORD.City__c == ann arbor,S-Docs Innovation Center,[ENDRENDER2][ENDRENDER1],Work From Home"></column>

  • If the record's Country field is USA, and the city is New York, the column will output "S-Docs HQ." If the record's Country field is USA and the city is Ann Arbor, the column will output "S-Docs Innovation Center." If the record's Country field is not USA, the column will output "Work From Home."

<column type="rtf" render="RECORD.StageName == 'Closed',<span style='font-color:red;'>Closed</span>,Open"></column>

  • If the Opportunity is Closed, the column will output "Closed" in red. Otherwise, the column will output "Open" in the default font color.
breakeverynchars Any numerical value. Inserts a line break after a specified character amount. <column breakeverynchars="10">

<column breakeverychars="10">Long_Line__c</column> will insert a line break after every 10 characters.

Adding a Related List to Your Template

By Developer's Guide, Documentation No Comments

Introduction

It's often necessary to include data from a record's related lists in your documents. In the template editor, S-Docs includes a powerful, easy-to-use related list generator just for this purpose.

For example, if you have a template from an opportunity, you can insert a related list that will display certain fields from an opportunity's child quote records. The S-Docs related list generator provides a complete range of flexibility in developing templated related lists. For example, without even editing any code, you can adjust the formatting of the related list's table and columns, select any of the related list object's fields that you would like displayed in your table, and even filter/sort the related list rows by user-specified criteria. If you decide to go one step further and edit the related list source code, the possibilities for modification become endless.

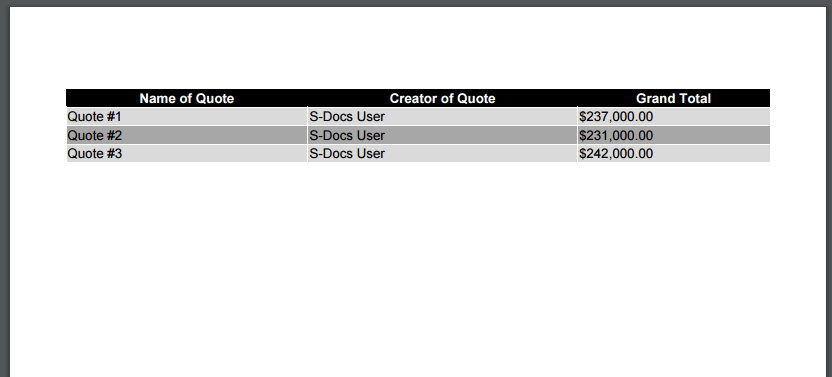
This guide will discuss how you can use the S-Docs template editor to create a table with columns comprised of related list fields. In the following steps, we will be creating a very basic related list that might generate the following document:

Dev Guide - Adding a Related List (1)

The document above was generated from a template for an opportunity. In this template, we inserted a related list for an opportunity’s child quote records. You can find a list of more advanced related list column attributes in our Advanced Template Features document.

Note: This article goes over how to use the Insert Related List button to format your related list data into a table. If you have other formatting requirements, please see our guide to customizing your related list layout. You can also generate a separate document for each record in your related list. For extensive customization opportunities, you may also want to consider generating a component template for each record in your related list. This method allows you to format your data in a separate component template in any way that you like, and reference that component in your main template.

Use The "Insert Related List" Button

Now, let's begin! In the template editor for our opportunity template, start by clicking the Insert Related List button at the top of the page.

Select A Related List

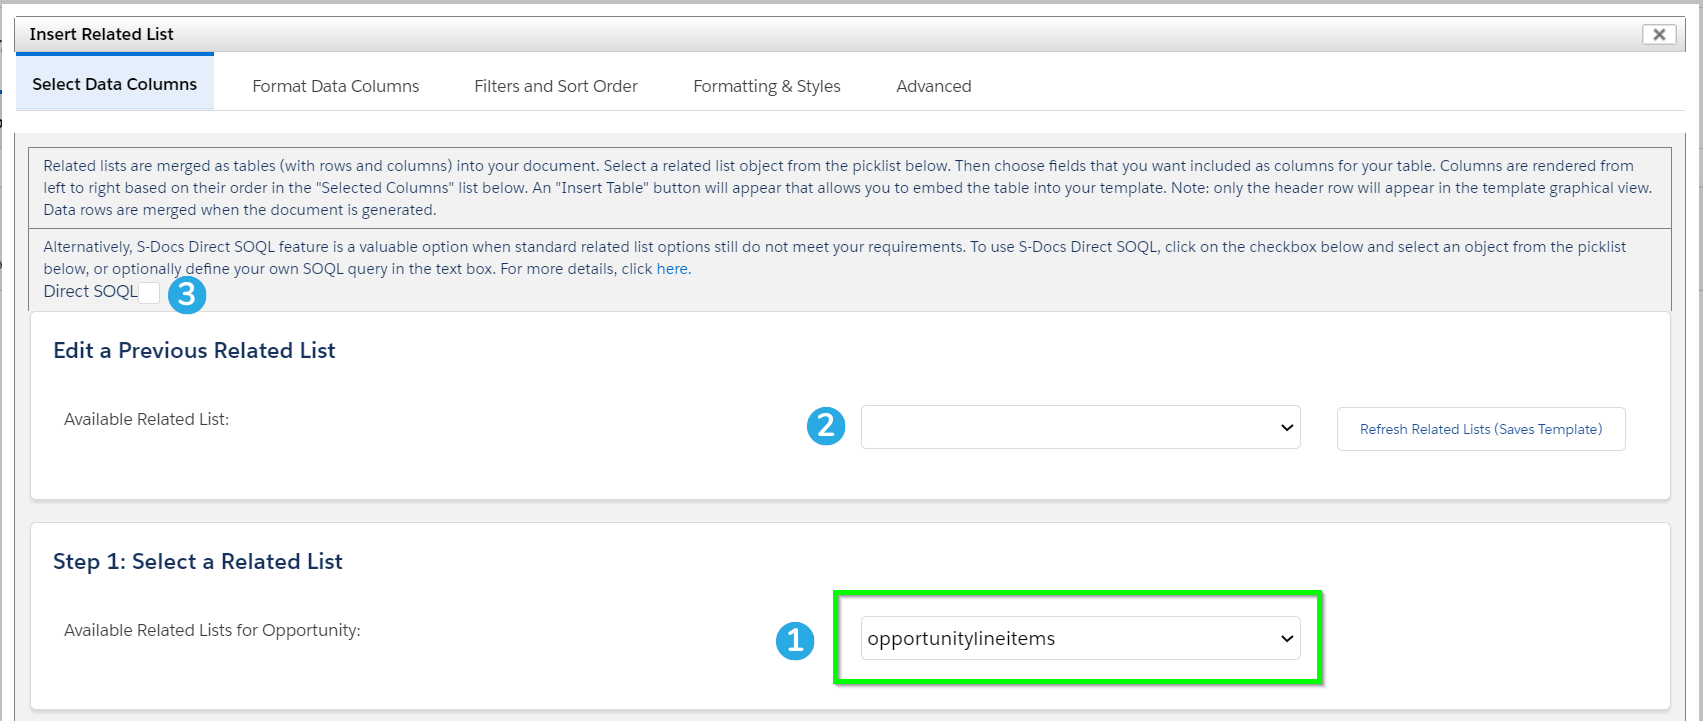
The following window will appear.

[1] The drop-down menu under “Step 1: Select a Related List” allows you to select an available related list for your object. In this case, we selected the opportunitylineitems related list. You can also [2] choose to edit a related list that you've configured in this template before, if applicable.

In addition, [3] you're given the option to utilize the S-Docs Direct SOQL feature, which allows you to merge records from objects that aren't related to your base object, and much more. Find out more about the Direct SOQL feature in this documentation article.

Choose Table Columns

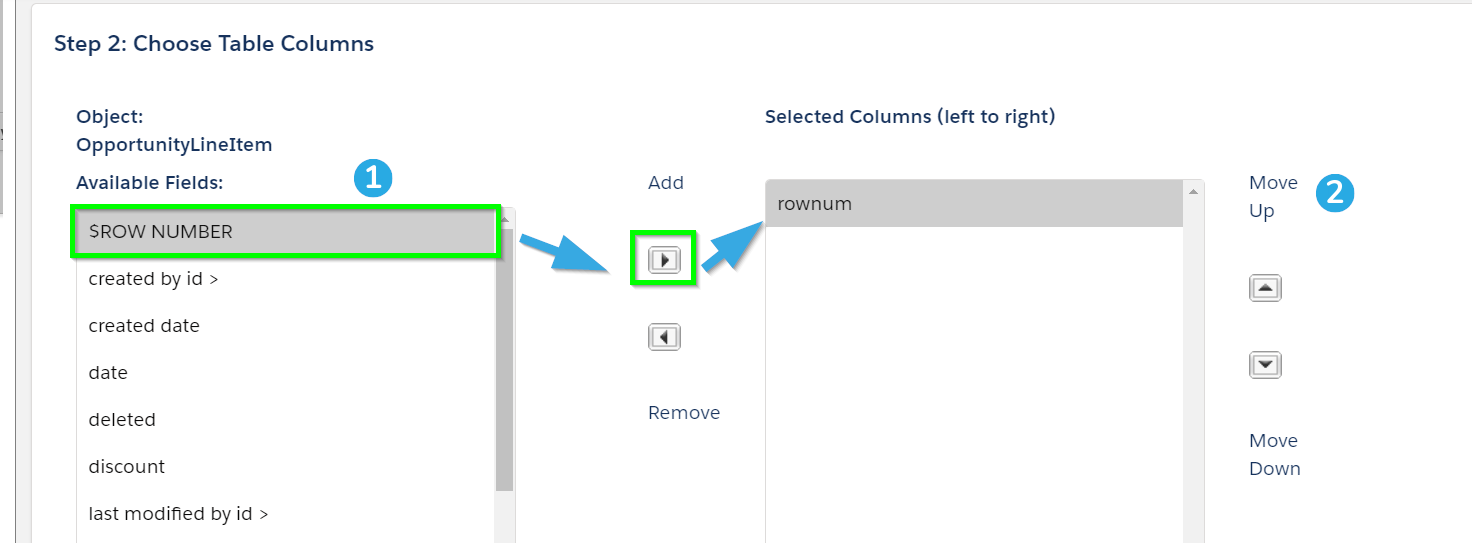
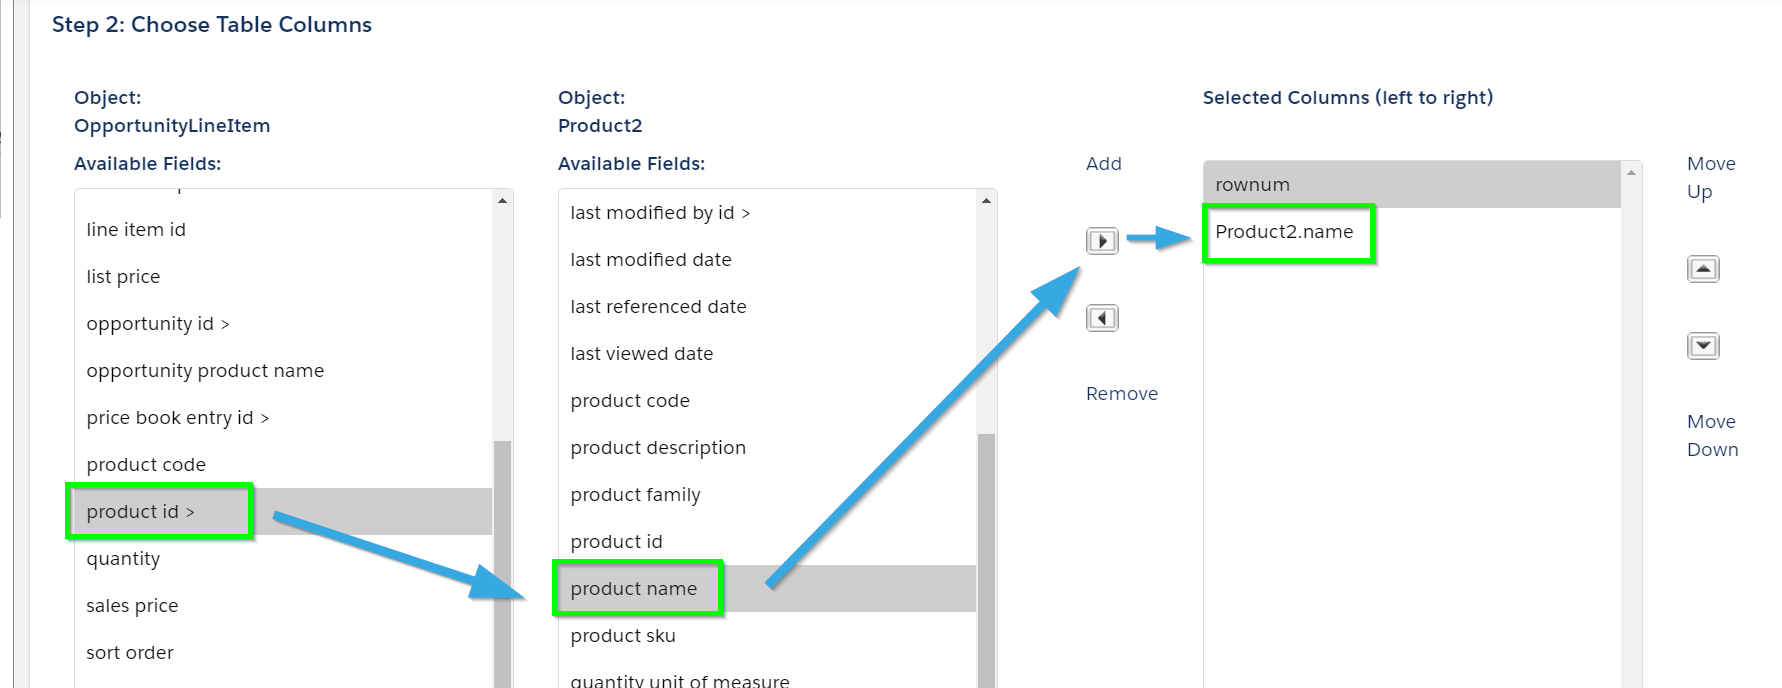
Scroll down to Step 2: Choose Table Columns to select fields from your related list object to be used as columns in the related list table.

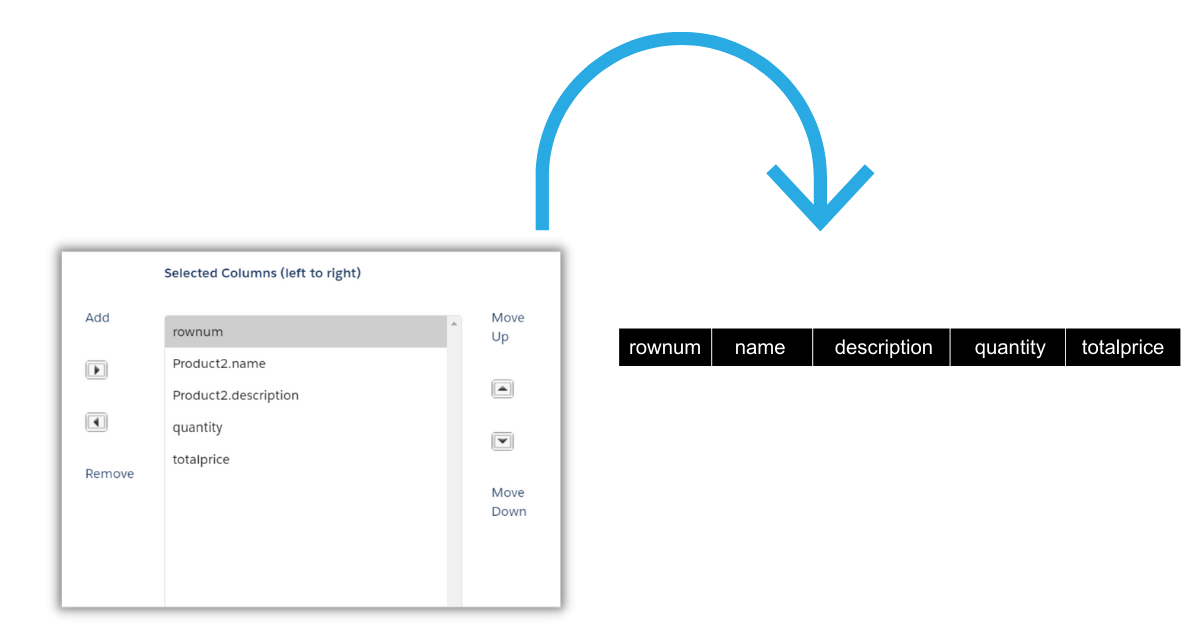
To add a field as a column in your table, [1] click the name of that field and then click the button under “Add.” The topmost field will become the leftmost table column, but you can [2] rearrange the fields as necessary on this screen.

Note that some fields have this character to the right of them: “>.” These fields correspond to IDs of object records in our related list; clicking on them will bring up another menu where we can pull data from these object records.

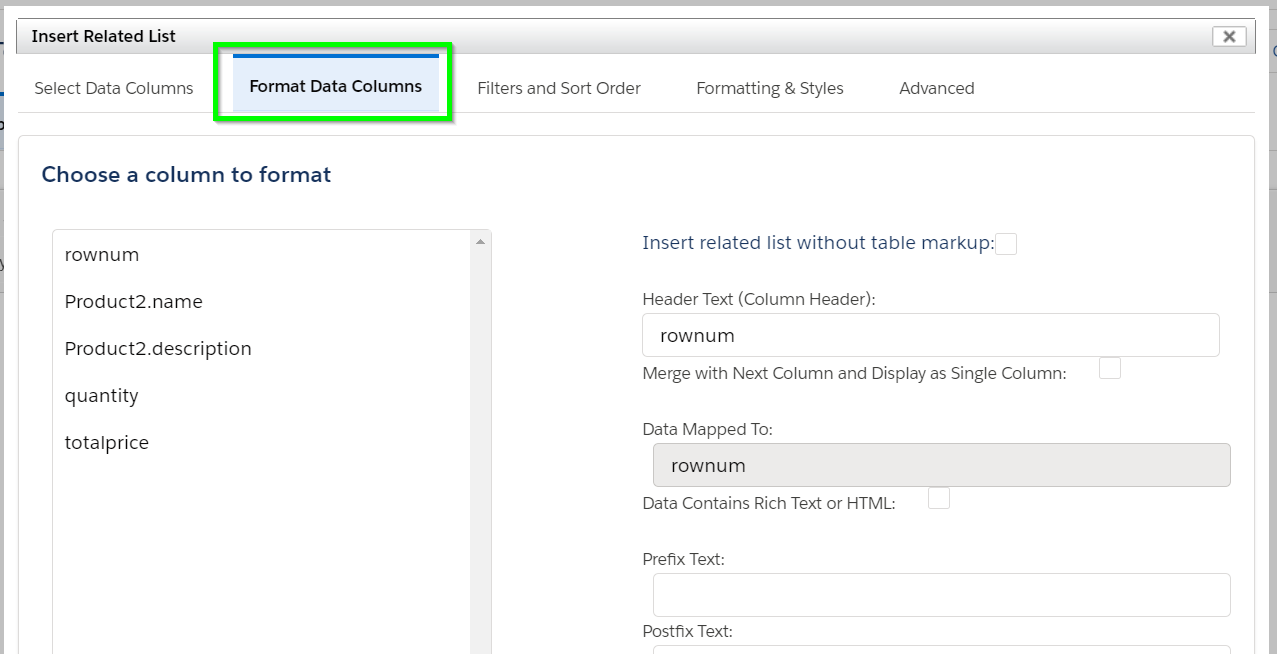
After choosing the following fields, our related list columns would appear as follows:

This simple related list would output a numbered list of products related to this Opportunity, including product names, descriptions, quantities, and total prices.

Format Table Columns

After selecting all the columns you’d like to have in your related list, open the Format Data Columns tab.

Here, you can edit how each column will appear. By default, the current columns would be named “rownum,” “name,” "description," "quantity," and "totalprice." You can change these names under Header Text (Column Header). The other fields offer useful formatting options for each entry under the selected column. For the “totalprice” column in our example, we set the prefix text to “$” and the format number to #,###.## so that price entries will be formatted as currency.

Additional Table Formatting & Styles

After formatting your columns, click Formatting & Styles to apply even more formatting to your table. You can change the table style as a whole as well as change the formatting of the text in each individual column.

Filter & Change Row Order

You can also filter out rows and change the order in which the rows are sorted using SOQL and filter logic by accessing the Filters and Sort Order tab. Examples of filter logic are included under the description for each field in this tab: for example, using “Quantity > 1” in the first field would make our table only output products that have a quantity greater than 1. The other two fields allow us to limit the number of rows created in our table, and to sort our rows by filter logic or SOQL ORDER BY clauses.

Edit Source Code

Finally, view the Advanced tab to see the source code generated for the table you have been creating. You may edit the source here before inserting the table if you wish to fine tune your table’s qualities (you can also edit your related list in the template editor's source mode after inserting your related list). You can edit the CSS here in order to fine-tune the formatting of your table (e.g. border-width, font-size, the background color of even rows, etc.). If you'd like more control over your related list's layout, you can customize your related list code; extensive documentation on this can be found here.

Insert Your Related List

Click Insert to insert the table into your template.

Note that there is no data or fields present under the columns, as this is a template. The table will populate as expected upon document generation. If you wish to edit your table after insertion (such as adding and deleting certain fields it uses as columns), you can click Insert Related List again and select your related list under the Edit a Previous Related List section.

You may also edit it in the source editor. That's it! You are now ready to use related lists in your templates.

The S-Docs Template Editor

By Developer's Guide, Documentation No Comments
Note: The Insert Related List and Insert RENDER buttons are explained in separate articles.

Introduction

This document will explain how to use & navigate through the S-Docs template editor, including all of the buttons and tabs. The S-Docs template editor provides a powerful interface for creating attractive, data-driven documents. S-Docs templates are written in HTML, and the template editor provides two options for editing: a WYSIWYG editor (What You See Is What You Get) and an HTML Source editor. Changes made in one editor will be reflected in the other editor. For example, if you make text bold in the WYSIWYG editor, the text will be enclosed in <strong> tags in the source editor. Likewise, enclosing text in the source editor in <strong> tags would lead to bold text being displayed in the WYSIWYG editor.

Template Editor Tabs

Click a tab name to scroll down to its explanation.
Template Body
Header & Footer
Page Settings
Document Options
Email Settings
Auto Create Task
Runtime Prompts
Advanced Options

The Template Body Tab

This is the template body tab of the S-Docs template editor:

Click a number below to scroll down to its explanation.

1    |    2    |    3    |    4    |    5    |    6    |    7    |    8    |    9    |    10    |    11    |    12    |    13    |    14    |    15         16    |    17

An S-Doc template has a header, footer, and body, much like an MS Word document. Opening the template body tab reveals an editor for your template. Below are explanations of the components of this template editor. Note that you can hover over every button in the toolbar of the template editor for a very short description of that button’s function.

1) This is the WYSIWYG editor: the large, blank white area in the above image that looks similar to a blank Word document. WYSIWYG is an acronym for What You See Is What You Get, which perfectly describes the nature of this editor; you can create a template from scratch in this editor and when you generate the document down the road, it should appear the same as the content appears here. Use the tools in the toolbar to edit the content in this editor. [Back to Top]

2) The Source button switches from the WYSIWYG editor to the source editor, allowing you to edit the HTML and CSS that represents your template. Note that you cannot use any of the buttons in the toolbar in the source editor; they are reserved for use in the WYSIWYG editor. When you make changes in the WYSIWYG editor, the background source updates automatically to reflect those changes. While simple and intuitive, the WYSIWYG editor does not support the same level of template customization that the source editor does. Below is an example of a template in the WYSIWYG editor:
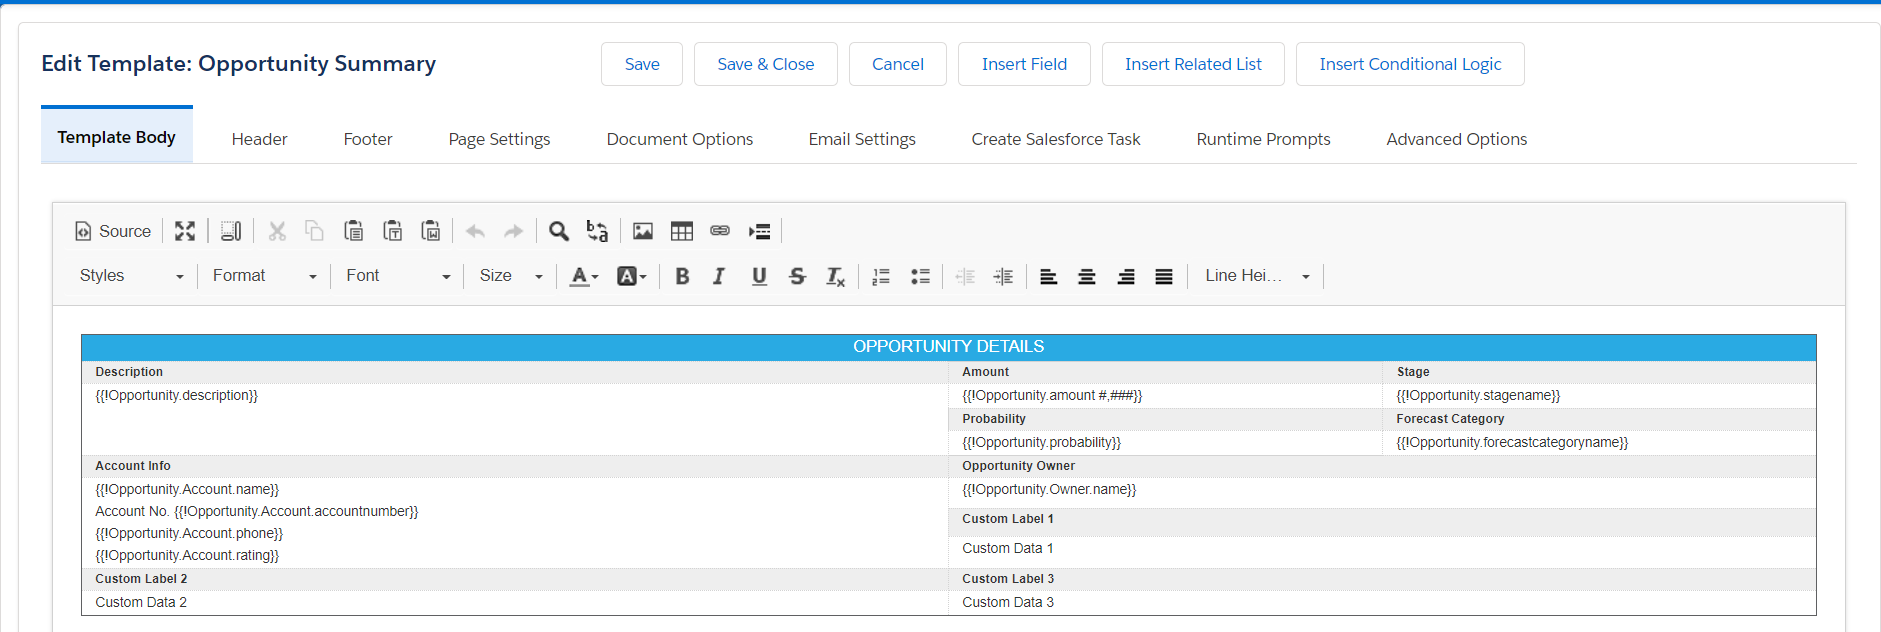
Here is that same template in the source editor:

[Back to Top]

3) This is the Maximize button. Clicking it will hide the tabs and buttons, and expand the WYSIWYG editor itself. [Back to Top]

4) This is the Show Blocks button. Clicking it will display the types of HTML tags that content is displayed in. In the following example, the information is between stored in <div> tags. Here it is first with Show Blocks turned off:
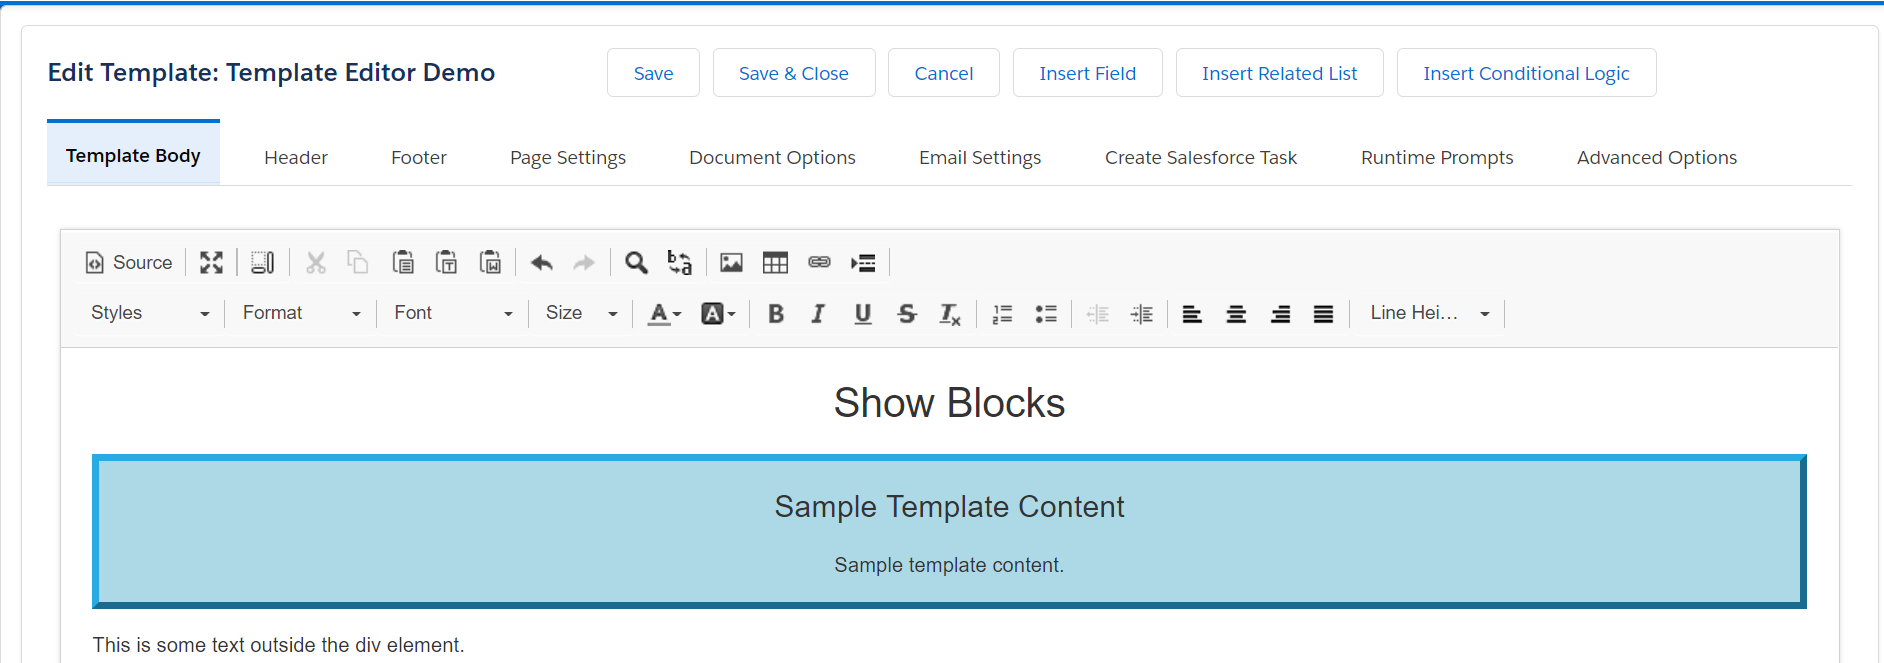
And here it is with Show Blocks turned on, exposing the DIVs:
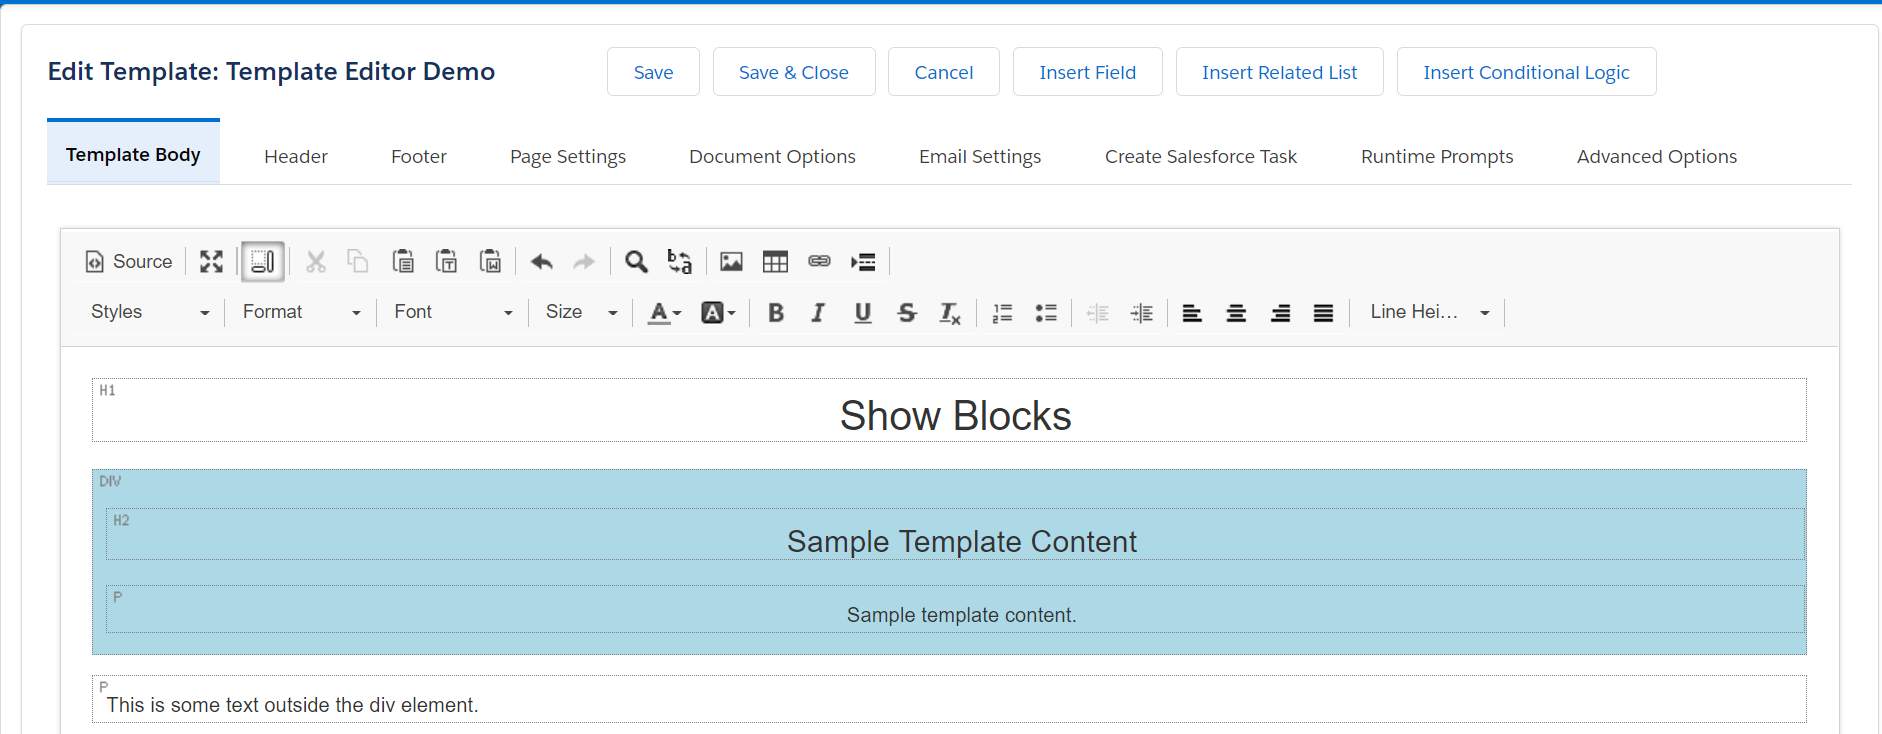
[Back to Top]

5) These buttons are for Cutting, Copying, and Pasting, respectively. There are three different kinds of pastes: Paste simply pastes whatever is copied to the clipboard, Paste as plain text pastes plain text with the formatting and images of the original source removed, and Paste from Word will accurately paste content copied from MS Word. Note that there are a few considerations to take into account when using Paste from Word; click here to read more about this option. [Back to Top]

6) These are the Undo and Redo tools. Use them to undo or redo previous actions. [Back to Top]

7) These are the Find and Replace tools. Use Find to find words within your editor, and use Replace to replace all occurrences of a certain word/string with a different word/string. [Back to Top]
8) These are the Insert tools. Use them to insert images, tables, hyperlinks, and page breaks, respectively. [Back to Top]

9) This is the Styles menu. You can select text in your document and then select a style from the Styles menu to apply that style to the selected text. [Back to Top]
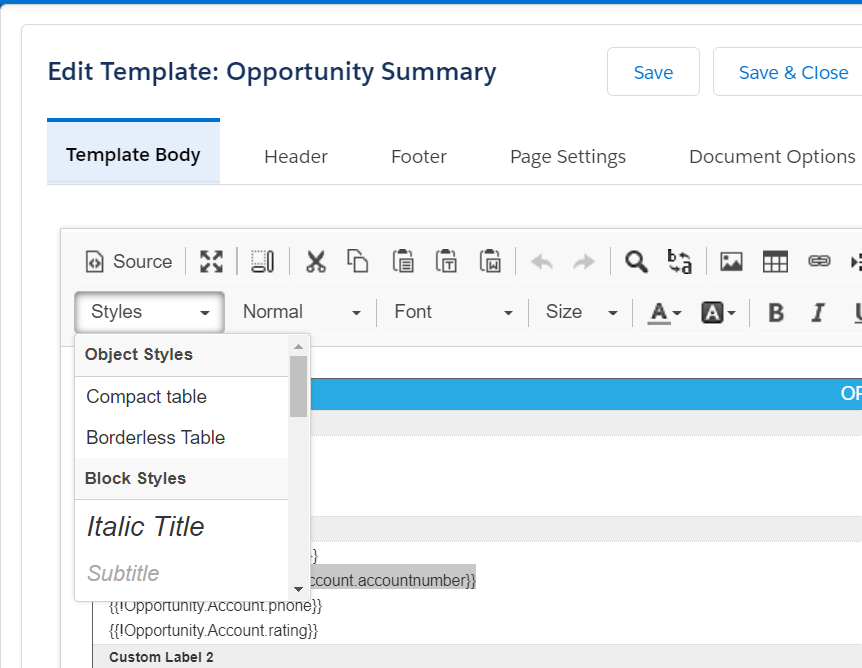
10) This is the Format menu. You can select text in your document and then select a style from the Format menu to apply that format to the selected text. [Back to Top]
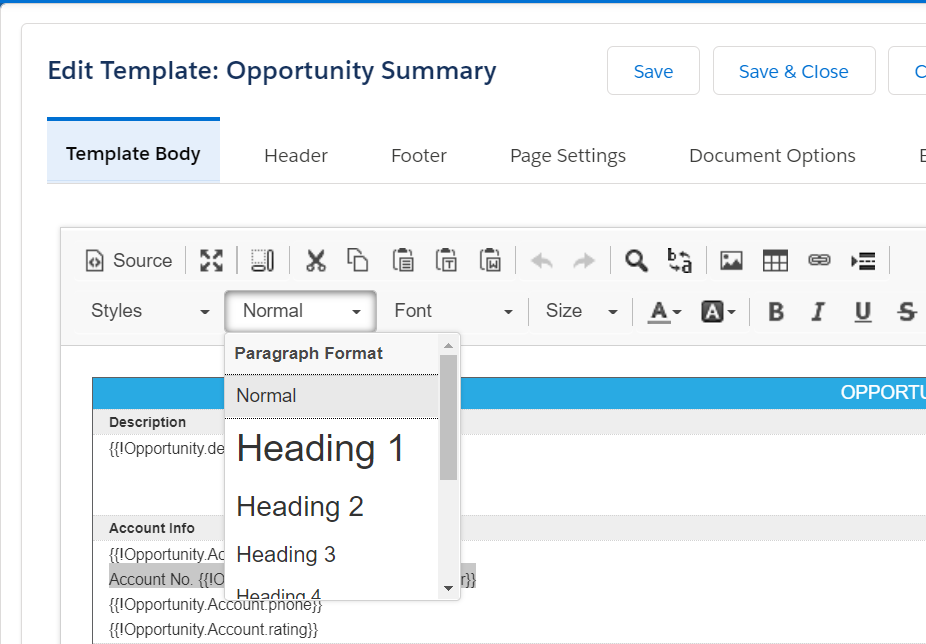
11) This is the Font menu. Use it to change the font of selected text. [Back to Top]

12) This is the Size menu. Use it to change the size of selected text. [Back to Top]

13) These are the Font Color controls. Use them to to change text color and text background color. [Back to Top]
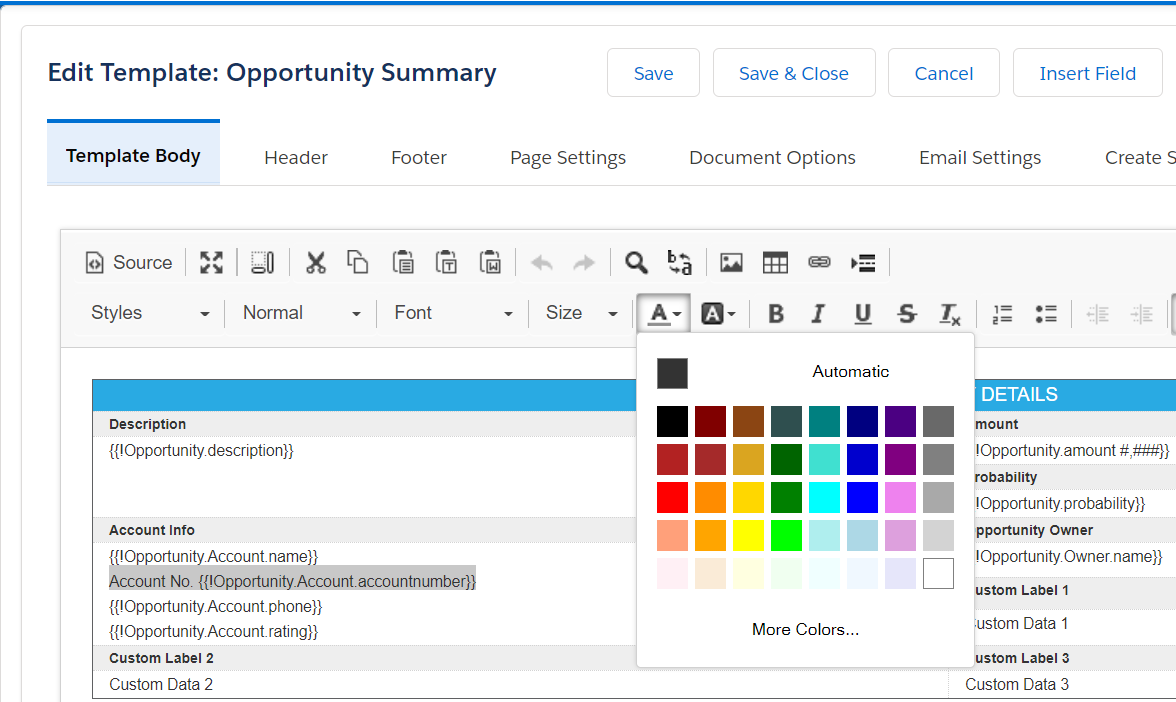
14) These are Text Formatting tools. Use them to make text bold, italic, underlined, stricken-through, or to remove all formatting of the selected text. [Back to Top]

15) These are List tools. Use them to create ordered or unordered lists, and to increase or decrease the indentation of these lists. [Back to Top]

16) These are Alignment tools. Use them to change the alignment of text on the page. [Back to Top]

17) This is the Line Height menu. You can use it to select the amount of spacing between a specific line. [Back to Top]

The HTML code in the source editor will automatically update at every change made to reflect the changes made in the WYSIWYG editor using the tools listed above.

The Header and Footer Tabs

The Header tab and the Footer tab are identical, with the obvious exception that the header tab can be used to add headers to your template and the footer tab can be used to add footers to your template. Here is the header tab:
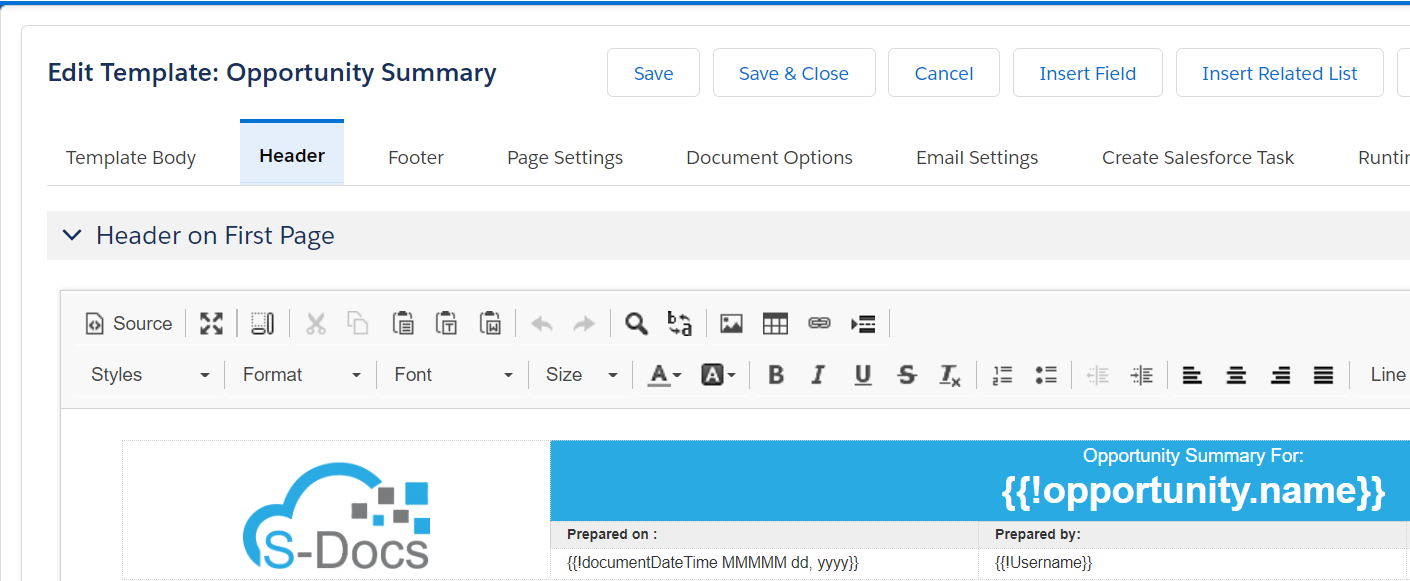
Opening Header on First Page or Header on Remaining Pages will reveal the same editor discussed above in The Template Body Tab. You can use it to design your template header/footer in the exact same way that you design your template body. If you would like to have the same header/footer on every page, design your header/footer in the Header/Footer on First Page editor, and make sure the Use First Page Header/Footer for All Pages checkbox under Header/Footer on Remaining Pages is checked.
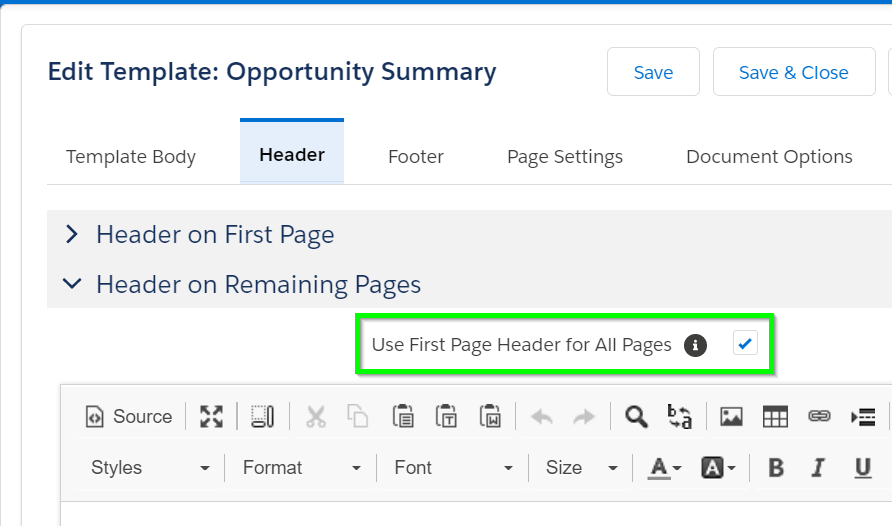
If you would like the first page to have its own header/footer, and for all remaining pages to share a different header/footer, uncheck this box and edit the header/footer for the first page in the Header/Footer on First Page tab, and edit the header/footer for all remaining pages in the Header/Footer on Remaining Pages tab.

The Page Settings Tab

The page settings tab contains controls for the width, height, and margins of the page. You can select inches, centimeters, or pixels as your unit of measurement and adjust the dimensions of the page and margins as you wish. Standard portrait and landscape options are provided for you in the Page Layout field; choosing either of these options will lock the Page Width and Page Height fields. You can select Custom instead to edit each field yourself.
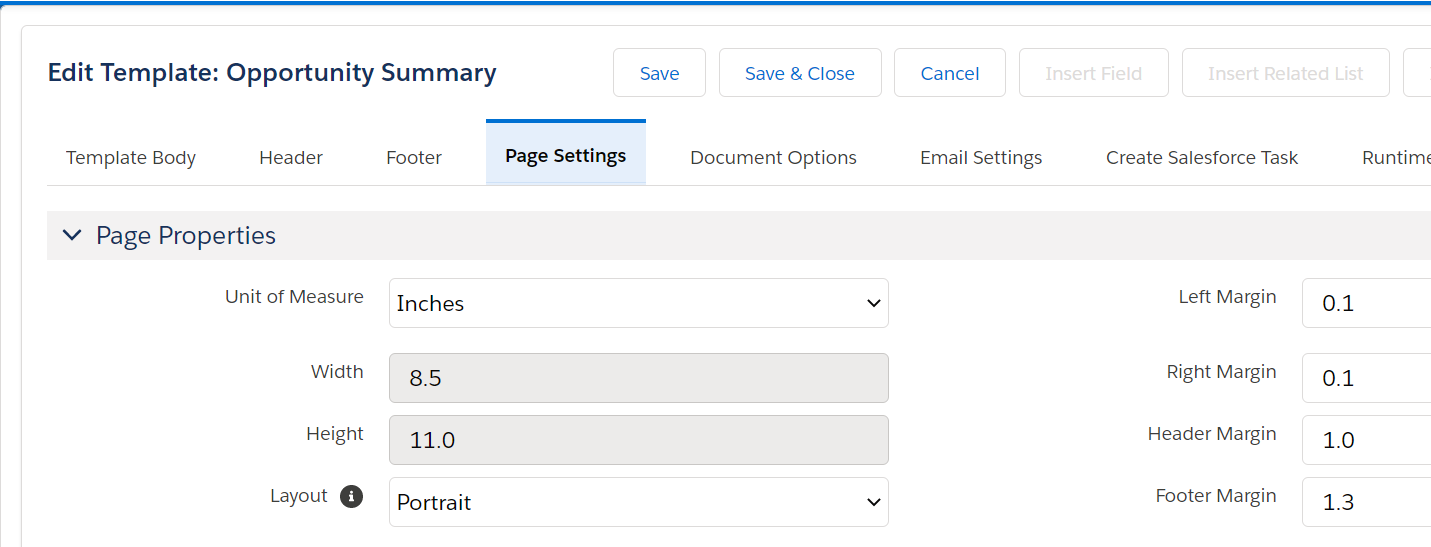
The Document Options Tab

The Document Options tab contains four sections: Attachment & File Name Options, Attachment & File Options, Mass Merge Options, and Other Options.

Note: The Mass Merge Options will only appear if you have configured the S-Docs Mass Merge feature in your org.

Attachment & File Name Options:
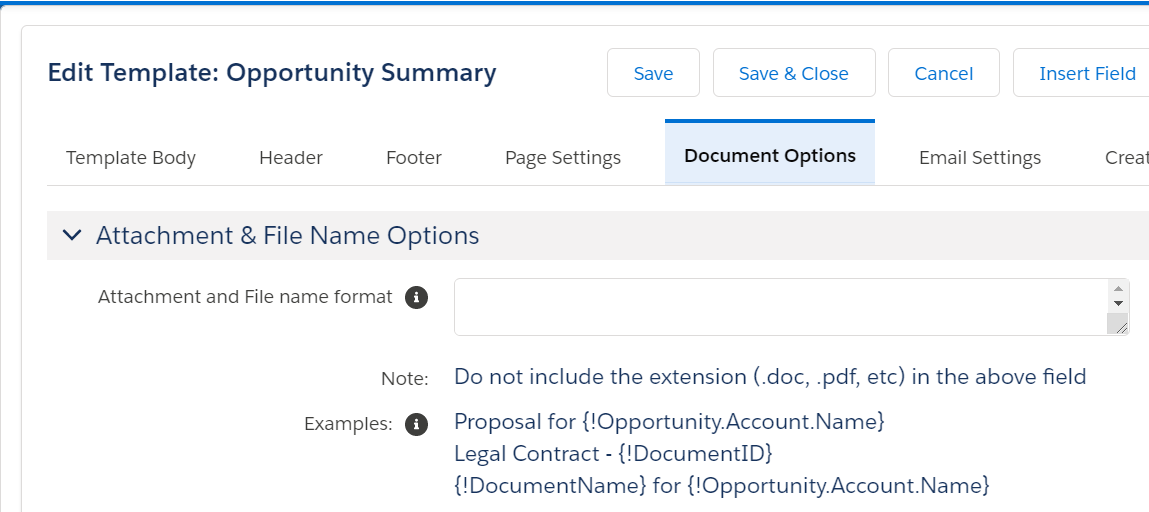
By default, generated S-Docs are named something like SD-0001.pdf. In this field, you can change the name of generated S-Docs to whatever you’d like. You can use static text or merge fields. For example, setting “Proposal For {!Opportunity.Account.Name}” as the output file format would result in the generated S-Doc being Proposal For John Smith.pdf rather than the default SD-0019.pdf. Note that merge fields must use single braces as opposed to double.

Attachment & File Options

1 & 2: Here, you can choose to automatically create a Salesforce Attachment or Salesforce File that will show up in your base record's Files or Notes & Attachments related list each time a document is generated with this template.

3. This option will cause a new Salesforce Attachment to be created only if the document is emailed.

4. If you have opted to create a Salesforce Attachment or File each time this template is generated, the default behavior is to delete these related Attachments or Files whenever the corresponding S-Doc record is deleted. This is a clean-up measure. You can uncheck this box if you want to preserve all Attachments or Files regardless of linked record deletes.

5. This enables the Live Edit feature. When checked, end users will be able to edit this document in their browser after it is generated.

6. If the Live Edit feature is enabled, you can check this box so that users can rename new Salesforce Attachments that are created each time a user edits the generated document. This option only applies if checkbox #7 is checked.

7. If the Live Edit feature is enabled, you can check this box so that new attachments are automatically created each time a user edits the generated document.

Mass Merge Options:

Note: These options will only appear if you have configured the S-Docs Mass Merge feature in your org.
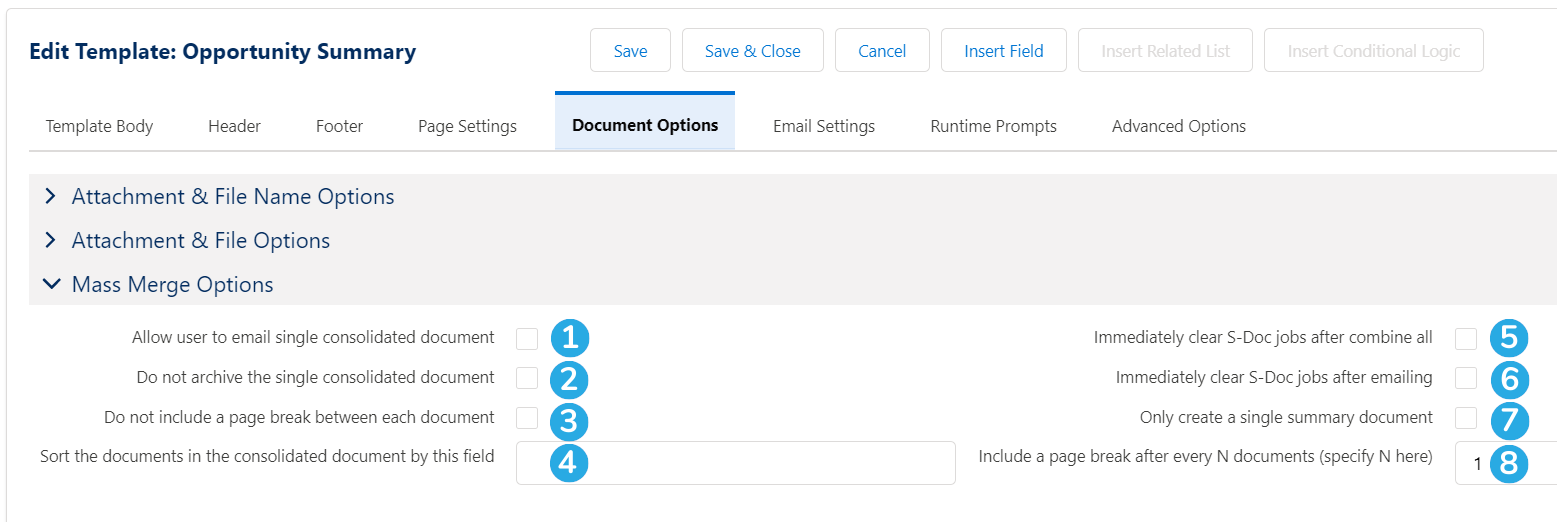
1. Checking this box will bring up the email page after the mass merge is finished and allow the user to email the consolidated document.

2. When a mass merge is created, a copy of the combined document will be saved in the Salesforce Documents folder. Checking this box will stop this from happening.

3. Choose to not create page breaks between documents during mass merge.

4. You can enter fields that you want documents to be sorted by in the mass merge and indicate the sort direction. Don't include the base object in this field; if you want to sort by {{!Opportunity.name}}, for example, you would just write "name asc" instead of "Opportunity.name."

  • To sort by a number field, specify asc/desc and add the "num" indicator. Example: "amount desc num"
  • To add multiple fields, separate them with commas.
  • Pro Tip: Use the Insert Field tool to make sure the field(s) after the base object is correct

5. An S-Doc Job is created for each record included in a mass merge. Checking this box will clear the S-Doc Jobs after the user clicks Combine all into single printable document. This keeps the system clean, but is not required.

6. An S-Doc Job is created for each record included in a mass merge. Checking this box will clear the S-Doc Jobs after the user clicks Send Email from the mass merge page. This keeps the system clean, but is not required.

7. Create a single summary doc in XML of all documents generated in the mass merge (XML format only)

8. You can create a page break after every n number of documents here. This is useful for things like receipts that are being printed.

Other Options:
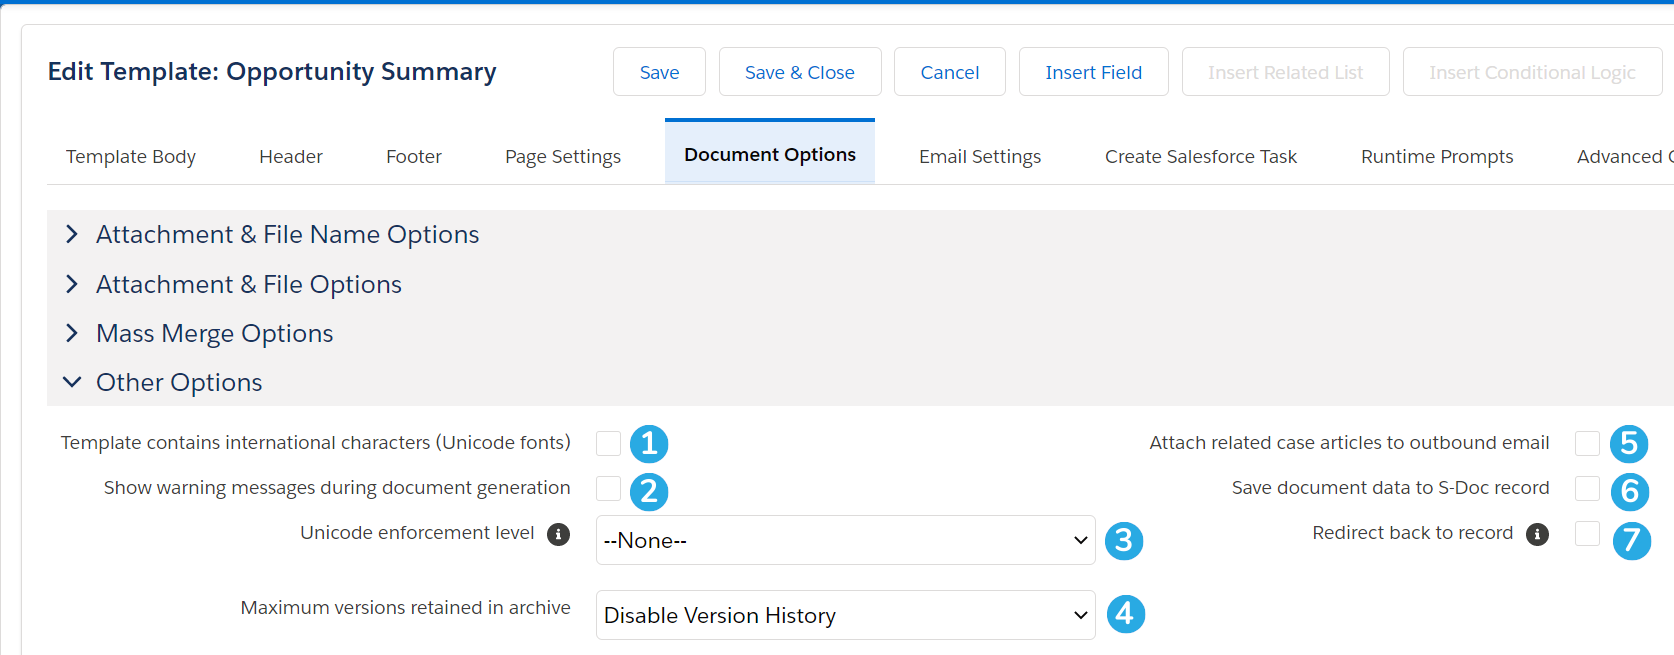
1. Check this box if your template contains international characters; otherwise, they may not display.

2. Show all warning messages during document generation. If unchecked, S-Docs will only display critical error messages.

3. If your international characters aren't displaying correctly even when you check checkbox #1, you can set the Unicode Enforcement Level to "Data” or "Strict" to ensure that they display properly.

4. You can set the amount of template versions that you want to save in the version history. A new version is created each time you click Save in the template editor. The version history can be viewed on the template detail page.

5. If you are creating a document for a case, checking this box will automatically pull articles from that case and attach it to the outbound email along with the document.

6. Checking this box will save all merge field data within the document to an S-Doc Record as an XML field. This is useful if you want to use the merge field data after document generation.

7. Checking this box will redirect the user back to the base record after they generate this template.

The Email Settings Tab

The email settings tab contains options for controlling the behavior when this template is emailed. There are four sections in this tab: Email Subject Settings, Email Recipient Settings, Email Sender Settings, and Other Email Settings.

Email Subject Settings
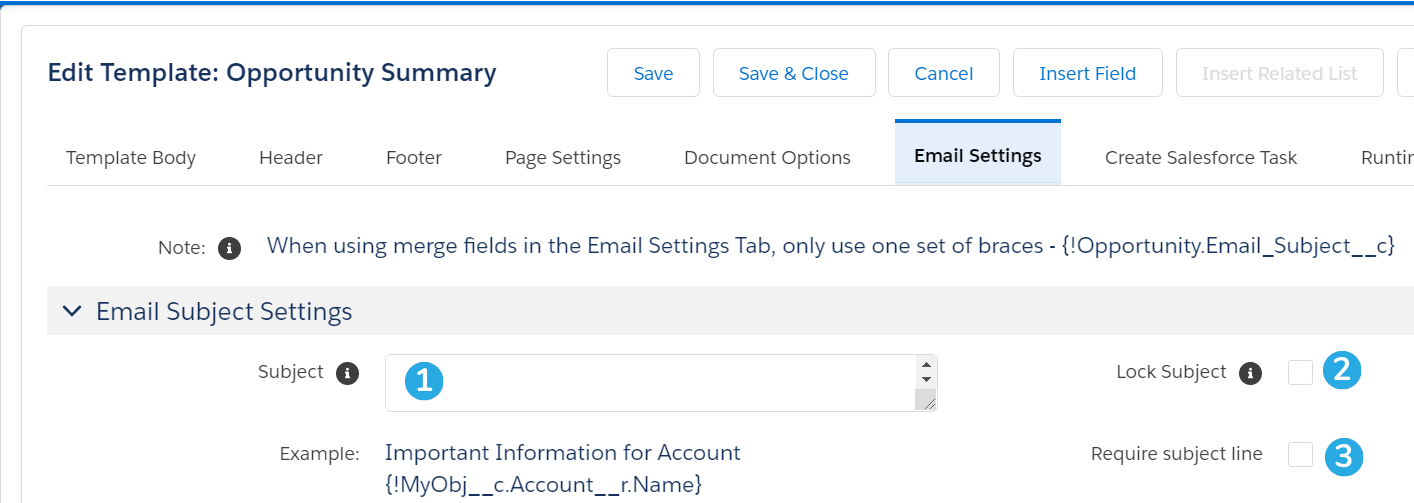
1. Optionally enter an email subject. You can use static text or merge fields (make sure to use single braces as opposed to double).

2. Check this box to lock the Subject field to the end-user. If you leave the Subject field blank when this box is checked, the entire Subject field will be hidden on the S-Docs email page.

3. Check this box to require end-users to enter an email subject before emailing this document.

Email Recipient Settings
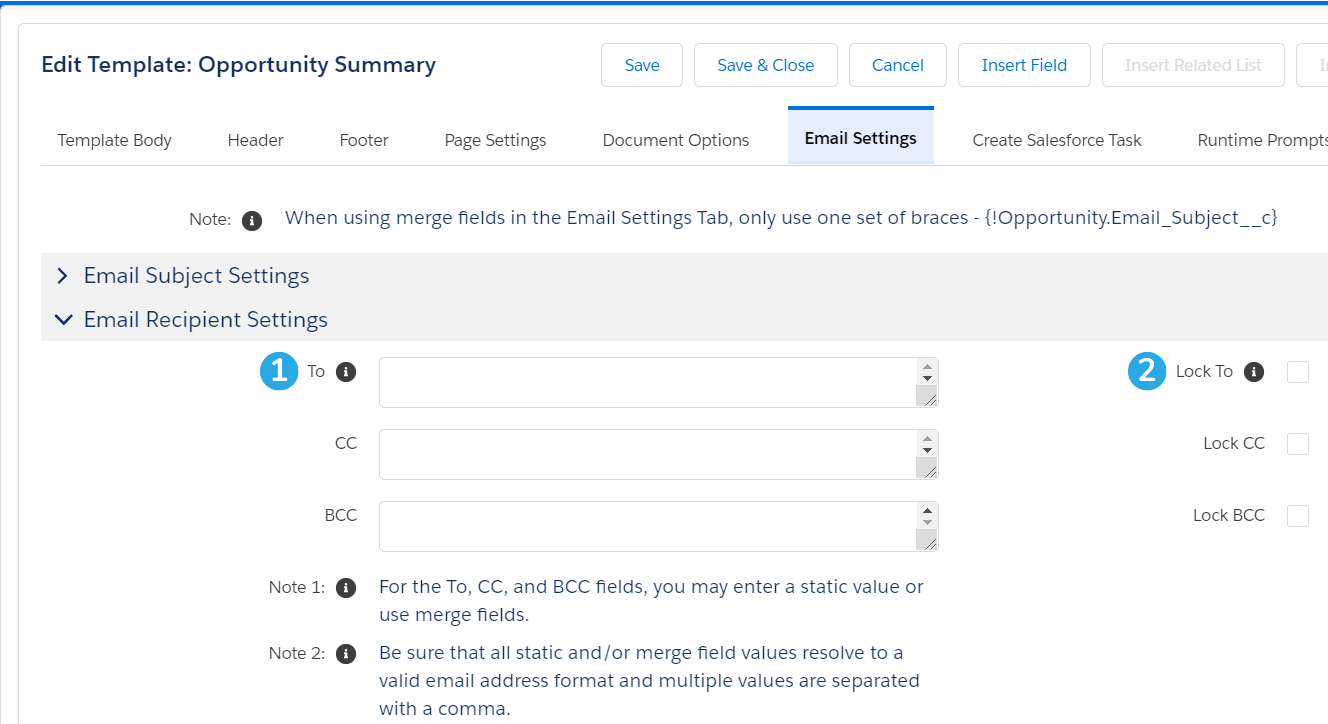
1. Optionally set the To, CC, or BCC email fields. You can use static text or merge fields (make sure to use single braces as opposed to double).

2. Lock the To, CC, or BCC fields so that end-users cannot edit them. Note that if you leave the To field blank when you lock it, this template will not be able to be emailed. If you leave the CC or BCC fields blank when you lock them, these fields will be hidden on the S-Docs email page.

Email Sender Settings
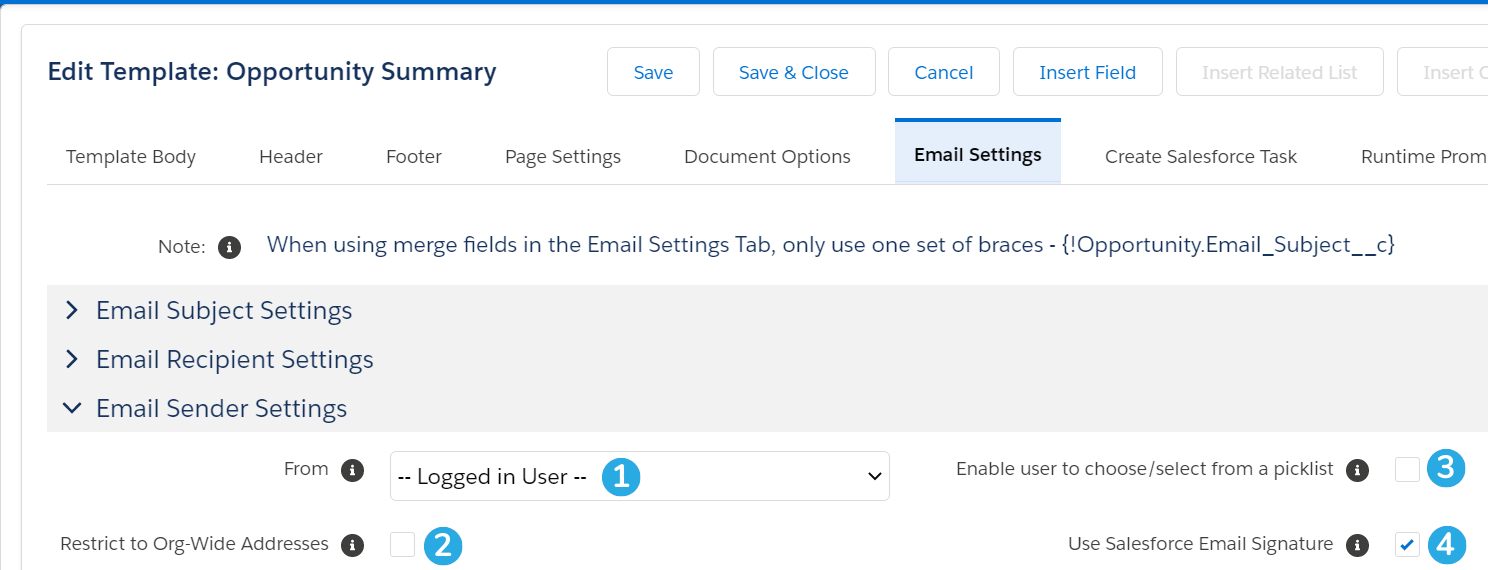
1. Choose to send this document from the email address of the logged in user, or from one of your Org-Wide email addresses.

2. Check this box to restrict the email From field to an org-wide email address. This prevents this document from being sent as the logged in user.

3. Check this box to allow the end-user to pick from a list of your Org-Wide email addresses to send this document from.

4. Check this box to allow users to use their Salesforce Email Signature in email body templates. You can insert the {{{!UserSignature}}} special merge field to reference the generating user's email signature once this box is checked.

Other Email Settings
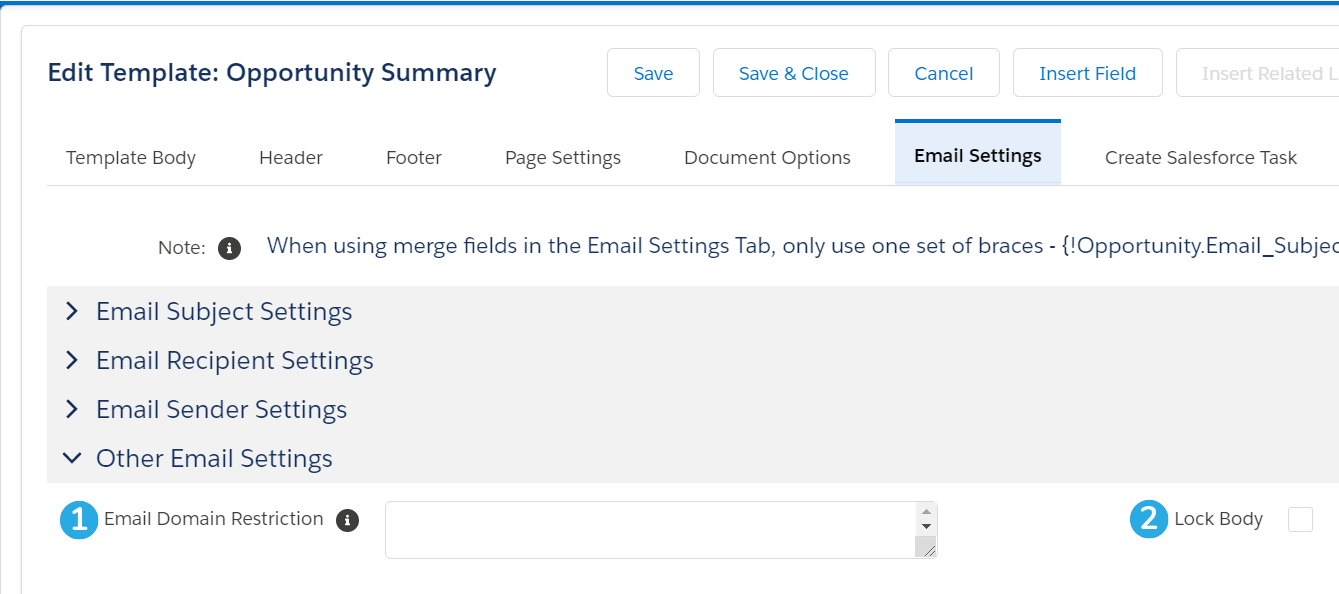
1. Enter a comma-delimited list of email domains to restrict users from emailing this document to anyone outside of those domains. Example: sdocs.com,trailhead.edu

2. Check this box to prevent the end-user from modifying the email body when sending this document.

The Create Salesforce Task Tab

The Create Salesforce Task tab can be used to configure your template to automatically generate a Salesforce task whenever a document is generated using that template. This tab is hidden by default; to enable it, navigate to the SDocsSettings Custom Settings record (Setup > Custom Settings > SDocsSettings > Manage > Edit). Check the Enable Create Salesforce Task Feature checkbox.
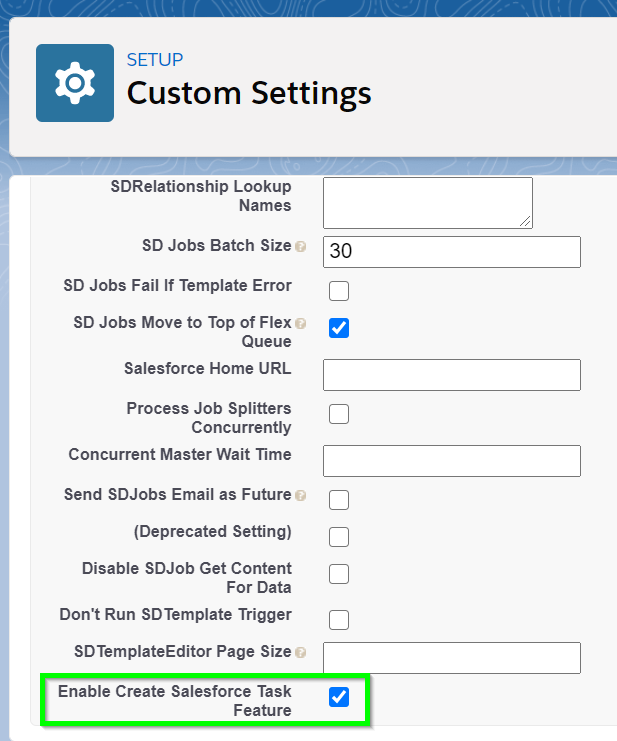
There are four sections in the Create Salesforce Task tab: Salesforce Task Settings, Salesforce Task Subject, Salesforce Task Status, and Salesforce Task Activity Date.

Salesforce Task Settings

1. Check this box to enable the Create Salesforce Task feature and automatically create a new Salesforce task whenever this template is generated.

2. Check this box to allow the user to choose whether or not a Salesforce Task should be created each time this template is generated.

3. Check this box to allow the user to edit the details of the Salesforce Task for this document before it's created.

Salesforce Task Subject
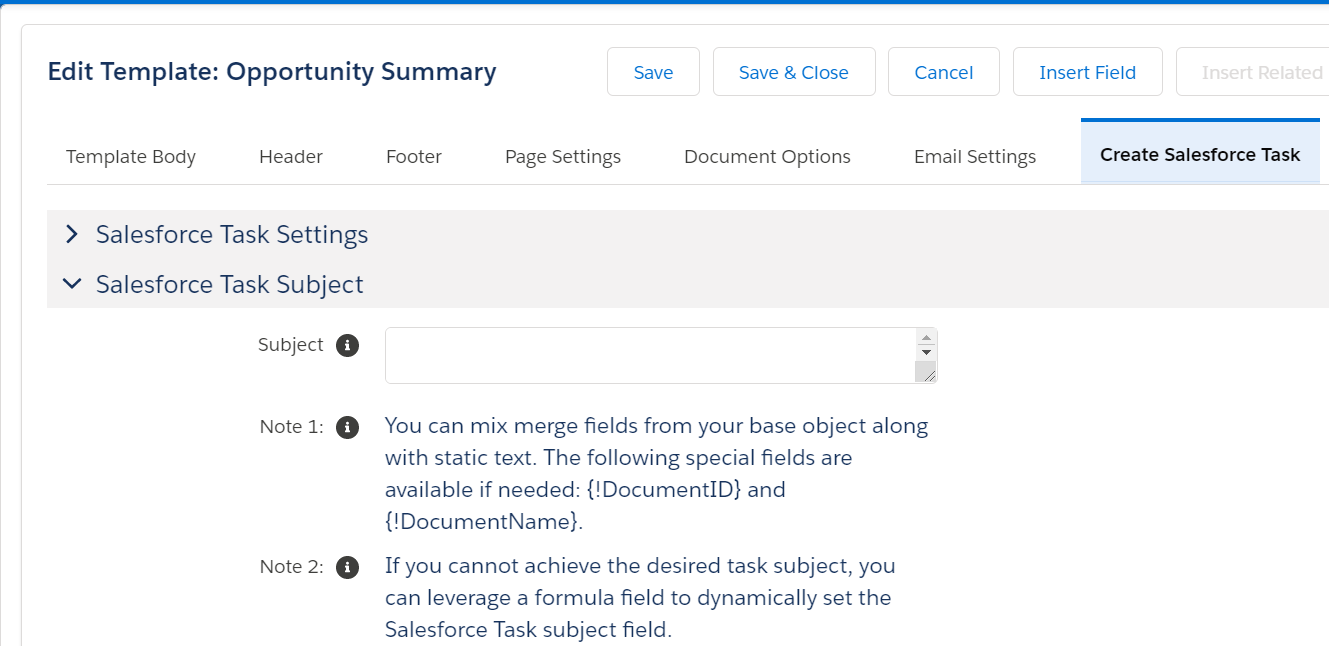
You can optionally enter a Salesforce Task subject here. You can use static text or merge fields (make sure to use single braces as opposed to double). If you do not enter a subject, it will default to "S-Doc Generated:Template_Name."

Salesforce Task Status
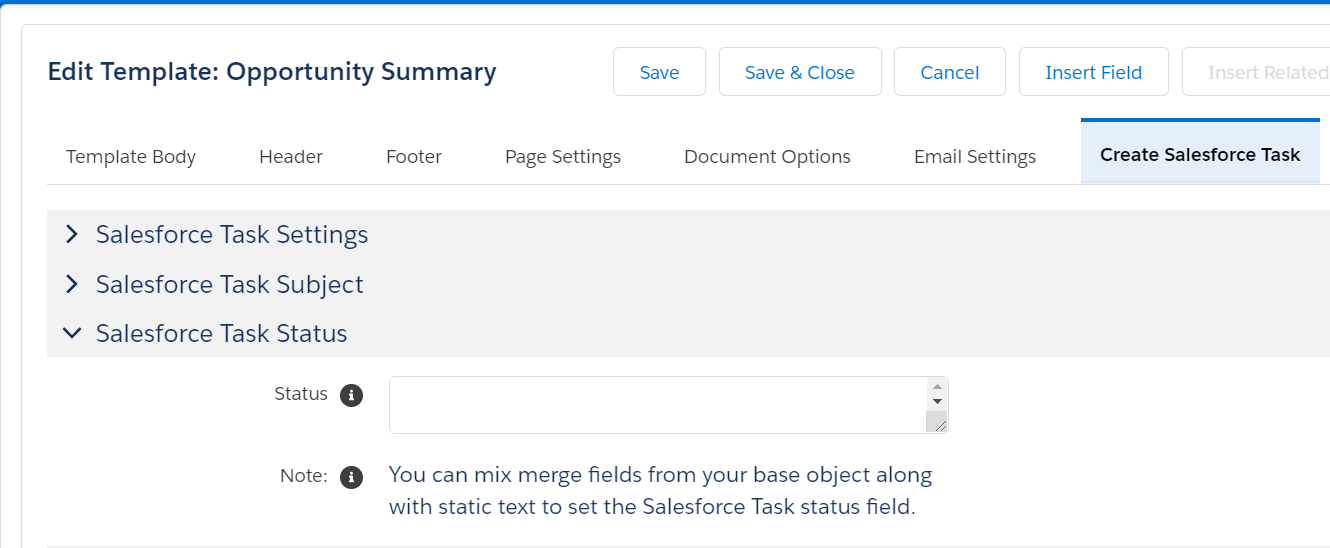
You can optionally enter a Salesforce Task status. You can use static text and merge fields (make sure to use single braces as opposed to double). If you do not enter a status, it will default to Completed and go directly to the Activity History list, as opposed to the Open Activities list.

Salesforce Task Activity Date
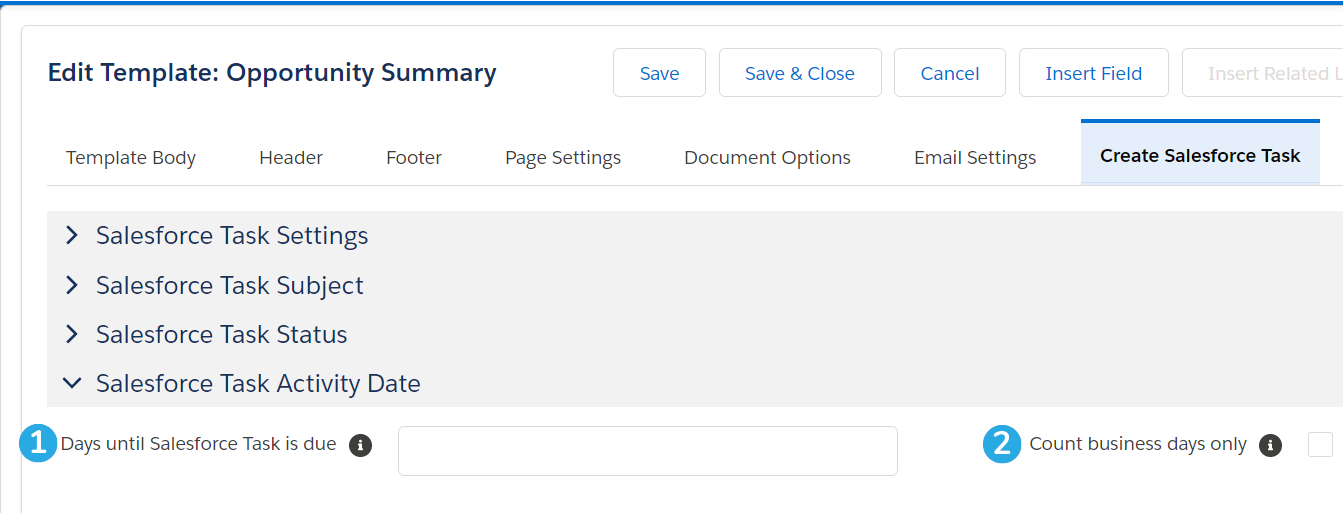
1. Optionally enter the number of days until this task is due. If this field is left blank, the due date will default to the date that the document is generated on.

2. Check this box to count only weekdays when calculating the task due date (weekends will be excluded, but holidays will be included).

The Runtime Prompts Tab

In this tab, you can create text, date, checkbox, or related list prompts for users to input information into during document generation. User input will then be merged into the document at runtime based on merge fields that you define. Click here for an in-depth explanation of runtime prompts.
The Advanced Options Tab

The Advanced Options tab contains three sections: Advanced Template Settings, Export Template, and Configure Contact Lookup.

Advanced Template Settings

1. The Enable S-Sign checkbox will open up the S-Sign e-signature panel, which allows you to add e-signature tags to your template (along with other types of input) and send the generated document for e-signature with our e-signature add-on product S-Sign. The checkbox will be disabled unless you've downloaded the trial or full version of S-Sign. For more information about installing and configuring S-Sign, click here.

2. The Preview ID field allows you to enter a Salesforce record ID, and then preview the final generated document using data from that record. When you enter an ID into this field, a Save & Preview button will appear at the top of the template editor. Clicking this button will Save your template and generate a preview document in a new tab.

Export Template
To move this template between orgs, you can click Generate to generate a string of importable template data that can be used to create a clone of this template in another org. Click here to learn more about exporting individual templates. Click here to learn more about exporting large numbers of templates.

Configure Contact Lookup
Templates with a Related To Type of Opportunity or Account can contain a number of special contact merge fields. When these fields are included in a template, the user will be able to select contact records during the document generation process that should be merged into the document. This list includes contact records related to the base record that the template is generated from; however, [1] the Additional Contact Roles for Lookup list in this section allows you to choose additional objects for S-Docs to query for contact records. Any records found will be added to the contact selection picklist.

[2] If you would like to limit which contacts show up in this list, you can input a WHERE clause (omitting the WHERE) that dictates which contacts should appear in this list. Note that this query will affect the contact picker for special contact merge fields and the S-Docs Email page.

Note: This section only appears for templates with a Related To Type of Opportunity or Account.

Template Editor Buttons

These are the Template Editor buttons. Click a number to scroll down or be redirected to its explanation.

1    |    2    |    3    |    4    |

1. Save, Save & Close, Cancel

Save saves your work. Save and Close saves you work and takes you back to the template detail page. Cancel removes all edits made after the last save and take you back to the template detail page.

2. Insert Field

Clicking this button will bring up the Insert Field menu.

Object Fields
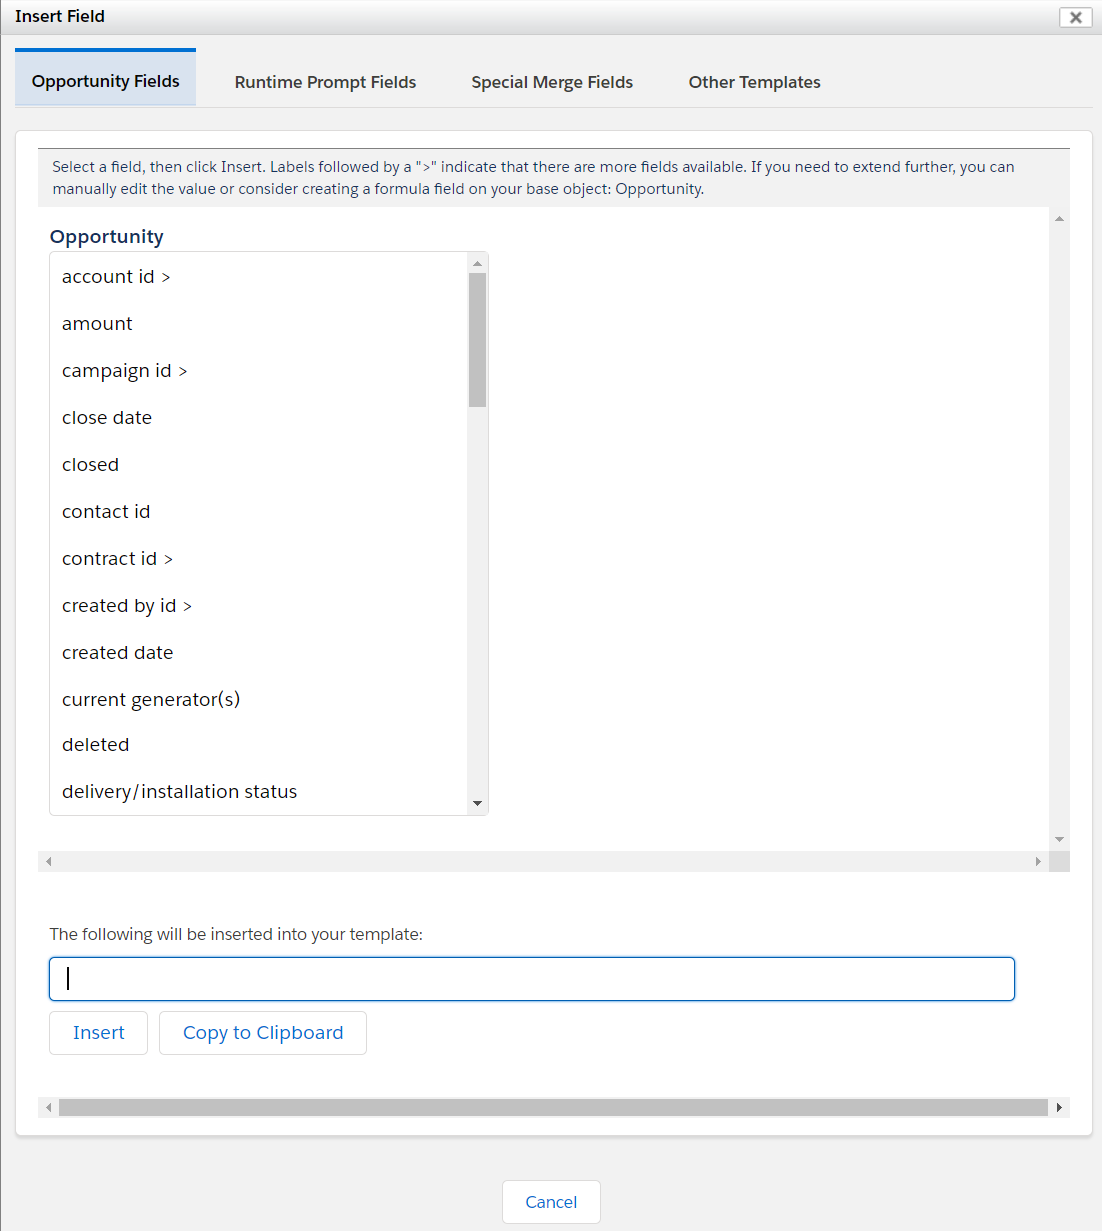
The first tab of this menu contains all of the fields from the template's base object (which was set when the template was created) that are available to the user who is editing the template. If certain fields are restricted from the user, they will not show up here. Since our example template's base object is Opportunity, we see opportunity fields.
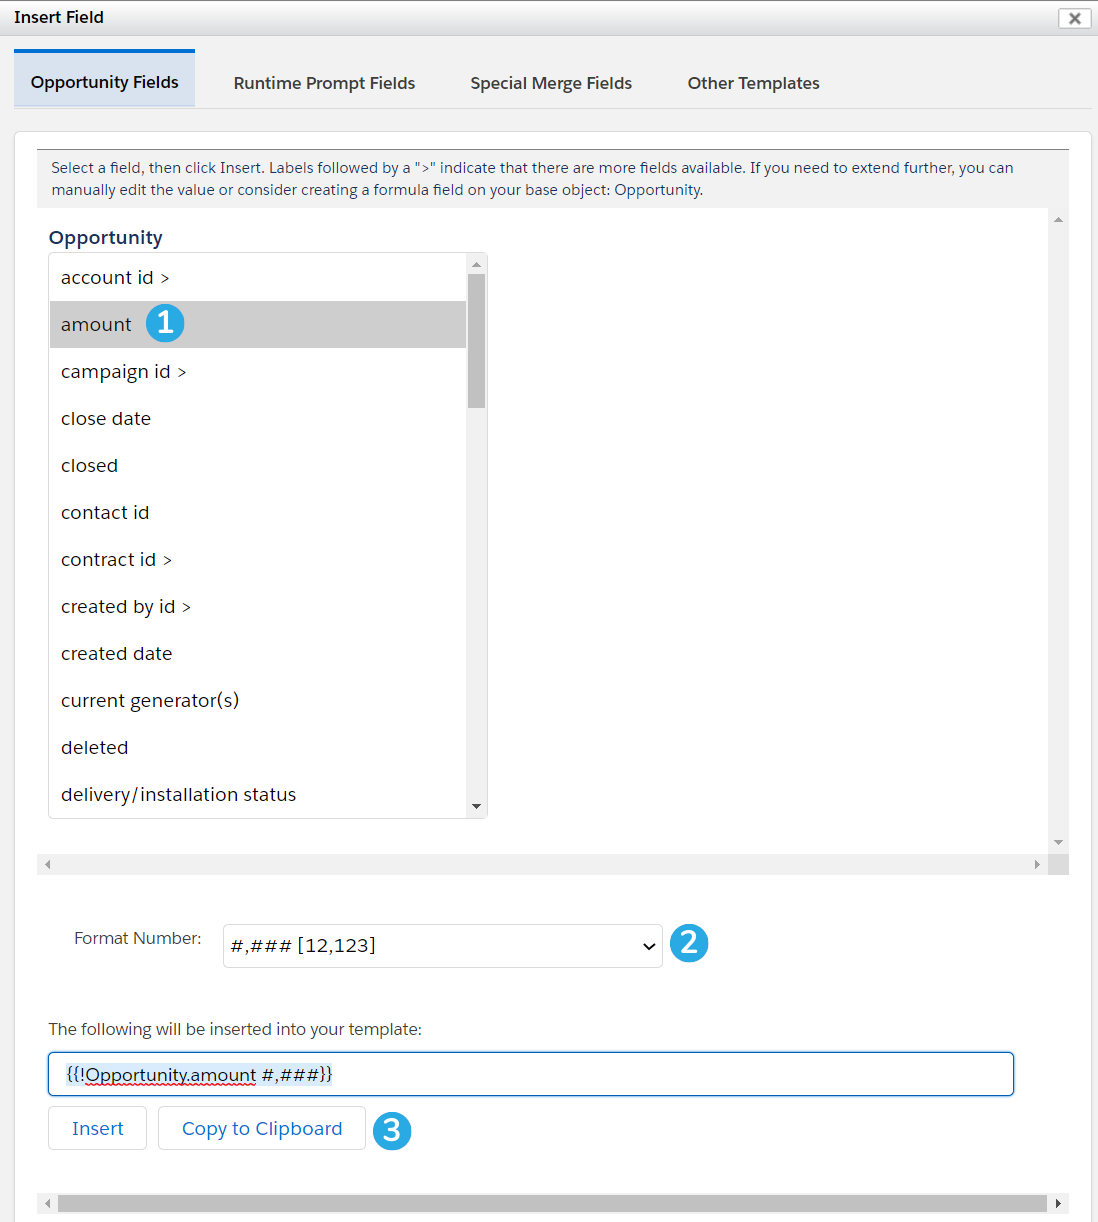
1. Select a field from the list.

2. If your field requires formatting (such as number or date fields), you can select how you want the data to display using the picklist below the field menu.

3. You can click Insert to insert the merge field wherever your cursor last was in the template editor, or click Copy to Clipboard to copy the field and paste it yourself.

The Insert button will only work in the Template Body tab; if you are working in the Source of the Template Editor, for example, or you want to insert a field into a Header, you will need to copy and paste it manually.

If a field name has a > symbol at the end of it, that means that it's a lookup field for another object. Clicking it will bring up all available fields for that object. You can click lookup fields in that object as well, but you are limited to 5 layers.
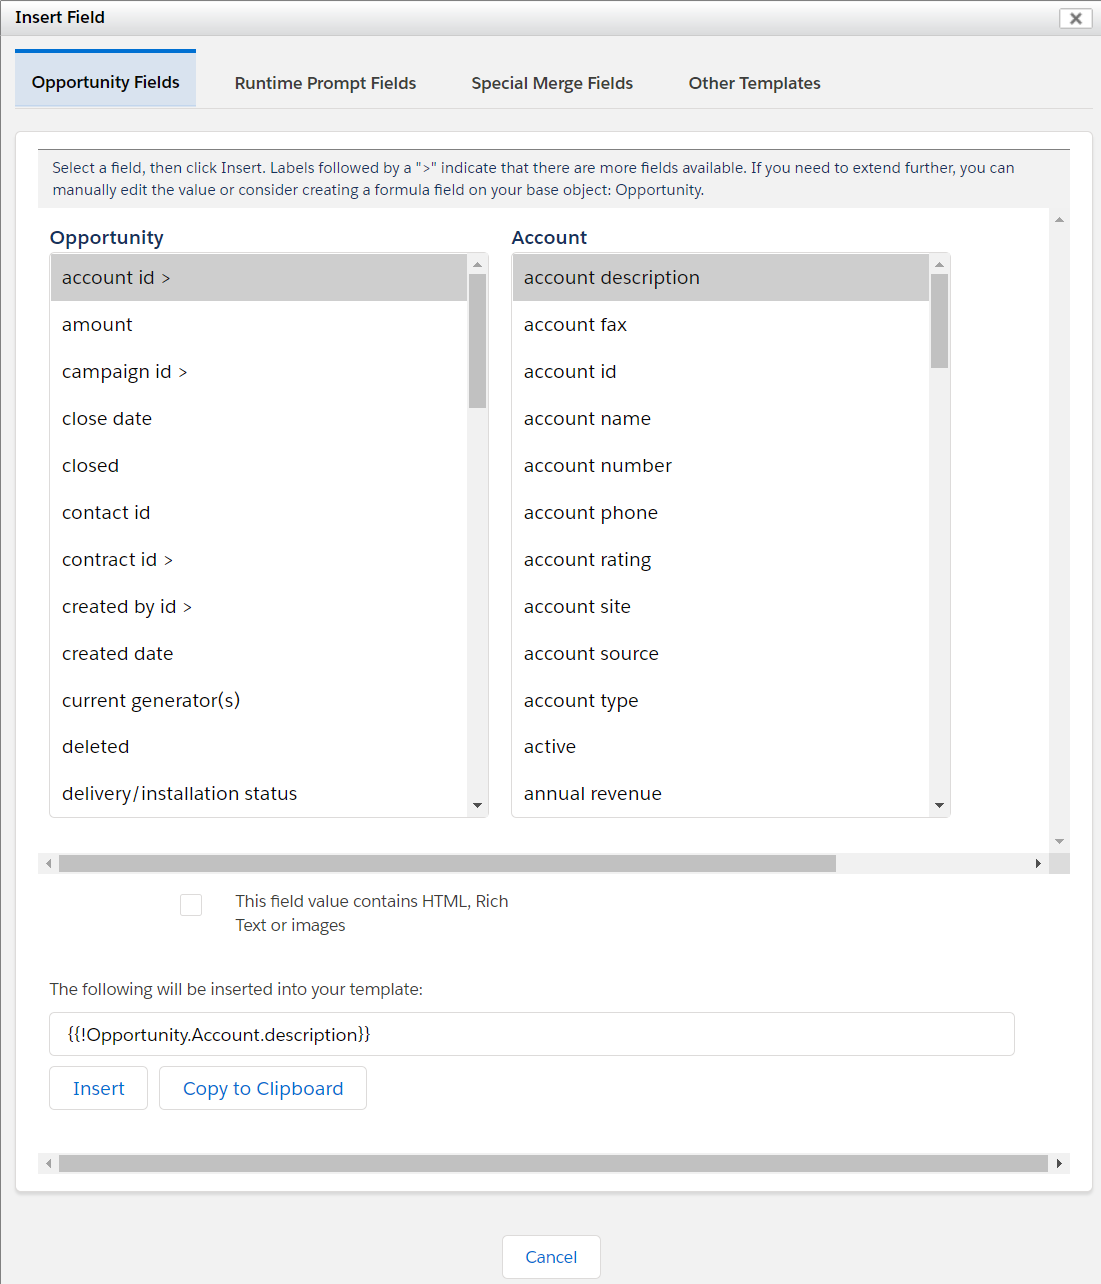
Runtime Prompts Fields

The Runtime Prompt Fields tab will show any runtime prompts that you have defined, and allow you to insert them.
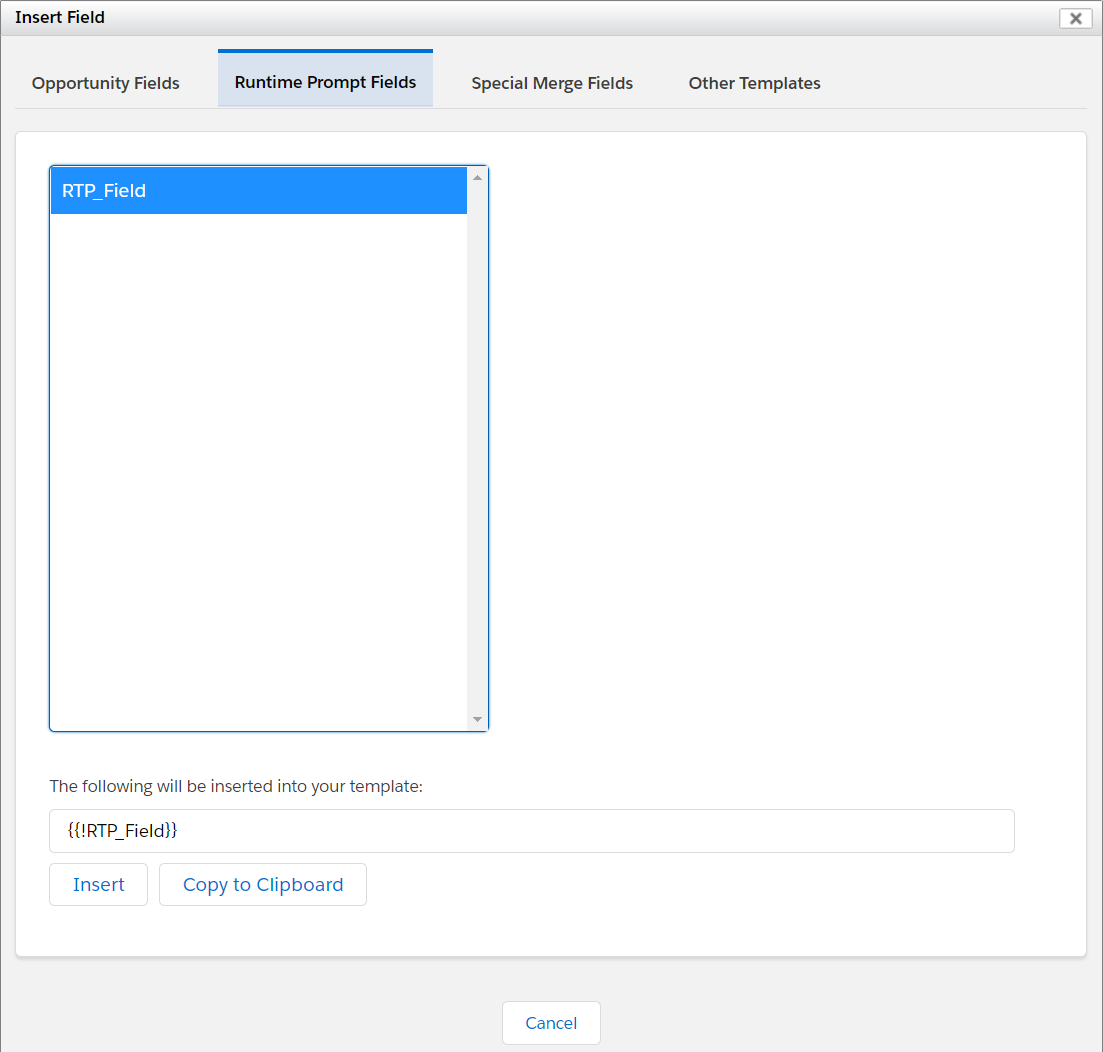
Special Merge Fields

The Special Merge Fields tab shows fields that S-Docs has defined. To view an explanation of each special merge field, click here.
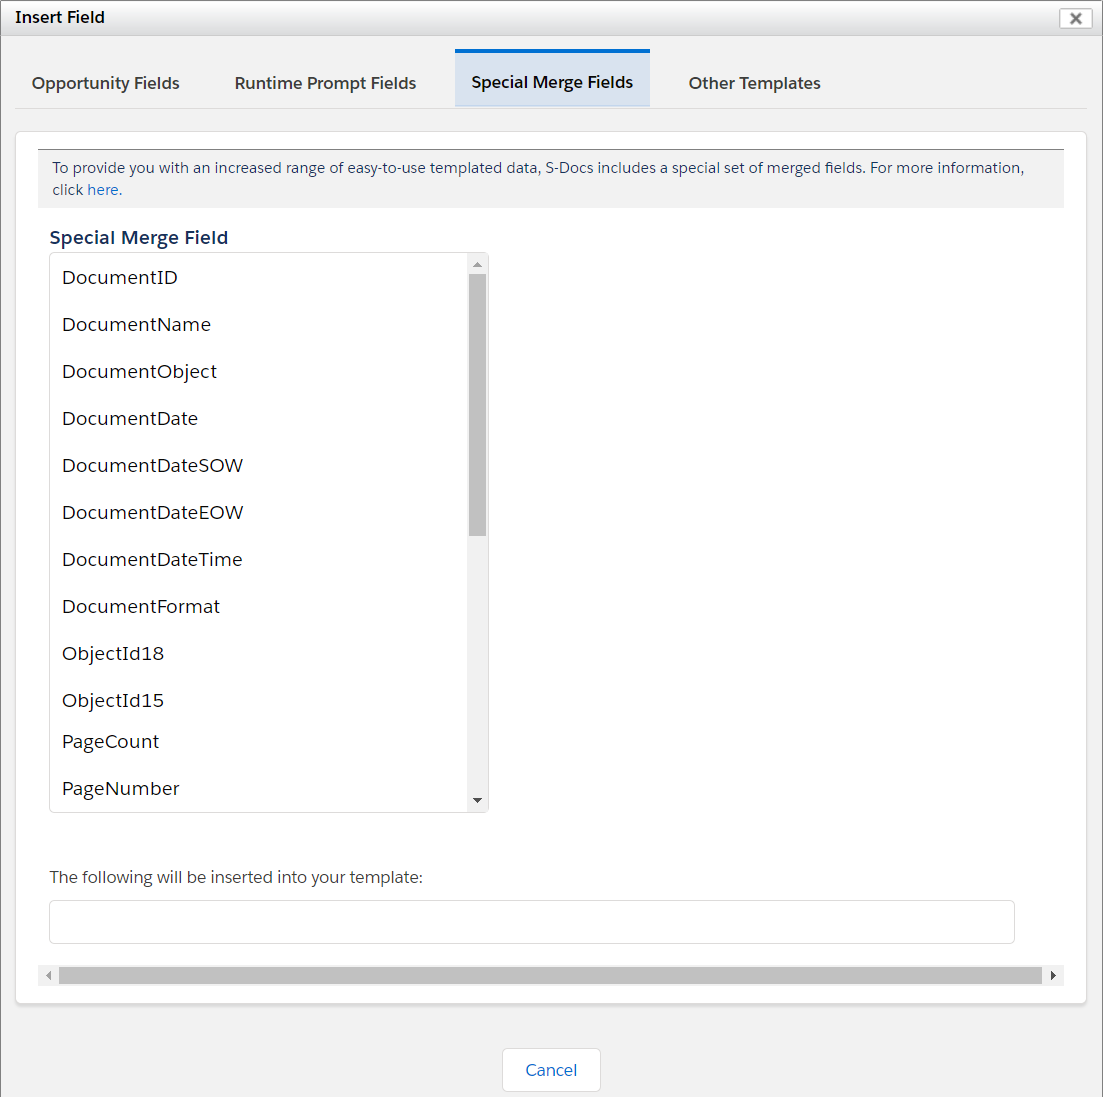
The Other Templates tab will allow you to easily insert one template into another as a merge field. These are called component templates. All available component templates will be listed under this tab in the following format: [Object] Template Name. To learn how to configure templates to be used as merge fields in other templates, click here.
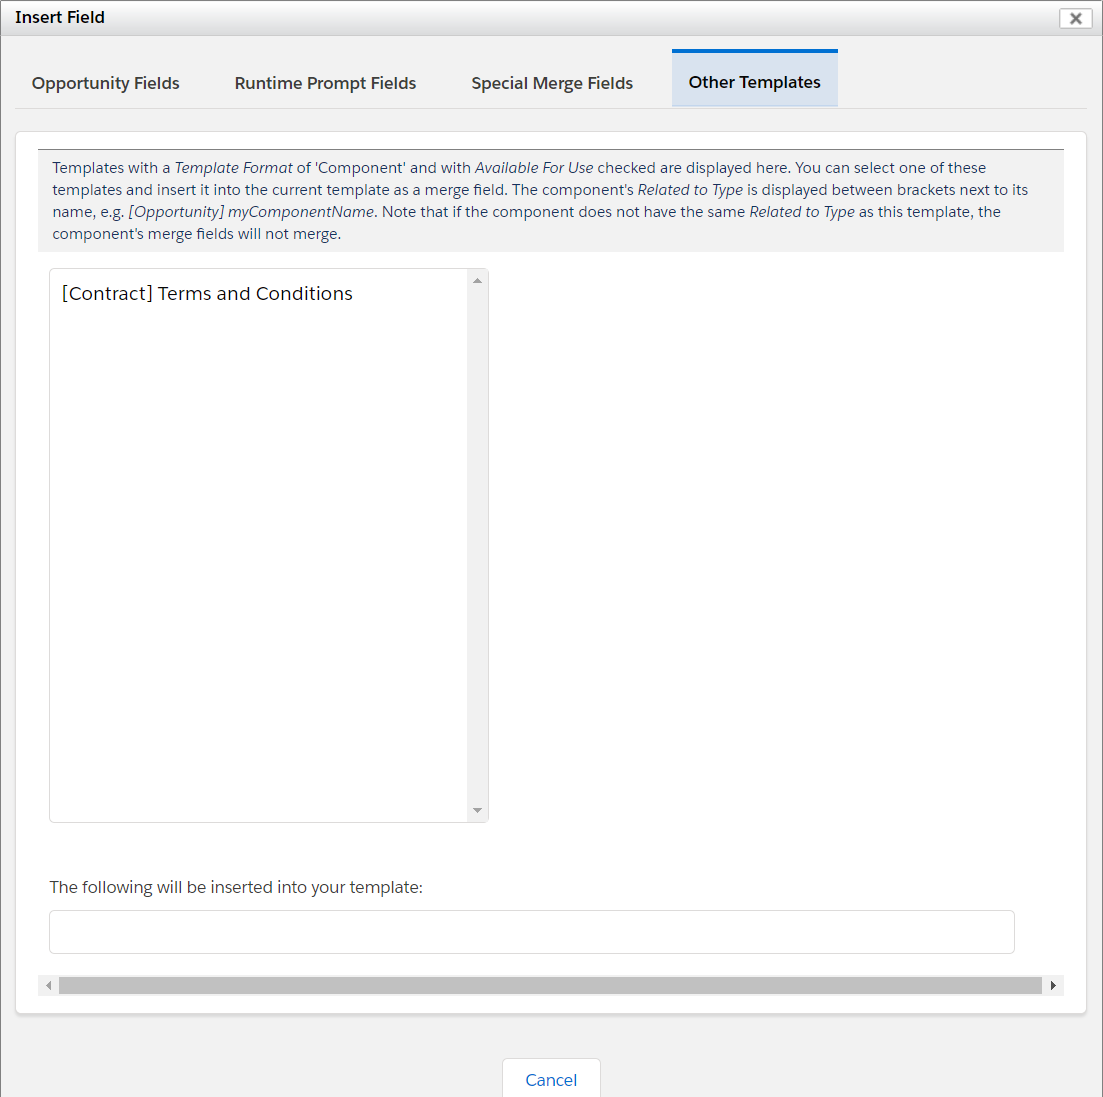
The Insert Related List and Insert Conditional Logic buttons are explained in detail in separate articles.
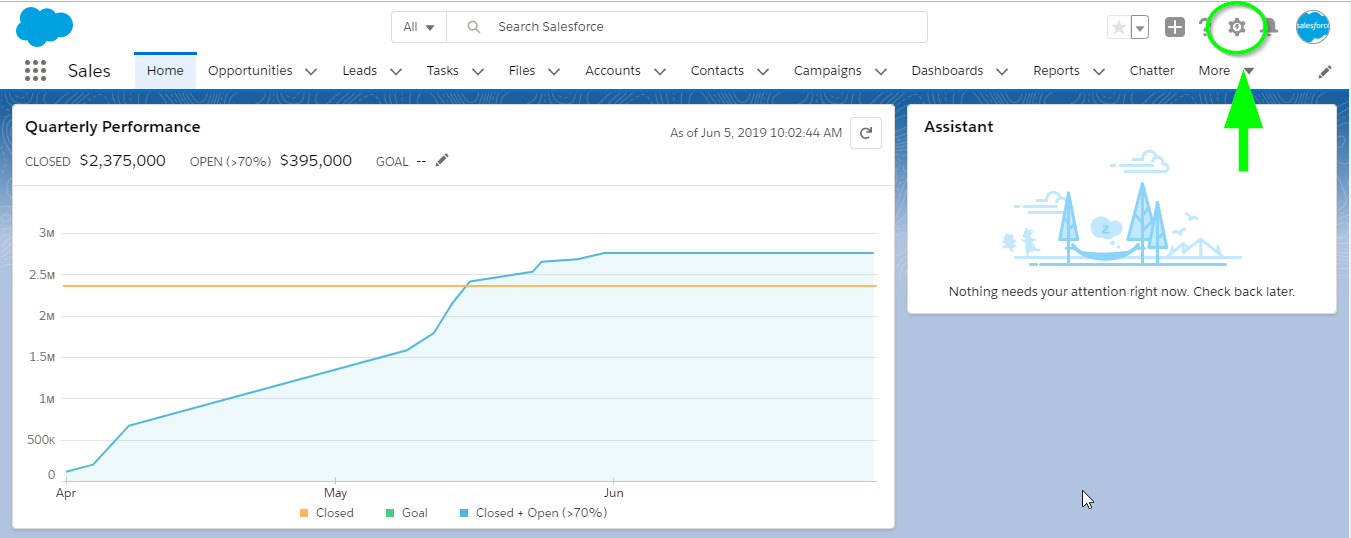
Top